Rulers and guides are essential tools in Photoshop that assist users in precisely aligning and positioning objects within their designs. Rulers, displayed at the top and left edges of the canvas, provide visual measurements. Guides, which you can drag from the rulers, allow you to create a custom grid system for accurate placement. This guide explains How To Show Ruler Guides In Photoshop and customize their preferences for optimal workflow.
Setting Unit Preferences for Rulers
Before learning how to show ruler guides in Photoshop, you should configure your ruler preferences. This ensures your measurements are displayed in your preferred unit.
- Navigate to Photoshop in the menu bar and select Preferences > General. This will open the Preferences window.
- In the Preferences window, choose Units & Rulers from the sidebar. Here, you can select your desired unit of measurement for the rulers, such as inches, pixels, millimeters, or points.
- Once you’ve made your selection, click the OK button to save your changes.
Displaying and Hiding Rulers
Now that you’ve set your unit preferences, you need to learn how to show ruler guides in Photoshop by enabling rulers themselves.
- To show the rulers, go to the View menu and select Rulers. Alternatively, you can use the keyboard shortcut CMD+R (Mac) or CTRL+R (Windows).
- To hide the rulers, repeat the same steps: go to the View menu and deselect Rulers, or use the same keyboard shortcut CMD+R (Mac) or CTRL+R (Windows).
Creating and Manipulating Guides
Once rulers are visible, you can easily create guides. Showing ruler guides in Photoshop is the first step, manipulating them is key to precise design.
-
Creating a Guide: Hover your cursor over either the left (vertical guide) or top (horizontal guide) ruler. Click and drag from the ruler onto your document. A thin line will appear, indicating your guide. Use the ruler to precisely position the guide in your desired location.
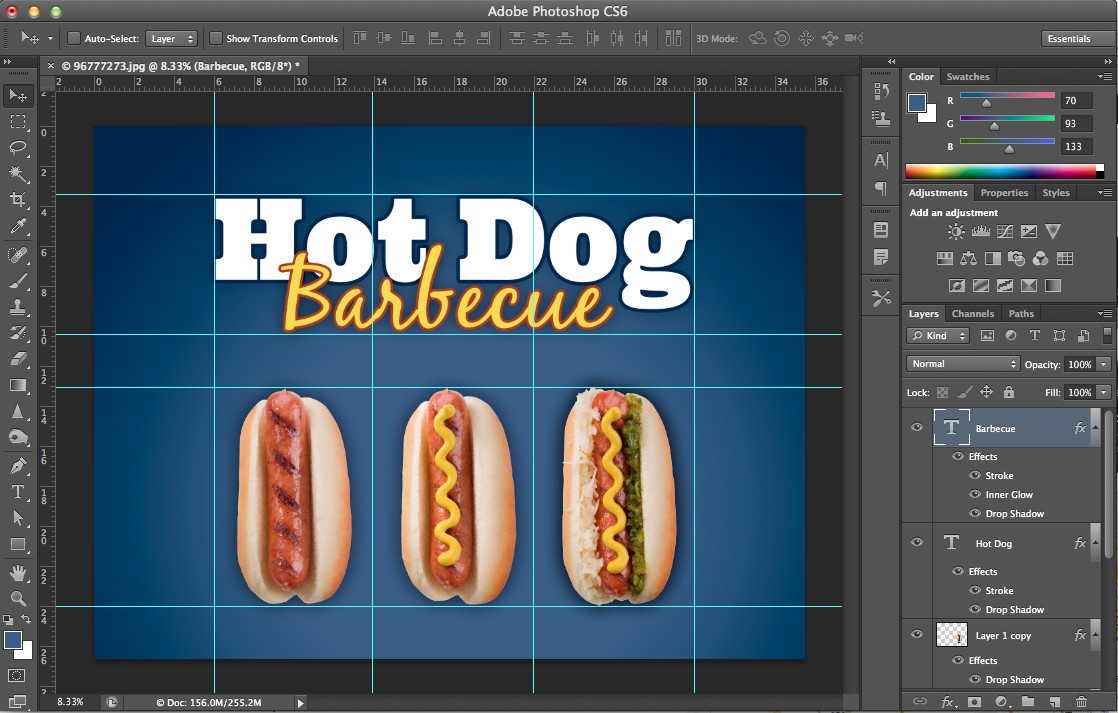 Creating a Photoshop guide by dragging from the ruler
 -
Moving a Guide: Place your cursor over the guide, then click and drag it to reposition it on your canvas.
-
Hiding / Showing Guides: Go to the View menu, select Show, and then toggle the Guides option to hide or show them. The keyboard shortcut for this is Cmd + ; on Mac or Ctrl + ; on Windows.
-
Deleting Guides: To delete a guide, drag it back onto the ruler from which it originated. Alternatively, use the Move Tool to select the guide and press the DELETE key.
-
Changing Guide Appearance: Customize the appearance of your guides for better visibility. Go to Photoshop > Preferences > Guides, Grids & Slices. Here, you can adjust the color and style (lines or dots) of your guides.
Customizing Guide Preferences
Photoshop provides further customization options for guides.
- Go to Photoshop in the menu bar and select Preferences > Guides, Grids & Slices.
- The Preferences window will appear. In the sidebar, select Guides, Grids & Slices.
- Here, you can change the color and style (solid or dashed) of your guides for better visibility against different backgrounds.
Conclusion
Mastering how to show ruler guides in Photoshop and effectively using them is fundamental for precise design work. By customizing unit preferences, displaying rulers, creating and manipulating guides, and adjusting guide appearance, you can significantly enhance your workflow and achieve accurate object placement in your Photoshop projects. Experiment with these techniques to find the settings that best suit your design needs and improve your overall precision.