Guided Access is a fantastic feature on iPad (and iPhone, iPod touch) that allows you to lock your device into a single app and control which features are available. This is particularly useful when letting a child use your iPad, or in situations where accidental gestures might be disruptive. This guide will walk you through the process of setting up and using Guided Access on your iPad.
Setting Up Guided Access on Your iPad
Before you can use Guided Access, you need to enable it in your iPad’s settings:
-
Open the Settings app on your iPad.
-
Scroll down and tap on Accessibility.
 ipad accessibility settings
 -
In the Accessibility menu, scroll down to the General section and tap on Guided Access.
-
Toggle the Guided Access switch to the ON position. This will enable the feature.
-
Tap on Passcode Settings.
-
Tap on Set Guided Access Passcode. You will be prompted to enter a passcode. This passcode will be required to end a Guided Access session. Choose a passcode you’ll remember!
-
Enter your desired passcode, then re-enter it to confirm.
-
You can also enable Face ID or Touch ID to end Guided Access sessions, if your iPad supports these features. This provides a convenient alternative to entering the passcode.
How to Start a Guided Access Session
Now that you have Guided Access set up, here’s how to start a session:
-
Open the app that you want to lock your iPad into. For example, if you want to let a child use a specific educational app, open that app.
-
Triple-click the Top Button (on iPads without a Home button) or the Home button (on iPads with a Home button). This will activate the Guided Access menu.
-
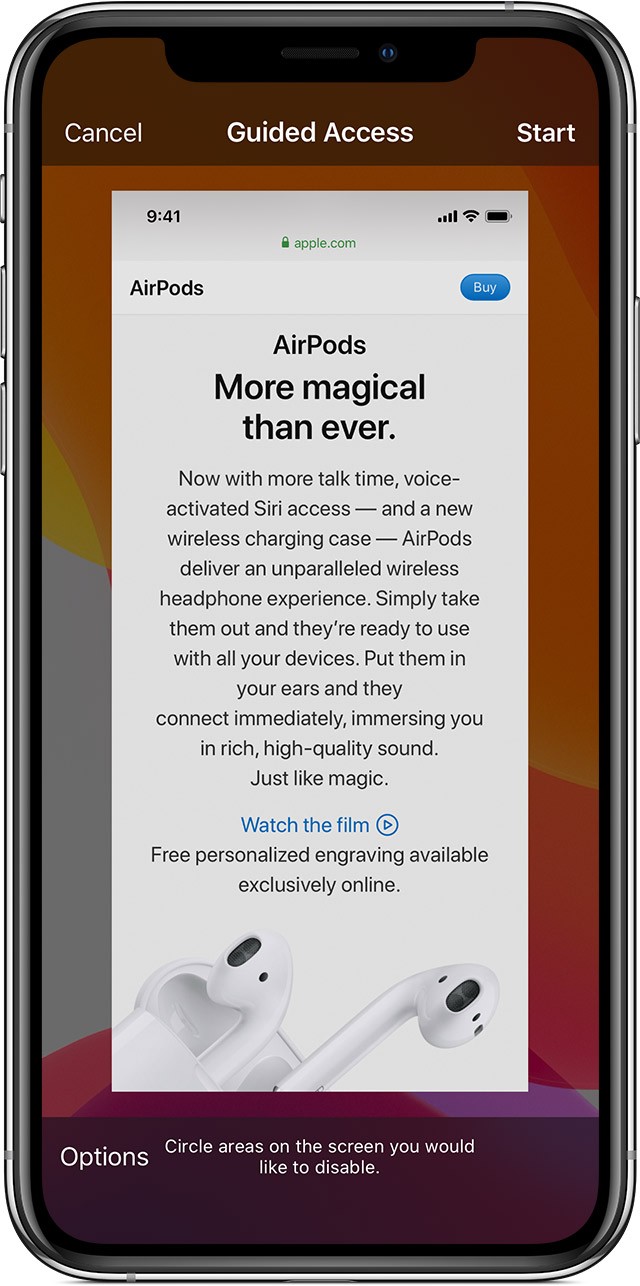
The Guided Access options screen will appear. Here, you can customize the session.
-
If you want to disable certain areas of the screen from responding to touch, use one finger to draw circles around those areas. For example, you might want to disable the home button area or an advertisement banner.
- You can move or resize the circles by dragging their edges.
- To remove a circle, tap the “X” inside it.
-
Tap Options at the bottom of the screen to further customize the session (more details on Options below).
-
Tap Start in the upper-right corner of the screen to begin the Guided Access session.
It’s also worth noting that you can start a Guided Access session with Siri. Simply open the desired app and say “Turn on Guided Access”. This feature depends on Siri being enabled and configured correctly.
Controlling Available Features During Guided Access
The “Options” menu in Guided Access allows you to control which features are available during the session. To access the Options menu:
- Triple-click the Top Button (or Home button).
- If prompted, enter your Guided Access passcode, use Touch ID, or use Face ID.
- Tap Options in the bottom-left corner of the screen.
Here’s a breakdown of the available options:
-
Sleep/Wake Button: Disables the Sleep/Wake button, preventing the device from being turned off or locked.
-
Volume Buttons: Disables the volume buttons, preventing volume adjustments.
Alt text: The volume button option in Guided Access settings.
-
Motion: Limits the device’s response to motion. For example, disabling screen rotation or preventing response to shaking.
-
Keyboards: Disables the keyboard from appearing, preventing text input.
Alt text: The keyboard option within the Guided Access customization menu.
-
Touch: Disables all touch input on the screen.
-
Dictionary Lookup: Enables the “Look Up” feature when text is selected.
Alt text: The Dictionary Lookup toggle in Guided Access Options.
-
Time Limit: Allows you to set a time limit for the Guided Access session. When the time limit is reached, the session will automatically end, and the device will be locked.
Once you have configured the desired options, tap Done in the upper-right corner of the screen to save your changes.
Ending a Guided Access Session
To end a Guided Access session:
- Triple-click the Top Button (or Home button).
- Enter your Guided Access passcode, use Touch ID, or use Face ID, depending on how you configured it.
- Tap End in the upper-left corner of the screen.
The iPad will then return to its normal state, allowing you to use all of its features.
Troubleshooting and Tips
- Forgetting the Passcode: If you forget your Guided Access passcode, you will need to restore your iPad to factory settings. This will erase all data on your device, so it’s crucial to remember your passcode.
- Siri Not Working: If you cannot start Guided Access with Siri, ensure that Siri is enabled in Settings > Siri & Search and that “Hey Siri” is configured correctly.
- Guided Access Not Starting: If triple-clicking the Top or Home button does not start Guided Access, double-check that Guided Access is enabled in Settings > Accessibility > Guided Access.
Guided Access is a powerful tool for creating a focused and controlled environment on your iPad. By understanding how to set up, start, customize, and end Guided Access sessions, you can ensure that your iPad is used safely and effectively in various situations.