Guided Access is a helpful feature on iPads that allows you to temporarily restrict the device to a single app. This can be useful for various reasons, such as preventing children from accessing other apps or keeping a device focused on a specific task. However, sometimes you might find yourself stuck in Guided Access mode and unsure how to exit. This guide provides several methods on how to turn off Guided Access on iPad, covering various iPad models and scenarios.
Understanding Guided Access on iPad
Guided Access locks your iPad into a single app, disabling the Home button (or gestures for newer iPads without a Home button) and other functionalities. While enabled, you can even disable specific areas of the screen to prevent interaction. It’s designed to be secure, but if you forget the passcode or encounter a glitch, exiting Guided Access can be tricky.
Method 1: Using the Triple-Click (or Triple-Press) Method
This is the most common and straightforward method to disable Guided Access.
-
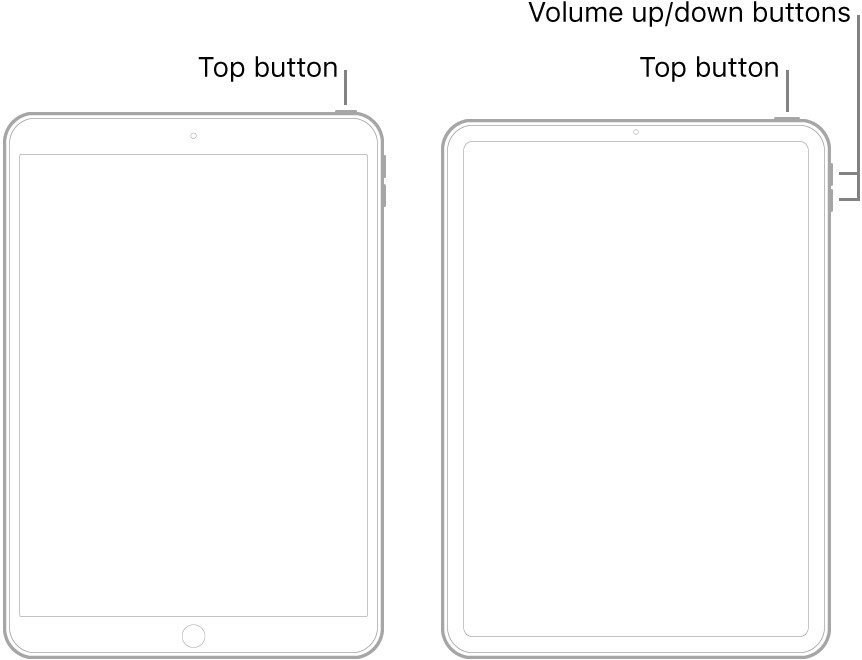
Identify your iPad’s Home/Side Button: If your iPad has a physical Home button, you’ll use that. If it doesn’t (newer iPad Pro, iPad Air, and iPad mini models), you’ll use the top (power) button.
-
Triple-Click/Press: Quickly press the Home button (or top button) three times in a row. Ensure the presses are relatively quick and consistent.
-
Enter Passcode: A screen should appear asking for your Guided Access passcode. Enter the passcode you set when you enabled Guided Access.
-
Tap “End”: Once you enter the correct passcode, tap the “End” button in the upper-left corner of the screen. This will disable Guided Access and return you to your iPad’s normal operation.
Method 2: Force Restarting Your iPad
If the triple-click method doesn’t work (perhaps the button is malfunctioning or Guided Access is glitched), a force restart is your next best option. The process varies depending on your iPad model:
For iPads with a Home Button:
- Press and hold both the Home button and the Power button (located on the top or side of the iPad) simultaneously.
- Continue holding both buttons until the Apple logo appears on the screen.
- Release both buttons. The iPad will restart.
For iPads without a Home Button:
- Press and quickly release the Volume Up button.
- Press and quickly release the Volume Down button.
- Press and hold the Power button (top button).
- Continue holding the Power button until the Apple logo appears on the screen.
- Release the Power button. The iPad will restart.
 Force restart iPad with home button showing power and home button being pressed
Alt: Force restart iPad with home button showing power and home button being pressed to exit guided access.
After the restart, Guided Access should be disabled. You may need to enter your regular iPad passcode.
Method 3: Using iCloud “Mark as Lost” Feature
This method is helpful if you’ve forgotten your Guided Access passcode and the force restart didn’t work. It requires access to another device (computer, smartphone, or another tablet) with internet connectivity. This also requires that you had Find My iPad enabled before getting locked in Guided Access.
-
Go to iCloud.com: On another device, open a web browser and go to iCloud.com.
-
Sign in: Sign in with the Apple ID and password associated with the locked iPad.
-
Find My: Click on the “Find My” icon.
-
Select Your iPad: From the “All Devices” list, select the iPad that’s stuck in Guided Access.
-
Mark as Lost: Click on “Mark as Lost”. This will remotely lock your iPad. You may be prompted to enter a phone number where you can be reached. You can skip this.
-
Unlock and Disable Guided Access: On the iPad, enter your Apple ID password to unlock it. After unlocking, immediately go to Settings > Accessibility > Guided Access and turn Guided Access off. You may be prompted to enter a new Guided Access passcode, so ensure you remember it.
Method 4: Draining the Battery
This is a last resort method if none of the above work. Let the iPad’s battery drain completely. Once it powers off, charge it again and turn it on. In some cases, this can reset Guided Access. This method can take a significant amount of time.
Method 5: Restoring Your iPad (Data Loss)
This is the most drastic measure and will erase all data on your iPad. Only use this if absolutely necessary and you have a recent backup.
- Connect to a Computer: Connect your iPad to a computer with iTunes (or Finder on macOS Catalina and later).
- Enter Recovery Mode: The steps to enter recovery mode are the same as the force restart steps outlined above. You need to hold the buttons until you see the recovery mode screen (a computer icon with a cable).
- Restore: iTunes/Finder will detect your iPad in recovery mode. You’ll be given the option to “Restore” or “Update”. Choose “Restore.”
- Follow On-Screen Instructions: Follow the on-screen instructions to restore your iPad to its factory settings.
Important Note: Restoring your iPad will erase all data. If you have a backup, you can restore from the backup after the process is complete.
Preventing Future Issues with Guided Access
- Remember Your Passcode: The most important step is to remember the Guided Access passcode. Consider writing it down in a safe place.
- Enable Touch ID/Face ID: If your iPad supports Touch ID or Face ID, enable it for Guided Access. This provides an alternative to using a passcode. To set this up, go to Settings > Accessibility > Guided Access and toggle on “Touch ID” or “Face ID.”
- Disable Guided Access When Not Needed: Only enable Guided Access when you need it. Leaving it on unnecessarily can lead to accidental lockouts.
- Keep Your iPad Software Updated: Ensure your iPad is running the latest version of iPadOS. Software updates often include bug fixes and improvements that can prevent Guided Access issues. Go to Settings > General > Software Update.
Conclusion
Getting locked out of your iPad due to Guided Access can be frustrating, but with these methods, you should be able to regain control of your device. Remember to take preventative measures to avoid future lockouts.