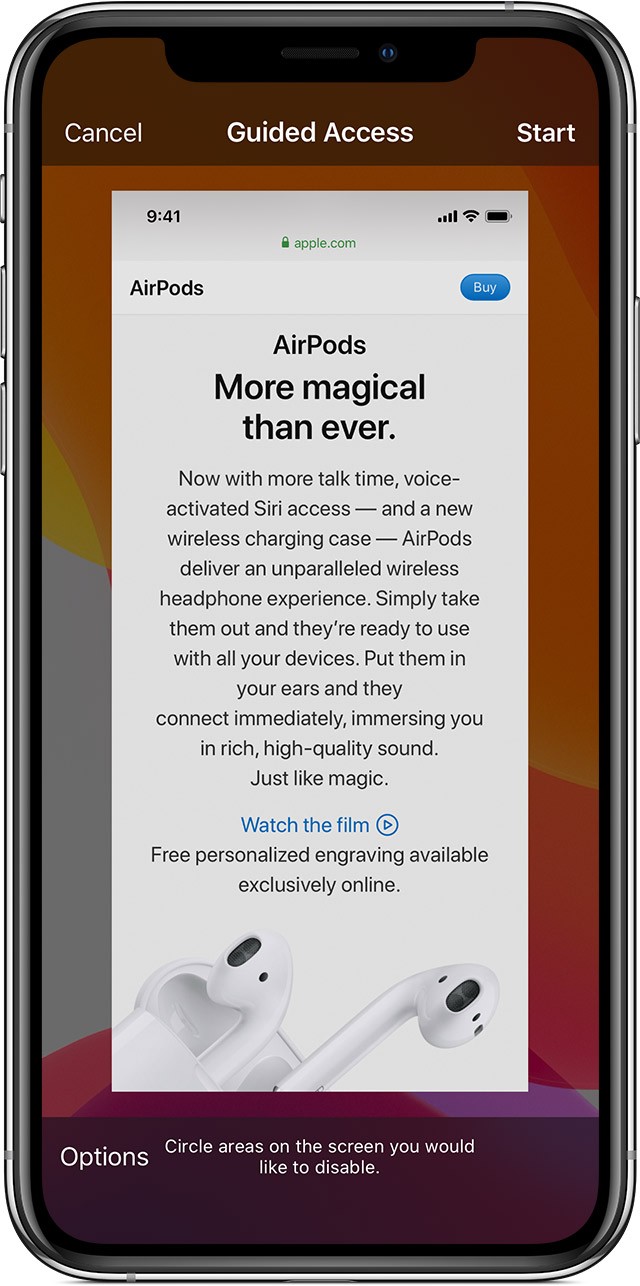
Guided Access is a powerful feature on iPhones, including the iPhone X, that locks your device into a single app and lets you control which features are available. This is particularly useful when you want to limit distractions or control how someone else uses your phone. Whether you’re lending your iPhone to a child or need to focus on a specific task, Guided Access can help. Here’s a step-by-step guide on How To Turn On Guided Access On Iphone X.
Setting Up Guided Access on Your iPhone X
Before you can start using Guided Access, you need to set it up in your iPhone’s settings. Follow these instructions to enable and configure Guided Access:
-
Navigate to Accessibility Settings: Open the Settings app on your iPhone X. Scroll down and tap on “Accessibility.”
-
Enable Guided Access: In the Accessibility menu, scroll down to the “General” section and tap on “Guided Access.” Turn the Guided Access toggle switch to the “on” position.
-
Configure Passcode Settings: Tap on “Passcode Settings.” Then, tap “Set Guided Access Passcode.”
-
Set Your Passcode: Enter a passcode, then re-enter it to confirm. This passcode will be used to end the Guided Access session.
-
Enable Face ID (Optional): You can also enable Face ID as an alternative way to end a Guided Access session. Simply toggle the “Face ID” switch to the “on” position. This allows you to use facial recognition instead of the passcode.
Starting a Guided Access Session on iPhone X
Once Guided Access is set up, you can easily start a session within any app. Here’s how:
-
Open the Desired App: Launch the app you want to lock into.
-
Triple-Click the Side Button: On your iPhone X, quickly press the side button (also known as the power button) three times in a row.
-
Customize Screen Areas (Optional): If you want to disable touch input on certain areas of the screen, use one finger to draw a circle around those areas. You can move or resize the circle as needed. To remove a selected area, tap the “X” within the circle.
-
Start Guided Access: Tap the “Guided Access” button in the bottom-left corner of the screen. Then tap “Start” in the upper-right corner.
 ios13-iphone-xs-settings-accessibility-guided-access-safari
Screenshot showing the Guided Access settings screen on an iPhone X, with options to customize passcode and Face ID settings.
Controlling Available Features During Guided Access
Guided Access allows you to control which hardware buttons and screen features are available during a session. Here’s how to customize these options:
-
Access Options: Triple-click the side button to bring up the Guided Access menu. If prompted, enter your passcode or use Face ID.
-
Tap Options: Tap the “Options” button in the bottom-left corner of the screen.
-
Customize Features: You’ll see a list of available features that you can toggle on or off:
- Sleep/Wake Button: Disable the side button, preventing the device from being put to sleep.
- Volume Buttons: Disable the volume buttons.
Volume control options within Guided Access, showcasing the ability to restrict hardware button access.
-
Motion: Limit the device’s response to motion, preventing screen rotation and disabling shake gestures.
-
Keyboards: Disable the keyboard, preventing text input.
Keyboard setting icon in Guided Access, representing the option to disable keyboard input during a session.
-
Touch: Disable all touch input on the screen.
-
Dictionary Lookup: Enable or disable the “Look Up” feature when selecting text.
Dictionary Lookup icon in Guided Access settings, highlighting the choice to allow or restrict dictionary use.
- Time Limit: Set a time limit for the Guided Access session.
-
Apply Settings: Once you’ve selected your desired options, tap “Done” in the upper-right corner of the screen.
Ending a Guided Access Session
To exit Guided Access, follow these steps:
- Triple-Click the Side Button: Quickly press the side button three times in a row.
- Enter Passcode or Use Face ID: Enter your Guided Access passcode or use Face ID to authenticate.
- Tap End: Tap the “End” button in the bottom-left corner of the screen.
Troubleshooting and Tips
- Forgotten Passcode: If you forget your Guided Access passcode, you may need to restore your iPhone to factory settings. This will erase all data on your device, so it’s important to remember your passcode or enable Face ID as a backup.
- Siri Integration: You can also start a Guided Access session using Siri. Open the app you want to lock into, then say “Turn on Guided Access.” Keep in mind that Siri features may vary by country or region.
- Customizing Screen Areas: Experiment with drawing circles around different parts of the screen to disable touch input. This can be useful for preventing accidental taps or restricting access to certain buttons or areas within an app.
Conclusion
Guided Access is a valuable tool for anyone who wants to limit distractions or control how their iPhone X is used. By following these steps, you can easily turn on, customize, and end Guided Access sessions as needed. Whether you’re a parent, educator, or simply someone who wants to focus on a specific task, Guided Access can enhance your iPhone experience.