Are you struggling to achieve a razor-sharp edge on your knives using a whetstone? The how-to guide on using an angle guide whetstone offered by CONDUCT.EDU.VN simplifies the process, ensuring consistent results and prolonged knife life. Discover how to use this essential tool, improve your sharpening skills, and achieve professional-quality results every time with our effective methods, sharpening techniques, and blade alignment.
1. Understanding the Angle Guide Whetstone
An angle guide whetstone is a tool designed to help maintain a consistent angle between the knife blade and the sharpening stone. This consistency is crucial for achieving a sharp, even edge. These guides typically clip onto the spine of the knife, providing a stable reference point as you move the blade across the whetstone. Let’s explore what angle guide whetstones are, their benefits, and different types of angle guide whetstones available.
1.1. What is an Angle Guide Whetstone?
An angle guide whetstone is a tool designed to maintain a consistent angle while sharpening knives on a whetstone. It typically consists of a clip or bracket that attaches to the spine of the knife, ensuring the blade is held at the correct angle relative to the stone. Angle guides are particularly useful for beginners or those who struggle to maintain a consistent angle freehand.
1.2. Benefits of Using an Angle Guide Whetstone
Using an angle guide whetstone offers several advantages:
- Consistency: Maintains a consistent sharpening angle for a uniform edge.
- Ease of Use: Simplifies the sharpening process, especially for beginners.
- Improved Results: Helps achieve a sharper, more durable edge.
- Safety: Reduces the risk of accidentally rounding the knife’s edge.
- Time Savings: Makes sharpening faster and more efficient.
1.3. Types of Angle Guide Whetstones
There are several types of angle guide whetstones available, each with its own design and features. Here are some common types:
- Clip-On Guides: These guides clip onto the spine of the knife and are held in place by friction. They are simple to use and relatively inexpensive.
- Magnetic Guides: Magnetic guides use magnets to attach to the blade, providing a secure and stable platform for sharpening.
- Adjustable Guides: Adjustable guides allow you to set the sharpening angle to a specific degree, providing greater precision and control.
- Universal Guides: These guides are designed to work with a wide range of knife sizes and blade shapes, offering versatility and convenience.
2. Essential Equipment for Whetstone Sharpening
Before you begin sharpening your knives with an angle guide and whetstone, gather the necessary equipment. Having the right tools will make the process smoother and more effective.
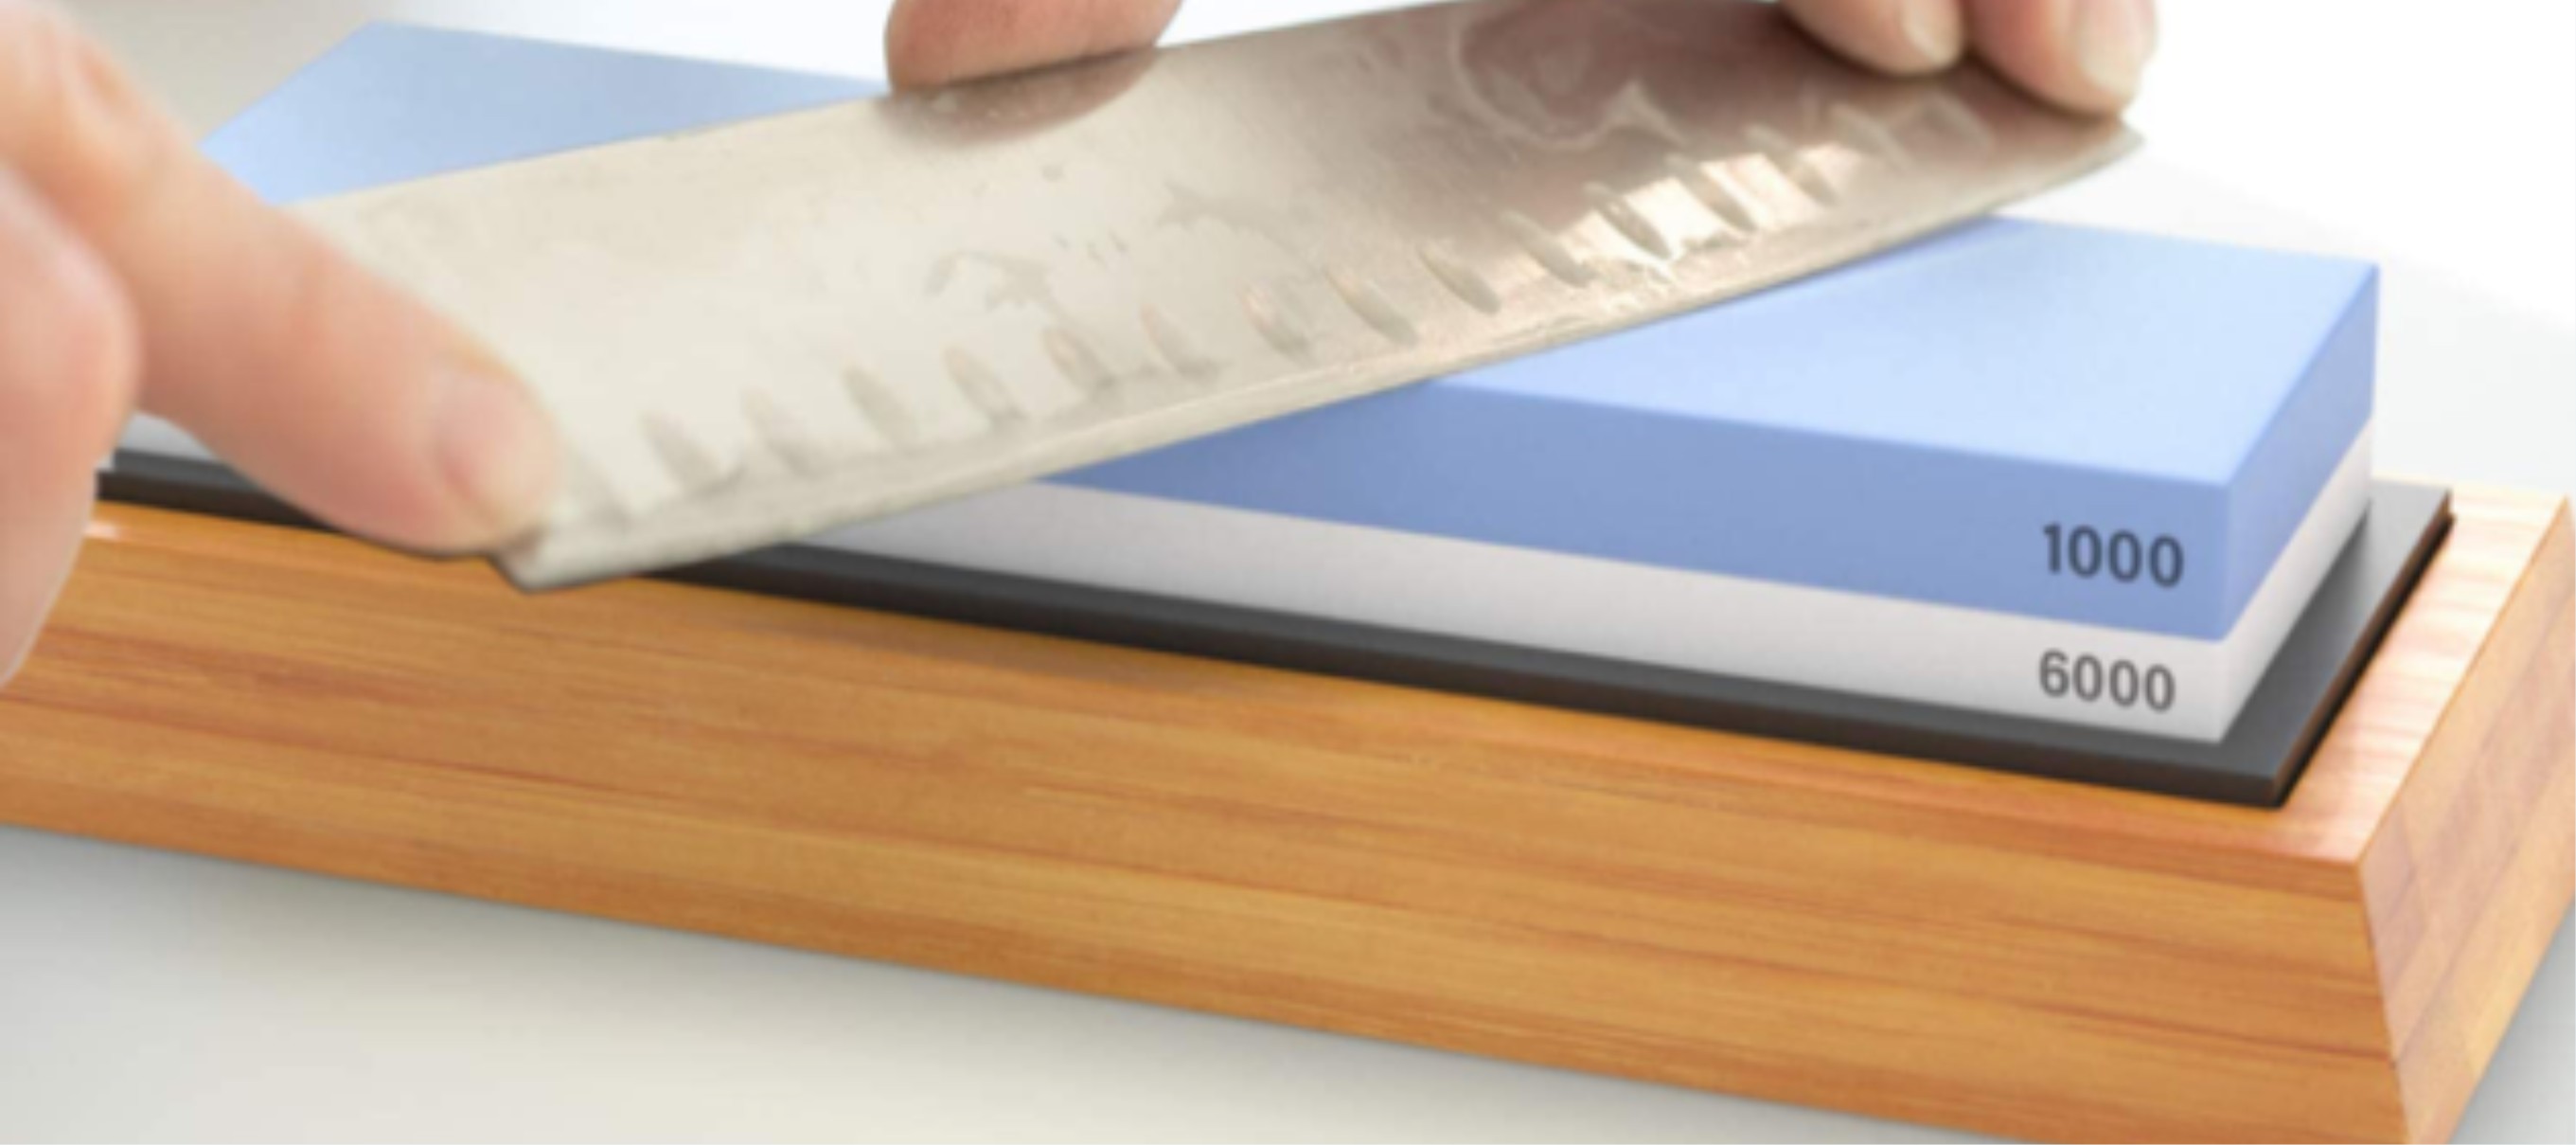
2.1. Whetstones
Whetstones, also known as sharpening stones, come in various grits, each serving a specific purpose in the sharpening process.
- Coarse Grit (200-400): Used for repairing damaged blades or reshaping the edge.
- Medium Grit (800-1200): Used for general sharpening and refining the edge.
- Fine Grit (3000-8000): Used for polishing the edge and achieving a razor-sharp finish.
2.2. Angle Guide
An angle guide helps maintain a consistent angle between the knife blade and the whetstone, essential for achieving a uniform edge. Choose a guide that is compatible with your knife type and comfortable to use.
2.3. Honing Steel
A honing steel is used to realign the edge of the knife between sharpenings, maintaining its sharpness and extending the life of the edge.
2.4. Water or Honing Oil
Water or honing oil is used to lubricate the whetstone, preventing it from clogging with metal particles and ensuring smooth, efficient sharpening.
2.5. Cleaning Supplies
Keep a clean cloth or paper towel on hand to wipe the blade and whetstone during and after sharpening. You may also want to use a brush to clean the whetstone after use.
3. Preparing Your Whetstone and Knife
Proper preparation of your whetstone and knife is essential for achieving the best results when sharpening.
3.1. Soaking the Whetstone
Most whetstones need to be soaked in water or honing oil before use. This lubrication helps to float away metal filings during sharpening, preventing the stone from clogging.
- Water Stones: Soak water stones in water for 5-10 minutes before use, until they stop bubbling.
- Oil Stones: Apply a thin layer of honing oil to the surface of the oil stone before use.
3.2. Cleaning the Knife
Before sharpening, clean the knife blade with soap and water to remove any dirt, grease, or debris. This ensures that the blade makes clean contact with the whetstone.
3.3. Setting Up Your Work Area
Choose a stable, well-lit work area for sharpening. Place a damp cloth or rubber mat under the whetstone to prevent it from slipping during use.
4. Setting the Correct Angle
The correct sharpening angle is crucial for achieving a sharp, durable edge. The ideal angle varies depending on the type of knife and its intended use.
4.1. Identifying the Ideal Angle for Your Knife
Different knives require different sharpening angles. Here are some general guidelines:
- Kitchen Knives: 20-22 degrees
- Pocket Knives: 20-25 degrees
- Hunting Knives: 25-30 degrees
- Japanese Knives: 15-18 degrees
4.2. Using the Angle Guide to Achieve the Desired Angle
Attach the angle guide to the spine of the knife, ensuring it is securely in place. Adjust the angle guide to the desired sharpening angle, using a protractor or angle gauge if necessary.
4.3. Maintaining a Consistent Angle Throughout Sharpening
Maintaining a consistent angle is essential for achieving a uniform edge. Use the angle guide as a reference point, keeping the blade at the correct angle as you move it across the whetstone.
5. Step-by-Step Guide to Sharpening with an Angle Guide Whetstone
Now that you have prepared your whetstone and knife and set the correct angle, you are ready to begin sharpening.
5.1. Applying the Angle Guide
Attach the angle guide to the spine of the knife, ensuring it is securely in place. The guide should be positioned close to the edge of the blade for maximum stability.
 Attaching an angle guide to a knife blade for whetstone sharpening, ensuring a consistent angle and stable sharpening platform.
5.2. Sharpening Process: Coarse Grit
Start with a coarse grit whetstone to repair any damage and reshape the edge.
- Place the whetstone on a stable surface, with the coarse grit side facing up.
- Hold the knife at the desired angle, using the angle guide as a reference.
- Apply light pressure and move the blade across the whetstone in a smooth, even motion, from heel to tip.
- Repeat this process 10-15 times on each side of the blade, alternating sides with each stroke.
5.3. Sharpening Process: Medium Grit
Switch to a medium grit whetstone to refine the edge and remove any scratches left by the coarse grit stone.
- Clean the whetstone and ensure it is properly lubricated.
- Repeat the sharpening process as described above, using the medium grit whetstone.
- Apply light pressure and maintain a consistent angle.
- Repeat this process 10-15 times on each side of the blade, alternating sides with each stroke.
5.4. Sharpening Process: Fine Grit
Finish with a fine grit whetstone to polish the edge and achieve a razor-sharp finish.
- Clean the whetstone and ensure it is properly lubricated.
- Repeat the sharpening process as described above, using the fine grit whetstone.
- Apply very light pressure and maintain a consistent angle.
- Repeat this process 5-10 times on each side of the blade, alternating sides with each stroke.
5.5. Deburring the Blade
After sharpening, it is important to remove any burr that may have formed on the edge of the blade.
- Use a honing steel to realign the edge of the knife.
- Hold the honing steel vertically and draw the blade across it at a slight angle, from heel to tip.
- Repeat this process 5-10 times on each side of the blade, alternating sides with each stroke.
6. Tips for Maintaining a Sharp Edge
Maintaining a sharp edge on your knives requires regular honing and occasional sharpening.
6.1. Regular Honing
Honing realigns the edge of the knife between sharpenings, maintaining its sharpness and extending the life of the edge.
- Use a honing steel to realign the edge of the knife before each use.
- Hold the honing steel vertically and draw the blade across it at a slight angle, from heel to tip.
- Repeat this process 5-10 times on each side of the blade, alternating sides with each stroke.
6.2. Proper Knife Storage
Store your knives in a knife block, sheath, or magnetic strip to protect the edge from damage.
6.3. Using the Right Cutting Boards
Use cutting boards made of wood, bamboo, or plastic. Avoid using glass or ceramic cutting boards, as they can dull the edge of your knives.
6.4. Avoiding Dishwashers
Wash your knives by hand with soap and water. Dishwashers can damage the edge of your knives and shorten their lifespan.
7. Common Mistakes to Avoid
Avoiding common mistakes can help you achieve better results when sharpening your knives with an angle guide and whetstone.
7.1. Applying Too Much Pressure
Applying too much pressure can damage the edge of the knife and cause it to wear unevenly. Use light pressure and let the whetstone do the work.
7.2. Not Maintaining a Consistent Angle
Not maintaining a consistent angle can result in a dull, uneven edge. Use an angle guide to help maintain the correct angle throughout the sharpening process.
7.3. Skipping Grits
Skipping grits can result in a rough, uneven edge. Use a coarse grit whetstone to repair any damage, a medium grit whetstone to refine the edge, and a fine grit whetstone to polish the edge.
7.4. Neglecting Deburring
Neglecting deburring can leave a burr on the edge of the blade, making it feel dull. Use a honing steel to remove any burr after sharpening.
8. Advanced Sharpening Techniques
Once you have mastered the basics of sharpening with an angle guide and whetstone, you can explore some advanced techniques.
8.1. Sharpening Serrated Knives
Serrated knives require a different approach to sharpening than straight-edged knives. Use a tapered sharpening rod to sharpen each serration individually, following the curve of the blade.
8.2. Sharpening Japanese Knives
Japanese knives typically have a single bevel edge, which requires a different sharpening technique than double bevel knives. Use a whetstone to sharpen the beveled side of the blade, keeping the back of the blade flat against the stone.
8.3. Using a Sharpening Jig
A sharpening jig can help maintain a consistent angle and pressure when sharpening. These jigs typically hold the knife in place and guide it across the whetstone.
9. Safety Precautions
Sharpening knives can be dangerous if not done properly. Follow these safety precautions to avoid injury.
9.1. Using Cut-Resistant Gloves
Wear cut-resistant gloves to protect your hands from accidental cuts.
9.2. Keeping Fingers Clear of the Blade
Keep your fingers clear of the blade at all times during sharpening.
9.3. Maintaining a Stable Work Area
Work in a stable, well-lit area to avoid accidents.
9.4. Storing Knives Safely
Store your knives in a knife block, sheath, or magnetic strip to prevent accidental cuts.
10. Choosing the Right Whetstone
Selecting the right whetstone is essential for effective knife sharpening. Different types of whetstones cater to various sharpening needs. Here’s a guide to help you choose the best whetstone for your knives.
10.1. Types of Whetstones
- Natural Whetstones:
- Description: Mined from natural rock formations, these stones offer unique sharpening properties.
- Pros: Produce very fine edges, valued by enthusiasts.
- Cons: Can be expensive, require more skill to use effectively.
- Synthetic Whetstones:
- Description: Man-made stones with consistent abrasive particles.
- Pros: More affordable, uniform grit, readily available.
- Cons: May not produce the same fine edge as natural stones.
- Diamond Whetstones:
- Description: Steel plates coated with diamond particles.
- Pros: Excellent for very hard steels, fast sharpening.
- Cons: Can be aggressive, may remove too much material.
- Ceramic Whetstones:
- Description: Made from ceramic materials, known for their durability.
- Pros: Long-lasting, good for both coarse and fine sharpening.
- Cons: Can be more expensive than synthetic stones.
10.2. Grit Levels Explained
The grit level of a whetstone indicates its coarseness and is crucial for different stages of sharpening.
- Coarse Grit (200-400):
- Use: For repairing damaged edges and removing chips.
- Example: Use a 220-grit stone to fix a severely damaged blade.
- Medium Grit (800-1200):
- Use: For general sharpening and refining the edge after using a coarse stone.
- Example: An 800-grit stone is great for regular maintenance.
- Fine Grit (3000-8000):
- Use: For polishing the edge to achieve a razor-sharp finish.
- Example: A 6000-grit stone will give your knife a professional edge.
- Ultra-Fine Grit (10000+):
- Use: For achieving the sharpest possible edge, often used for specialty knives.
- Example: A 12000-grit stone is used for creating a mirror-like polish.
10.3. Factors to Consider When Choosing
- Knife Type: Different knives require different sharpening approaches. Japanese knives, for example, often need finer grit stones.
- Steel Hardness: Harder steels may require diamond or ceramic stones.
- Budget: Natural stones are more expensive than synthetic ones.
- Experience Level: Beginners might prefer synthetic stones for their ease of use.
- Maintenance: Consider how much maintenance each type of stone requires.
11. Frequently Asked Questions (FAQs)
Here are some frequently asked questions about using angle guide whetstones.
11.1. What is the Best Angle for Sharpening My Kitchen Knives?
The best angle for sharpening kitchen knives is typically between 20 and 22 degrees. This angle provides a good balance between sharpness and durability.
11.2. How Often Should I Sharpen My Knives?
How often you need to sharpen your knives depends on how frequently you use them. As a general rule, you should sharpen your knives every 1-2 months.
11.3. Can I Use an Angle Guide with Any Type of Knife?
Yes, you can use an angle guide with most types of knives. However, it is important to choose a guide that is compatible with your knife type and comfortable to use.
11.4. Do I Need to Use Water or Honing Oil When Sharpening?
Yes, you need to use water or honing oil to lubricate the whetstone and prevent it from clogging with metal particles.
11.5. How Do I Know When My Knife is Sharp Enough?
You can test the sharpness of your knife by slicing through a piece of paper. If the knife cuts through the paper cleanly, it is sharp enough.
11.6. Can I Over-Sharpen My Knives?
Yes, you can over-sharpen your knives by removing too much material from the blade. Use light pressure and check the sharpness of your knife frequently to avoid over-sharpening.
11.7. What Do I Do if I Damage My Whetstone?
If you damage your whetstone, you can try to repair it by flattening it with a lapping plate. If the damage is too severe, you may need to replace the whetstone.
11.8. Is It Safe to Sharpen Knives at Home?
Yes, it is safe to sharpen knives at home if you follow proper safety precautions. Wear cut-resistant gloves, keep your fingers clear of the blade, and work in a stable, well-lit area.
11.9. Where Can I Buy Angle Guides and Whetstones?
You can buy angle guides and whetstones at most kitchen supply stores, hardware stores, and online retailers.
11.10. What Are Some Good Brands of Whetstones and Angle Guides?
Some popular brands of whetstones include Shapton, Norton, and King. Some popular brands of angle guides include MagGrip, Smith’s, and AccuSharp.
12. The Science Behind Sharpness
Understanding the science behind sharpness can help you appreciate the importance of proper sharpening techniques.
12.1. Microscopic Edge Structure
A sharp knife edge is not perfectly smooth. Under a microscope, it has microscopic teeth or serrations that allow it to grip and slice through materials.
12.2. How Steel Hardness Affects Sharpness
The hardness of the steel affects its ability to hold an edge. Harder steels can be sharpened to a finer edge and will stay sharp longer, but they can also be more brittle and difficult to sharpen.
12.3. The Role of Edge Angle
The edge angle determines the sharpness and durability of the knife. A lower angle results in a sharper edge, but it is also more prone to damage. A higher angle is more durable but less sharp.
13. Proper Whetstone Maintenance
Maintaining your whetstones is crucial for their longevity and performance. Regular cleaning and flattening ensure they remain effective. Here’s how to properly maintain your whetstones.
13.1. Cleaning Your Whetstone
- Water Stones:
- During Use: Keep the surface wet by adding water as needed. This helps float away metal particles.
- After Use: Rinse the stone thoroughly under running water. Use a soft brush to remove any remaining debris.
- Drying: Allow the stone to air dry completely before storing it.
- Oil Stones:
- During Use: Apply honing oil regularly to keep the surface lubricated.
- After Use: Wipe the stone clean with a lint-free cloth. Use a solvent like mineral spirits to remove stubborn oil buildup.
- Drying: Ensure no solvent remains before storing the stone.
- Diamond Stones:
- During Use: Use water or a honing solution to keep the surface clean and lubricated.
- After Use: Scrub the surface with a brush and soapy water. Rinse thoroughly.
- Drying: Pat dry with a clean cloth or allow to air dry.
13.2. Flattening Your Whetstone
Over time, whetstones can develop an uneven surface, which affects their sharpening performance. Flattening the stone restores its even surface.
- When to Flatten: If you notice uneven wear or the stone no longer sharpens evenly.
- Tools Needed:
- Flattening Stone or Lapping Plate: A specialized flat stone or plate designed for flattening whetstones.
- Silicon Carbide Powder: An abrasive powder that aids in the flattening process.
- Water: Used as a lubricant.
- Flattening Process:
- Prepare the Flattening Surface: Place the flattening stone or lapping plate on a flat, stable surface.
- Apply Abrasive: Sprinkle silicon carbide powder evenly over the flattening surface.
- Lubricate: Add water to create a slurry.
- Flatten the Whetstone: Place the whetstone on the flattening surface and rub it in a figure-eight motion. Apply even pressure across the entire surface of the whetstone.
- Check Progress: Periodically rinse the whetstone and flattening surface to check for flatness. Continue until the entire surface of the whetstone is uniformly flattened.
- Rinse and Dry: Rinse both the whetstone and flattening surface thoroughly. Allow them to air dry.
13.3. Storing Your Whetstone
Proper storage protects your whetstones from damage and contamination.
- Water Stones: Store in a cool, dry place away from direct sunlight. Ensure the stone is completely dry before storing to prevent mold growth.
- Oil Stones: Store in a case or wrapped in a cloth to prevent contamination from dust and debris.
- Diamond and Ceramic Stones: Store in their original packaging or a protective case to prevent damage to the abrasive surface.
14. Angle Guide Whetstone vs. Other Sharpening Methods
Choosing the right sharpening method depends on your needs and preferences. Angle guide whetstones offer unique benefits compared to other methods. Let’s explore the differences and advantages.
14.1. Angle Guide Whetstone vs. Electric Sharpeners
- Angle Guide Whetstone:
- Pros: Provides greater control over the sharpening angle, resulting in a sharper and more durable edge. Gentle on the knife blade, preserving its lifespan.
- Cons: Requires more skill and time to use effectively. Can be messy due to the use of water or oil.
- Electric Sharpeners:
- Pros: Fast and convenient. Easy to use, even for beginners.
- Cons: Can remove too much material from the blade, shortening its lifespan. May not provide as sharp or durable an edge as a whetstone.
14.2. Angle Guide Whetstone vs. Honing Steel
- Angle Guide Whetstone:
- Pros: Sharpens the knife blade, creating a new edge. Can repair damaged edges and restore sharpness to dull knives.
- Cons: Requires more time and effort than honing.
- Honing Steel:
- Pros: Realigns the edge of the knife, maintaining its sharpness between sharpenings. Quick and easy to use.
- Cons: Does not sharpen the knife blade. Only realigns the existing edge.
14.3. Angle Guide Whetstone vs. Pull-Through Sharpeners
- Angle Guide Whetstone:
- Pros: Provides a more precise and controlled sharpening process. Results in a sharper and more durable edge.
- Cons: Requires more skill and time to use effectively.
- Pull-Through Sharpeners:
- Pros: Easy to use and convenient. Can be used on a variety of knives.
- Cons: May not provide as sharp or durable an edge as a whetstone. Can damage the knife blade if used improperly.
15. Exploring Knife Anatomy
Understanding the different parts of a knife can help you sharpen it more effectively.
15.1. Blade
The blade is the primary cutting surface of the knife. It’s crucial to maintain its sharpness for efficient cutting.
15.2. Edge
The edge is the sharpened part of the blade. This is where the actual cutting occurs, and it needs regular maintenance to stay sharp.
15.3. Spine
The spine is the unsharpened top edge of the blade. It provides strength and stability to the blade.
15.4. Bolster
The bolster is the part of the knife that connects the blade to the handle. It provides balance and protects the hand from slipping onto the blade.
15.5. Handle
The handle is the part of the knife that you grip. It should be comfortable and provide a secure grip.
16. Advanced Tips from Professional Chefs
Professional chefs rely on sharp knives daily. Here are some advanced tips they use to maintain their knives:
16.1. Consistent Sharpening Schedule
- Why: Regular sharpening prevents knives from becoming too dull, making each sharpening session easier and quicker.
- How: Set a schedule, such as sharpening knives every two weeks or after a certain number of uses.
16.2. Using a Leather Strop
- Why: A leather strop polishes the knife’s edge after sharpening, removing any remaining burrs and creating a razor-sharp finish.
- How: After sharpening, draw the knife’s edge along the leather strop several times on each side.
16.3. Checking Sharpness with a Tomato
- Why: A tomato’s skin is notoriously difficult to slice cleanly with a dull knife. If a knife can easily slice through a tomato without slipping, it’s sufficiently sharp.
- How: Gently try to slice a ripe tomato. If the knife slides through easily, it’s sharp.
16.4. Understanding Steel Types
- Why: Different types of steel require different sharpening approaches. Knowing the steel type of your knives helps you choose the right sharpening tools and techniques.
- How: Research the steel type of your knives and adjust your sharpening methods accordingly.
17. Ethical Considerations in Knife Use
Using knives responsibly involves both safety and ethical considerations.
17.1. Knife Safety
- Safe Handling: Always handle knives with care, keeping your fingers away from the blade.
- Proper Storage: Store knives securely to prevent accidents, using knife blocks, sheaths, or magnetic strips.
- Awareness: Be aware of your surroundings when using knives, ensuring others are a safe distance away.
17.2. Responsible Use
- Purpose: Use knives only for their intended purpose, avoiding misuse or reckless behavior.
- Respect: Treat knives with respect, recognizing their potential for harm if mishandled.
- Education: Educate others, especially children, on safe knife handling and storage practices.
17.3. Legal Aspects
- Local Laws: Be aware of local laws regarding knife ownership and carry.
- Compliance: Comply with all legal requirements, ensuring you are using knives responsibly within the bounds of the law.
18. Future Trends in Knife Sharpening
The field of knife sharpening is constantly evolving with new technologies and techniques.
18.1. Advanced Materials
- Ceramic Blades: These blades are incredibly hard and retain their edge for a long time but can be brittle and require specialized sharpening tools.
- Powdered Metallurgy Steels: These steels offer exceptional hardness and edge retention, requiring advanced sharpening techniques.
18.2. Automated Sharpening Systems
- Robotic Sharpeners: These systems use robotics to precisely sharpen knives, ensuring consistent results.
- AI-Powered Sharpeners: These sharpeners use artificial intelligence to analyze the knife’s edge and adjust the sharpening process accordingly.
18.3. Sustainable Practices
- Eco-Friendly Sharpening Stones: Made from sustainable materials, these stones reduce the environmental impact of knife sharpening.
- Water Recycling Systems: These systems recycle water used during sharpening, reducing water waste.
Achieving a razor-sharp edge on your knives is within reach with the correct techniques and tools. With an angle guide whetstone, even beginners can attain professional-quality results. Remember the importance of safety, proper maintenance, and consistent practice. For more in-depth guides and resources, visit conduct.edu.vn today and take your sharpening skills to the next level. Need more personalized guidance? Contact us at 100 Ethics Plaza, Guideline City, CA 90210, United States, or Whatsapp: +1 (707) 555-1234.