Microsoft PowerPoint is a powerful tool for creating visually engaging presentations. To ensure your slides are professional and well-aligned, understanding and utilizing guides, particularly the I Shaped Guide Line Microsoft users often refer to as the vertical guide, is crucial. This guide will walk you through effectively using these features to enhance your PowerPoint presentations.
Understanding Gridlines and Guides in PowerPoint
Gridlines and guides are formatting aids in PowerPoint that help you precisely position objects on your slides. They provide visual cues for alignment, making it easier to create balanced and visually appealing presentations.
Working with Gridlines
Gridlines in PowerPoint are a series of horizontal and vertical lines that create a grid of one-inch squares by default. While you cannot change the size of these squares, you can adjust the spacing of the dots that form the gridlines, offering more granular control over alignment.
How to Turn Gridlines On or Off:
- Navigate to the View tab on the PowerPoint ribbon.
- In the Show group, check the Gridlines box to display them, or uncheck it to hide them.
This simple toggle allows you to view and hide gridlines as needed during your design process.
Utilizing Guides: Focusing on the I Shaped Guide Line
Guides are different from gridlines. They are customizable lines that you can place anywhere on your slide, offering more flexibility for alignment. Among these, the I shaped guide line Microsoft PowerPoint users commonly talk about is the vertical guide. Think of it as an “I” because of its straight, vertical orientation. PowerPoint also provides horizontal guides, forming a crosshair at the center of your slide by default.
Displaying and Customizing Guides:
- Go to the View tab.
- In the Show group, click the dialog box launcher to open the Grid and Guides dialog box.
Alternatively, for a quicker method in newer versions:
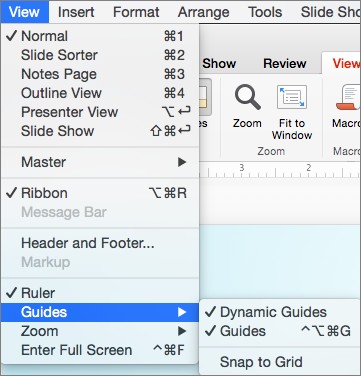
- Go to View > Guides.
- Select Guides to show or hide them.
Adding, Removing, and Moving Guides:
- To show or hide guides: Check or uncheck the Guides option in the View tab > Show group, or View > Guides in newer versions.
- To add a guide: Ctrl+click (Windows) or Command+click (macOS) or right-click on your slide, point to Guides, and then select Add Vertical Guide (the I shaped guide line) or Add Horizontal Guide.
- To remove a guide: Ctrl+click (Windows) or Command+click (macOS) or right-click on the guide line, and then select Delete on the menu.
- To move a guide: Simply drag the guide to your desired position. As you drag, PowerPoint displays the distance from the center of the slide, allowing for precise placement.
Changing Guide Color:
To differentiate guides or make them more visible against your slide background:
- Right-click on the guide you wish to customize.
- Select Color.
- Choose your desired color from the palette.
Snap-to Features: Grid and Guides Working Together
PowerPoint’s “snap-to” features enhance the precision of object placement by making objects automatically align with gridlines or guides as you move them.
Turning Snap-to Grid On or Off:
- Open the Grid and Guides dialog box as described earlier.
- Under Snap to, check Snap objects to grid to enable snapping to gridlines. Uncheck it to disable.
Alternatively, in newer versions:
- Go to View > Guides.
- Select Snap to Grid to toggle it on or off.
Turning Snap-to Guide On or Off:
Snap to guides is generally active when guides are displayed. To ensure it’s functioning:
- In the Grid and Guides dialog box, ensure guides are displayed (Display drawing guides on screen is checked under Guide settings).
- Snap objects to grid can be checked or unchecked independently; snap-to guides will still function as long as guides are visible.
 Grid and guide options
Tips for Using Snap-to Effectively:
- Temporary Override: Hold down Alt (Windows) or Command (macOS) while dragging an object to temporarily disable snap-to features for fine adjustments.
- Dynamic Guides: Enable Dynamic Guides (View > Guides > Dynamic Guides or in the Grid and Guides dialog) to see temporary guides appear as you move objects, helping you align objects relative to each other.
- Smart Guides: PowerPoint also offers “Smart Guides” which automatically appear to assist in aligning and spacing objects in relation to other objects on the slide. Ensure “Display smart guides when shapes are aligned” is checked in the Grid and Guides dialog box.
Making Grid and Guide Settings Default
To apply your preferred grid and guide settings to all new presentations:
- Configure your grid and guide settings in the Grid and Guides dialog box.
- Click Set as Default.
This will ensure consistency across all your future PowerPoint projects.
Conclusion
Mastering gridlines and guides, especially the I shaped guide line Microsoft PowerPoint users rely on for vertical alignment, is essential for creating polished and professional presentations. By understanding and utilizing these features, you can ensure precise object placement, balanced layouts, and visually compelling slides. Take advantage of these tools to elevate your PowerPoint skills and presentation quality.