Piano hinges, also known as continuous hinges, are characterized by their full-length design, running seamlessly along the surfaces they connect. This unique construction, featuring two leaf plates joined by a central pin, ensures a smooth and consistent pivot motion across the entire span. Their design offers superior weight distribution and stability compared to traditional hinges, making them a versatile choice for a wide array of applications. Originally favored for piano lids due to their silent operation and ability to prevent warping, piano hinges have evolved into a staple for cabinetry, furniture, doors, and more.
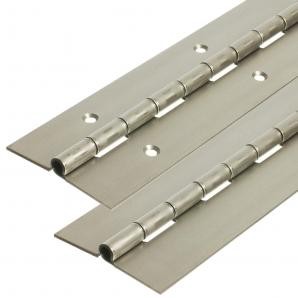 Piano hinges for medium duty applications providing continuous support and smooth operation
Beyond their aesthetic appeal and smooth functionality, piano hinges are recognized for their robustness and security. Their continuous support system enhances weight-bearing capacity, allowing for the use of heavier doors and hardware while significantly increasing the stability and longevity of both the door and frame. This inherent strength makes them ideal for high-traffic areas and security-conscious environments. In settings like healthcare facilities, piano hinges offer enhanced tamper-resistance and reduced ligature properties, particularly interleafed versions which minimize gaps between the door and frame. Unlike standard butt hinges which can suffer from misalignment and friction, piano hinges deliver consistent, smooth operation due to their single, perfectly aligned mechanism.
If you’re considering incorporating piano hinges into your next project, understanding the installation process is crucial. Fortunately, fitting piano hinges is straightforward, especially when compared to the more intricate process required for butt hinges which necessitate cutting recesses. This ease of installation, coupled with their inherent benefits, makes piano hinges a popular choice for both DIY enthusiasts and professional builders.
This comprehensive guide will walk you through the steps of piano hinge installation, ensuring a successful and secure fit for your project.
Step-by-Step Guide to Installing Piano Hinges
Installing a piano hinge is a relatively simple process that can be accomplished with basic tools and a bit of patience. Follow these steps for a seamless installation:
1. Prepare the Surfaces and Position the Hinge:
Begin by placing the piano hinge along the edge of either the door or frame you are working with. Fold the hinge to a 90-degree angle, aligning it precisely with the edge. This initial placement is crucial to ensure the hinge is straight and level.
2. Measure and Mark Pilot Hole Locations:
Using a measuring tape, determine the desired length and position of the hinge on the frame or cabinet. Accurately mark the locations for pilot holes along the hinge using a pencil. Consistent spacing of pilot holes will ensure even weight distribution and a secure fit.
3. Align and Secure the Hinge for Pilot Drilling:
Carefully align the hinge with the pencil markings, double-checking for straightness and level using a spirit level. Maintaining this alignment throughout the pilot hole drilling process is essential.
4. Drill Pilot Holes:
Starting from one end of the hinge, drill your first pilot hole. Ensure there is a small gap between the hinge end and the first screw to prevent splitting the material. Repeat this process along the marked locations until you reach the opposite end of the hinge. Maintaining a 90-degree angle while drilling will help ensure proper alignment for the screws.
5. Repeat for the Mating Surface:
Remove the hinge from the first piece and repeat steps 1-4 on the opposing surface (door or frame). This ensures that the pilot holes on both surfaces are accurately aligned for seamless hinge operation.
6. Join and Clamp the Pieces:
Carefully bring the two pieces of furniture or the door and frame together. Ensure they are level and aligned before proceeding to secure the hinge. Clamps can be helpful to hold pieces firmly in place during attachment.
7. Fasten the Hinge with Screws:
Begin securing the hinge by fastening one end to the pre-drilled pilot holes using appropriate screws. Ensure screws are tightened adequately but avoid over-tightening, which can strip the screw holes, especially in wood.
8. Attach the Remaining Side:
With one side of the hinge securely fastened, carefully align and attach the other leaf of the hinge to the corresponding surface, using screws to fasten it into the pre-drilled pilot holes.
9. Test the Operation and Make Adjustments:
After the hinge is fully installed, gently open and close the door or lid several times to test for smooth operation. Check for any binding or uneven movement. Make any necessary adjustments by slightly loosening screws and re-aligning if needed.
10. Final Tightening:
Once you are satisfied with the hinge’s operation, go back and ensure all screws are firmly tightened for a secure and long-lasting installation.
Tips for a Successful Piano Hinge Installation
- Choose the Right Hinge: Piano hinges come in various materials, thicknesses, and finishes. Select a hinge that is appropriate for the weight and application of your project. For heavier doors, opt for heavy-duty piano hinges.
- Pre-Drill Pilot Holes: Always pre-drill pilot holes that are slightly smaller than the diameter of your screws. This prevents wood splitting and makes screw insertion easier and more accurate.
- Use Appropriate Screws: Select screws that are the correct length and type for the material you are working with. Wood screws are ideal for wooden applications, while machine screws may be needed for metal projects.
- Ensure Proper Alignment: Accurate alignment is key to smooth hinge operation. Use a level and measuring tape meticulously during marking and installation.
- Consider Hinge Finish: Choose a hinge finish that complements your project’s aesthetics and provides adequate corrosion resistance, especially for outdoor or влажные environments.
- Lubricate the Hinge: For exceptionally smooth and silent operation, consider applying a small amount of lubricant to the hinge pin after installation.
Conclusion
Piano hinges are a versatile and robust solution for a wide range of hinging needs, offering superior support, durability, and a clean aesthetic. Their ease of installation, as outlined in this guide, makes them accessible for DIYers and professionals alike. By following these steps and tips, you can confidently install piano hinges and enjoy their long-lasting performance and smooth operation in your projects. For further assistance or to explore a comprehensive range of high-quality piano hinges, contact our expert team at conduct.edu.vn for guidance and support in selecting the perfect hinge solution for your specific requirements.