The Pit of Heresy dungeon, introduced with the Shadowkeep expansion in Destiny 2, remains a rewarding activity for Guardians of all levels. Whether you’re a seasoned veteran seeking high-stat armor or a new Lightfall player venturing into its depths for the first time, this guide will provide you with the knowledge and strategies needed to conquer this challenging dungeon. Pit of Heresy offers unique legendary weapons and armor, making it a worthwhile pursuit for any Guardian looking to enhance their arsenal and builds.
RELATED: Destiny 2: Where & How To Find Ethereal Charms
To begin your journey into the Pit of Heresy, you’ll first need to speak with Eris Morn on the Moon. She serves as the key NPC, offering quests and guidance on Luna. Initiating the “Deepening Wake” questline from Eris will unlock the Pit of Heresy dungeon, granting you access to its hidden challenges and treasures.
Updated Guide for 2024: With Destiny 2 constantly evolving, the Pit of Heresy continues to be relevant. This updated guide reflects the current meta and provides insights for both new and returning players aiming for powerful gear, god rolls, or even a Solo Flawless run.
The Deepening Wake Quest
Initiating the Pit of Heresy dungeon requires completing “The Deepening Wake” quest from Eris Morn. This quest serves as a brief introduction to the activities on the Moon and ensures you’re prepared for the challenges ahead. The quest involves two straightforward objectives:
- Open a Tier III Chest at the Altars of Sorrow: Participate in the Altars of Sorrow public event on the Moon and successfully reach Tier III. Opening the chest at this tier is a guaranteed objective completion.
- Kill 20 Nightmares in Altars of Sorrow: While participating in the Altars of Sorrow, eliminate 20 Nightmare enemies. This will likely be completed naturally as you progress through the tiers.
The Altars of Sorrow is a public event that can accommodate many players, making it easy to find assistance and complete these objectives quickly. Any effective area-of-effect (AoE) damage build will excel here, allowing you to clear waves of enemies efficiently. Once both objectives are done, the Pit of Heresy dungeon icon will appear on your Moon map, ready for exploration.
For players seeking to maximize their rewards from Pit of Heresy, consider completing Eris Morn’s weekly bounties beforehand. These bounties often reward a “Hymn of Desecration,” an item that significantly increases weapon drop rates during the Necropolis and Chamber of Suffering encounters within the dungeon.
Entering the Pit of Heresy
Being an older dungeon, power level is no longer a significant barrier to entry for Pit of Heresy. The activity is set at a base power level of 1600, which is the floor for all players in Lightfall. Fireteams of up to three Guardians are recommended, as teamwork will greatly simplify the encounters. While solo completion is possible and a significant achievement, be prepared for a considerable challenge.
Upon entering the Pit of Heresy, you’ll descend into the depths of the dungeon through a series of platforming sections. Careful jumps are crucial here, as missteps can lead to fatal falls. Navigate down the cliffs, utilizing your jump abilities wisely, to reach the first encounter area.
RELATED: Tips For The Pit Of Heresy Dungeon
Necropolis Encounter: Symbol Towers and Sword Logic
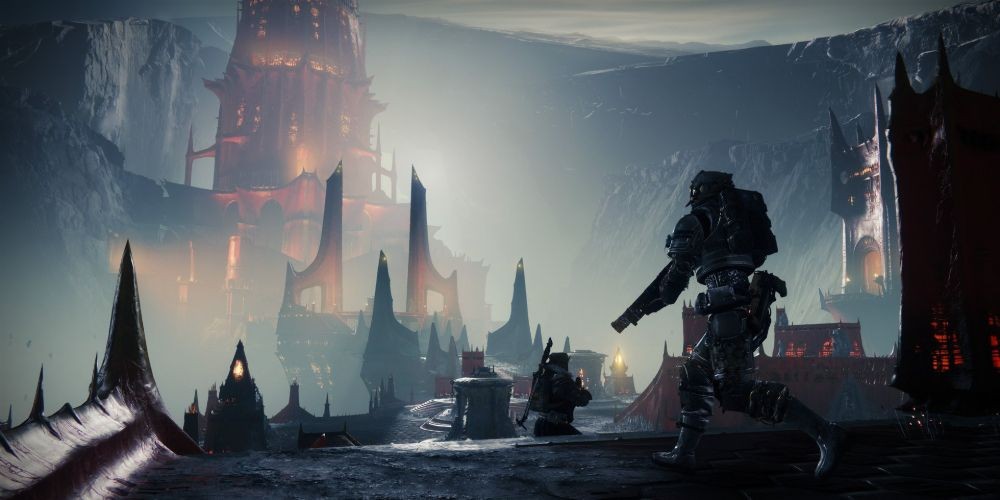 Destiny 2 Necropolis Encounter in Pit of Heresy
The Necropolis encounter introduces the core mechanic of Pit of Heresy: utilizing swords to overcome immune enemies. Here’s a breakdown of how to navigate this encounter:
-
Identify the Symbols: Look for the large red tower at the edge of the cliff. Inside, defeat the Swordbearer Knight to acquire a sword. Observe the three green Hive symbols displayed on the wall within this tower. These symbols correspond to three smaller towers scattered around the Necropolis.
-
Locate and Conquer the Towers: Travel to each of the three smaller towers marked with the symbols you identified. Inside each tower, you’ll face a Pitkeeper Knight and a boss enemy.
-
Defeat the Pitkeepers and Bosses: Defeat the Pitkeeper Knight in each tower to access the boss room. The bosses (Knight, Wizard, and Shrieker) are immune to standard weapons and abilities.
-
Sword Logic is Key: You must use the sword dropped by Swordbearer Knights to defeat the bosses. Swordbearer Knights will respawn in the main tower and roam between towers.
- Knight Boss: Defeat with standard sword melee attacks.
- Wizard Boss: Defeat with heavy sword attacks.
- Shrieker Boss: Block the Shrieker’s projectiles with your sword to reflect damage back and defeat it.
-
Coordinate and Conquer: While you can split your fireteam to tackle towers simultaneously, communication is key. Be mindful of roaming Ogres and Knights that can overwhelm you. Don’t hesitate to drop the sword to deal with these adds using your standard weapons if needed. Remember swords despawn after a short time on the ground. Hive elevators in each tower can quickly return you to the main tower, but be cautious of collision issues while carrying a sword, especially for solo players.
For a smoother experience in Necropolis, focus on builds that provide survivability and mobility. While specific builds aren’t critical, being able to quickly dispatch adds and navigate the environment is beneficial. Solo players should prioritize a slow and methodical approach, carefully clearing enemies and avoiding risky elevator maneuvers while carrying the sword.
Tunnels of Despair: Ogres and Runes
After Necropolis, follow the pillar of green light to the next area. You’ll find yourself in a room with numerous doorways, most of which are traps. Instead, look for a small slit in the wall to the right of the entrance platform – this is the correct path. This leads to the Tunnels of Despair, a stealth-focused encounter.
-
Evade the Ogres: This section features invincible Ogres patrolling the tunnels. Direct confrontation is futile. Your goal is to navigate through the tunnels stealthily, utilizing cover and passageways.
-
Open Passageways: Shoot the Hive webbing blocking passageways between the three main caves. These tunnels are essential for moving between objectives while avoiding the Ogres’ line of sight.
-
Defeat the Knights and Collect Orbs: In each of the three caves, defeat the yellow-bar Knight. Each Knight drops an orb.
-
Defuse the Runes: Carry the orbs to the blocked doorways and slam them near the runes to defuse them. You must defuse the runes on all three doorways to proceed.
The Knights themselves are not particularly challenging, but the Ogres pose a significant threat. Their eye blasts and slam attacks can quickly eliminate Guardians. Focus on movement and cover. Healing grenades, Warlock rifts, and Titan barricades can greatly improve survivability in this section.
Chamber of Suffering: Totem and Curse Management
The Chamber of Suffering encounter tests your team’s coordination and ability to manage the “Curse of Suffering” debuff.
-
Stand on the Totem Platform: At least one Guardian must stand on the platform in front of the totem at the back of the chamber. If no one is on the platform, it will glow red and wipe the fireteam.
-
Manage the Curse of Suffering: While on the platform, Guardians accumulate the “Curse of Suffering” debuff, stacking up to 5x, increasing incoming damage.
-
Kill Heretical Knights and Collect Orbs: Heretical Knights will spawn in the chamber. Defeat them and collect the orbs they drop.
-
Slam Orbs to Remove Curse: Carry the orbs and slam them near the totem platform to temporarily remove the Curse of Suffering for the Guardian who dunks.
-
Rotate and Survive: Team communication and rotation are crucial. Guardians should rotate off the platform to dunk orbs, ensuring the curse stacks are managed and the platform is always occupied. Dunking six orbs will open the exit door.
Defensive abilities like Titan Bubble and Warlock Well of Radiance are highly effective for holding the platform. Be aware that dunking orbs triggers the spawn of Knights on platforms high above in the chamber. Weapons like Xenophage are excellent for quickly eliminating these distant Knights.
Solo players must carefully balance platform duty and orb dunks. Prioritize killing Knights before leaving the platform to dunk, as the totem charges rapidly. Survivability builds utilizing invisibility (Hunter), Woven Mail (Titan), or Restoration (Warlock) are invaluable for soloing this encounter.
The Harrow: Platforming and Wizards
The Harrow is primarily a platforming challenge with a combat element. Navigate through spinning spike traps to descend further into the pit.
-
Symbol Recognition: Upon reaching the initial opening, identify the three green Hive symbols on the wall, similar to the Necropolis encounter.
-
Locate and Defeat Wizards: Traverse the traps and navigate the platforms to find three locations marked with these symbols. In each location, you’ll encounter a Wizard.
-
Eliminate the Wizards: Defeat all three Wizards. While not overly difficult, they can deal significant damage, so exercise caution.
-
Proceed Through the Doorway: After defeating the Wizards, the ruins will collapse, revealing a red doorway in the center of the area. Proceed through this doorway to advance.
The primary challenge in The Harrow is navigating the traps and maintaining awareness of your surroundings. Movement-enhancing abilities like Strand Grapple, Icarus Dash, or Lion Rampant can be helpful for quicker traversal and avoiding traps.
Final Encounter: Zulmak, Instrument of Torment
The final encounter pits you against Zulmak, Instrument of Torment. This fight combines mechanics from previous encounters with a DPS check.
-
Miniboss Cycle: Before damaging Zulmak, you must repeat the sword logic mechanic from the Necropolis encounter. Three minibosses (Knight, Wizard, Shrieker) will spawn on platforms around the arena.
-
Sword Acquisition and Miniboss Defeat: Swordbearer Knights spawn in the center of the arena. Defeat them to acquire swords and use them to defeat the minibosses, employing the same strategies as in Necropolis (melee for Knight, heavy attack for Wizard, block reflect for Shrieker).
-
Damage Phase: After defeating the three minibosses and dunking their orbs near Zulmak’s platform, a green damage phase circle will appear on the platform.
-
DPS Zulmak: Stand within the green circle to damage Zulmak. If you don’t defeat him quickly enough, he will wipe the fireteam with a crystal energy attack.
-
Repeat and Conquer: If you fail to defeat Zulmak in one damage phase, you must repeat the miniboss cycle to initiate another damage phase.
High DPS builds are crucial for the Zulmak encounter. Witherhoard, Izanagi’s Burden, and powerful rocket launchers are excellent weapon choices. Super-based DPS builds like Starfire Protocol Warlock or Thundercrash Titan can also significantly contribute to damage output. For solo players or lower DPS fireteams, you may need to cycle through multiple damage phases, requiring careful management of adds and minibosses.
Upon defeating Zulmak, a chest will spawn, rewarding you with legendary armor and weapons, including unique Moon-themed gear and the coveted Premonition pulse rifle.
Destiny 2 is available on PC, PlayStation 4, Xbox One, PlayStation 5, and Xbox Series X/S.
MORE: Destiny 2: Where & How To Find The Bound Manacle