The Prophecy dungeon in Destiny 2, a surprise addition launched alongside the Season of Arrivals, plunges Guardians into the enigmatic realm of the Nine. Like previous dungeons such as The Shattered Throne and Pit of Heresy, Prophecy offers a challenging, mechanic-rich experience akin to a mini-raid, demanding coordination and understanding to overcome its trials. This comprehensive Prophecy Dungeon Guide will equip you with the knowledge and strategies needed to navigate each encounter, secure valuable loot, and unravel the secrets hidden within this mysterious domain.
Recommended Loadout for Prophecy Dungeon
Before diving into the Prophecy dungeon encounters, optimizing your loadout is crucial. Here are some effective weapon recommendations to enhance your fireteam’s success:
- Primary Weapons: Auto Rifles, Hand Cannons, and Pulse Rifles are effective for general add clear and Knight elimination. Consider weapons with perks like Overflow or Subsistence to manage ammo efficiently.
- Special Weapons: Witherhoard excels at area denial and sustained damage, particularly useful against bosses and challenging adds. Fusion Rifles and Shotguns can be potent for close-quarters combat and burst damage.
- Heavy Weapons: Anarchy remains a top-tier choice for consistent damage over time, especially valuable for boss encounters. Falling Guillotine (Swords) can deliver significant burst damage against bosses when safe opportunities arise. Linear Fusion Rifles like Izanagi’s Burden (with catalyst) can also contribute substantial single-target damage.
- Exotic Choices: The Mountaintop (if still accessible) or other breech-loading grenade launchers can provide excellent burst damage.
Our Recommended Loadout Example: Auto Rifle (for general combat), Witherhoard (for area control and boss damage), Anarchy (for consistent boss damage). Adjust based on your fireteam’s preferences and available arsenal.
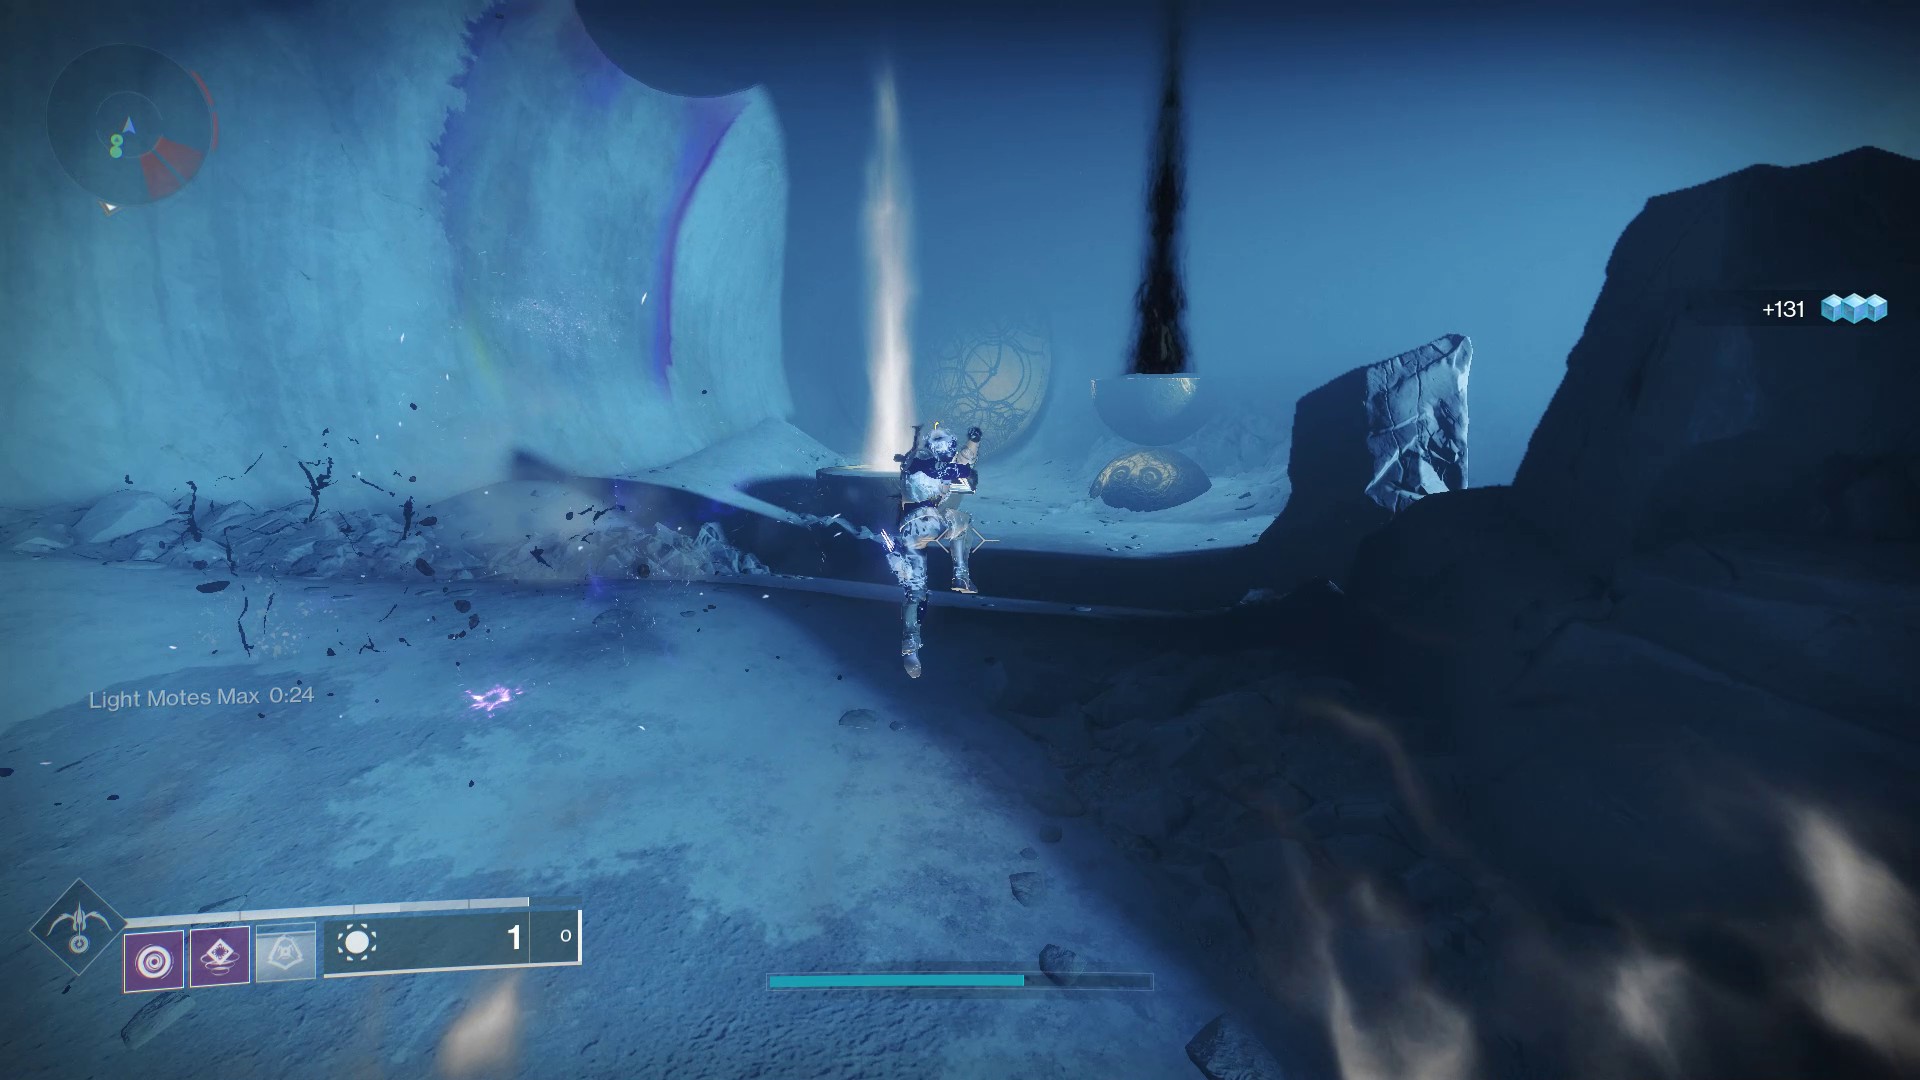
The Entrance: Light and Darkness Mechanics
The initial chamber serves as an introduction to the core mechanic of the Prophecy dungeon: Light and Darkness manipulation.
Caption: Understanding Light and Darkness pillars is key to progressing through the Prophecy dungeon.
At the far end of the hall, you’ll encounter both a Light pillar and a Darkness pillar. To cleanse these pillars, you must collect Motes of Light and Motes of Dark, respectively. These motes are dropped by Taken Knights that spawn throughout the area.
The crucial element is that the type of Motes dropped by Taken Knights depends on your positioning within the environment. Standing in areas bathed in Light (indicated by a brighter screen border) will cause Knights to drop Motes of Light. Conversely, positioning yourself in areas of Darkness (indicated by a darker screen border) will result in Motes of Dark.
Entrance Encounter Strategy:
- Identify Light and Darkness Zones: Observe the environment to discern areas of Light and Darkness. Your screen border will provide a clear visual cue.
- Mote Collection: Position yourselves in either Light or Darkness zones as needed. Defeat the Taken Knights to gather the corresponding Motes.
- Pillar Cleansing: Collect five Motes of Light to cleanse the Light pillar by interacting with the trigger on top. Repeat the process with Motes of Dark for the Darkness pillar.
- Progression: You will repeat this cleanse sequence twice to open the path forward, leading you to the first boss encounter.
Phalanx Echo: First Boss Encounter
The first boss, Phalanx Echo, awaits in a confined arena, emphasizing strategic positioning and rapid pillar cleansing.
Caption: Focus fire and pillar control are essential to defeat the Phalanx Echo.
Phalanx Echo is protected by an immunity shield. To remove this shield, you must cleanse four pillars that spawn around the arena. Similar to the entrance, these pillars require specific Motes – Light or Dark.
Phalanx Echo Boss Strategy:
- Pillar Identification: Quickly determine the Light and Darkness pillar locations within the arena.
- Mote Collection and Cleansing: Coordinate your fireteam to collect the necessary Motes by positioning in Light and Darkness zones. Cleanse each of the four pillars as quickly as possible.
- Damage Phase: Once all four pillars are cleansed, Phalanx Echo’s shield will drop, initiating the damage phase. Unleash your heavy weapons and supers to maximize damage output. Be mindful of the limited cover in the small arena and prioritize survival.
- Repeat: The boss will regain its shield after a short damage phase. Repeat the pillar cleansing and damage cycle until Phalanx Echo is defeated. Weapons like Anarchy or Witherhoard can be highly effective for sustained damage during the DPS phase.
The Wasteland: Sparrow Navigation and Secret Chest
Following the defeat of Phalanx Echo, you’ll descend into the Wasteland, a vast, open area requiring Sparrow traversal and blight destruction.
Caption: Sparrows are essential for traversing the expansive Wasteland in the Prophecy dungeon.
In the Wasteland, your objective is to locate and destroy Taken Blights scattered throughout the landscape. Upon destroying a Blight, jump into the floating Light that appears to progress. You will need to repeat this process multiple times to advance.
Wasteland Navigation and Secret Chest:
- Sparrow Deployment: Summon your Sparrows and navigate the Wasteland.
- Blight Destruction: Search for and destroy the Taken Blights. They are visually distinct and relatively easy to spot.
- Light Collection: After destroying each Blight, jump into the emanating Light to move to the next area.
- Secret Chest Location: While traversing the Wasteland, keep an eye out for a small ruin marked by golden sand. Near your initial drop point into the Wasteland, heading left and cresting a few hills will lead you to this ruin. Crouch through a small crack in the Relic inside to access a secret chest. This chest provides additional loot and enhances your dungeon rewards.
Caption: Discover the hidden secret chest within the ruin in the Prophecy dungeon Wasteland.
After finding the light three times and optionally securing the secret chest, a door will open, leading you to the next encounter area.
The Cube: Toland Puzzle Encounter
The Cube encounter presents a unique puzzle centered around spatial awareness and pillar cleansing, guided by the enigmatic Toland.
Caption: Solve the Toland puzzle by strategically cleansing pillars in the Prophecy dungeon Cube.
You’ll find yourself inside a massive cube with Light and Darkness pillars on each of its four sides. Sand circles are present on the floor, walls, and ceiling. Toland, the familiar wisp of light, will appear on one of the walls or the ceiling.
The Cube Puzzle Strategy:
- Locate Toland: Find Toland within the cube. He will indicate the direction you need to move.
- Pillar Cleansing and Teleportation: Cleansing the pillar corresponding to Toland’s location will teleport the entire cube in that direction. For example, if Toland is on the east wall, cleanse the east pillar to move east. If he is on the ceiling, cleanse the east pillar twice to move upwards towards the ceiling (east twice effectively moves you up in this context).
- Follow Toland: “Chase” Toland by cleansing pillars to move the cube in his direction. Repeat this process five times.
- Centurion Echoes: After five teleports, you will face two powerful Centurion Echoes. Focus fire and utilize cover to defeat them quickly.
- Progression: Ascend the room to find the exit and proceed.
The Wasteland and Deadsea: Ribbon Navigation and Second Secret Chest
Returning to the Wasteland, your path now leads through the Deadsea, guided by a ribbon and culminating in another secret chest opportunity.
Caption: Follow the ribbon through the Deadsea to progress and find hidden treasures in the Prophecy dungeon.
This time in the Wasteland, follow the Kell Echo (a powerful Fallen Captain enemy) towards the new exit. This path leads to a vast room featuring red ribbons guiding your way towards pyramid-shaped structures (“birdhouses”).
Ribbon Path and Second Secret Chest:
- Follow the Ribbon: Adhere to the red ribbon path. It will guide you through the environment and towards the final pyramid structure.
- Enemy Elimination: Eliminate enemies within each pyramid structure as you progress along the ribbon path.
- Second Secret Chest: In the final pyramid structure, before jumping down with the platforms, locate a hole in the back right corner. This hidden passage leads to the second secret chest of the Prophecy dungeon. Ensure you collect this chest before proceeding.
- Final Platform: Continue following the ribbon to the final platform after the last pyramid structure. You will be drawn upwards, leading you to the final boss chamber.
Kell Echo Boss Fight: Final Encounter
The Kell Echo boss fight is the most challenging encounter in the Prophecy dungeon, demanding precise mechanics execution, damage management, and constant movement.
Caption: Coordinate pillar cleansing and manage Dark Entropy to defeat the Kell Echo in the Prophecy dungeon.
Kell Echo Boss Fight Phases:
Phase 1: Triangle Room and Ogre Summons
- Initial Room: The encounter begins in a triangle-shaped room. Three Kell Echo shades are positioned at each point, constantly firing at you. Each shade is protected by a Light or Darkness pillar.
- Pillar Cleansing and Ogre Spawns: Cleansing a pillar will remove the corresponding boss shade but will spawn a Taken Ogre.
- DPS Phase Trigger: Cleanse all three pillars to initiate the Damage Per Second (DPS) phase. You can choose to defeat the Ogres or proceed directly to the DPS area after cleansing the pillars.
Phase 2: DPS Room and Dark Entropy
- Transition: After cleansing the pillars, proceed to the long, platform-filled room for the DPS phase.
- Taken Blight Projectiles: Kell Echo will fire Taken Blight projectiles that inflict significant damage and teleport you backward if you survive.
- Dark Entropy Debuff: While in the DPS room, you accumulate Dark Entropy stacks. Reaching 10 stacks results in death.
- Dark Entropy Mitigation: To reduce Dark Entropy, you must remain close to Kell Echo – within one or two platforms.
- Boss Teleportation and Movement: Kell Echo will teleport through the room periodically, pausing briefly before teleporting again. Follow the boss, prioritizing Taken Hobgoblin snipers along the way.
- Damage Strategy: Due to constant movement, single-fire, high-impact weapons like The Mountaintop, Witherhoard, or Anarchy are highly effective. Fire-and-forget weapons allow you to maintain damage while focusing on movement and survival. Utilize buffing Supers like Weapons of Light (Bubble), Well of Radiance, or Shadowshot (Tether) during the initial and final boss positions in the room for maximized damage.
- Repeat Phases: When Kell Echo teleports out of the DPS room, you will be returned to a different triangle room with new boss shades. Repeat the pillar cleansing and DPS phases until the boss is defeated.
Victory and Rewards
Upon defeating Kell Echo, you will be teleported to the audience chamber of the Nine, where you will receive your well-earned loot from the Prophecy dungeon. This loot pool includes unique armor sets, weapons, and potentially the coveted dungeon-exclusive rewards.
Congratulations, Guardian, on conquering the Prophecy dungeon! This prophecy dungeon guide has provided you with the knowledge and strategies to overcome the challenges within. Now, venture forth, explore the realm of the Nine, and claim your rewards!