Salvation’s Edge stands as the climactic raid in Destiny 2‘s The Final Shape expansion, challenging you and your Fireteam to penetrate The Witness’ Monolith within the Pale Heart of the Traveler. This raid demands strategic energy manipulation, a rematch with a familiar foe, and a touch of spatial reasoning to ultimately confront and defeat The Witness.
While the recommended power level is 1945, Destiny 2‘s Fireteam Power system ensures accessibility, provided at least one member of your team reaches 1950 power or higher. Crucially, to initiate the raid, at least one Fireteam member must have completed The Final Shape campaign and the “Wild Card” quest.
This Destiny 2: The Final Shape Salvations Edge Witness Guide provides a comprehensive walkthrough for every encounter in the Salvation’s Edge raid. You’ll find detailed instructions on encounter completion, secret chest locations, and strategies to triumph in the final boss fight against The Witness.
For Guardians seeking additional rewards, we also recommend checking out our Salvation’s Edge raid challenge guide for information on encounter challenges and bonus loot opportunities.
Salvation’s Edge Raid Walkthrough: Encounters and Core Mechanics
Salvation’s Edge features five distinct encounters, each propelling you closer to your ultimate objective in The Final Shape: vanquishing The Witness. Here’s a concise overview of each encounter:
- Substratum: Navigate a labyrinthine area, gathering and depositing Resonance to unlock further access within The Witness’ Monolith.
- Dissipation: Battle the Herald of Finality, a Disciple-level iteration of the infamous Taniks.
- Repository: Engage in a dynamic race across three increasingly complex rooms, strategically dunking Resonance to progress.
- Verity: Rescue your fellow Guardians from the shadow realm by engaging in intricate shape-based puzzles and calculations.
- The Witness: Confront and defeat The Witness and its formidable hands, weakening it for the final confrontation in the expansion’s culminating mission.
Before diving into individual encounters, understanding the core mechanics prevalent in the first three – Substratum, Dissipation, and Repository – is crucial. (Verity and The Witness boss encounter introduce mostly unique mechanics, which will be explained within their respective sections.)
These initial encounters revolve around charging plates, interconnected wires, Resonance pickups, and conduits. Mastery of these elements working in synergy is key to success in Salvation’s Edge.
Understanding Charging Plates and Wires
Alt text: Guardian standing on a glowing charging plate in Destiny 2 Salvation’s Edge raid, wires connecting plates visible.
Each of these encounters incorporates three to four pairs of plates, linked by a visible wire.
Upon unblocking these plates – typically by defeating a designated boss enemy – one plate in each pair will begin to glow. Stepping on a glowing plate initiates energy transfer through the wire to its paired plate. For energy rebound and Resonance generation, a Guardian must step on the receiving plate after it begins to glow (indicating energy arrival) and before the glow dissipates. Successfully rebounding energy spawns Resonance in the vicinity.
Generating Resonance Pickups
Alt text: Destiny 2 Guardian grabbing a triangular Pyramidal Resonance pickup during Salvation’s Edge raid.
Acquiring Resonance buffs, distinguished by shapes, is a fundamental mechanic throughout Salvation’s Edge. This mechanic, while evolving slightly, remains relevant even in the final encounters. The initial encounter only features triangle-shaped Pyramidal Resonance. Encounter two introduces circle-shaped Spherical Resonance, and encounter three adds square-shaped Hexahedron Resonance.
Resonance serves two primary purposes: interacting with conduits and extending the encounter timer at the end of each phase.
Activating Conduits
Alt text: Destiny 2 Guardian shooting an active conduit displaying a triangle symbol in Salvation’s Edge raid.
Some charging plates are positioned adjacent to conduits, which can be either active or dormant. Dormant conduits require energy activation, achieved through the same process that activates the plates. Active conduits display a shape (triangle, circle, or square), indicating the required Resonance type for activation. Activating multiple conduits triggers the appearance of the Resonance bank, essential for progressing the encounter.
Conduit activation is a precise process, requiring these steps:
- A Fireteam member steps on the plate opposite the conduit, initiating energy flow towards the conduit plate.
- While possessing the Resonance buff matching the conduit’s shape, shoot the conduit.
- Once energy reaches the conduit plate (it will begin to glow), step on the plate to lock the conduit.
Successful activation results in the conduit expanding with a bright gold glow. The Guardian who shot the conduit will lose one stack of Resonance. Locking the conduit causes all Resonance generated by that plate pair to disappear. Therefore, prioritize collecting excess Resonance (maximum three stacks to avoid death) before locking the conduit.
Activating three conduits spawns the Resonance bank beneath The Witness’ time bomb.
Stopping and Resetting the Encounter Timer
Alt text: Destiny 2 Fireteam member depositing Pyramidal Resonance into the bank during the Salvation’s Edge raid.
Each Salvation’s Edge encounter features a timer displayed at the top of the screen. Failure to complete the encounter before the timer expires results in a wipe and encounter restart. The default timer duration is intentionally insufficient for completion, necessitating timer extension or reset. In the first three encounters, the Resonance bank serves this purpose.
Upon spawning the bank, deposit any collected Resonance into it. Depositing Resonance adds time to the encounter timer.
Keep these core mechanics in mind as you delve into The Witness’ Monolith.
Substratum Encounter Guide: Navigating the Monolith’s Depths
Alt text: Detailed map of Destiny 2 Salvation’s Edge Substratum encounter, showing 9×9 grid layout, created by Reddit user charl/chrlmain via Raid Secrets.
The Substratum encounter unfolds within a 9×9 grid, with each grid square representing a distinct room.
At the room’s center, a triangle (Pyramidal Resonance) floats above the ground. Collect it and deposit it into the bank directly ahead. Banking the Resonance spawns one of The Witness’ hands in the central room. Simultaneously, two random doors will open, and Vex Supplicants (exploding Harpies) will rush into the area.
Room Clearing and Door Activation
Alt text: Destiny 2 Guardian firing at Vex Supplicants in the Substratum encounter of Salvation’s Edge raid.
Divide your Fireteam into two groups of three for the remainder of this encounter. Designate a lead player for each team, with others following their direction. Manage the Supplicants and direct each team to enter one of the opened doors.
With teams separated, navigate through interconnected rooms. Rooms are linked by doors to adjacent squares within the grid.
The initial room entered by each team will contain standard Vex enemies. Eliminate them swiftly and proceed to the next open room. Here, you’ll encounter a Quantum Minotaur alongside other Vex units. Defeat all enemies. Upon the Minotaur’s death in one team’s room, a Vex Hydra will spawn in the other team’s second room. Conversely, when the other team defeats their Quantum Minotaur, a Vex Hydra will appear in the first team’s second room. Eliminating these Vex Hydras will open doors for your teammates.
Alt text: Destiny 2 Guardian engaging an Overload Minotaur Champion, Devotee of the Witness, in Salvation’s Edge raid.
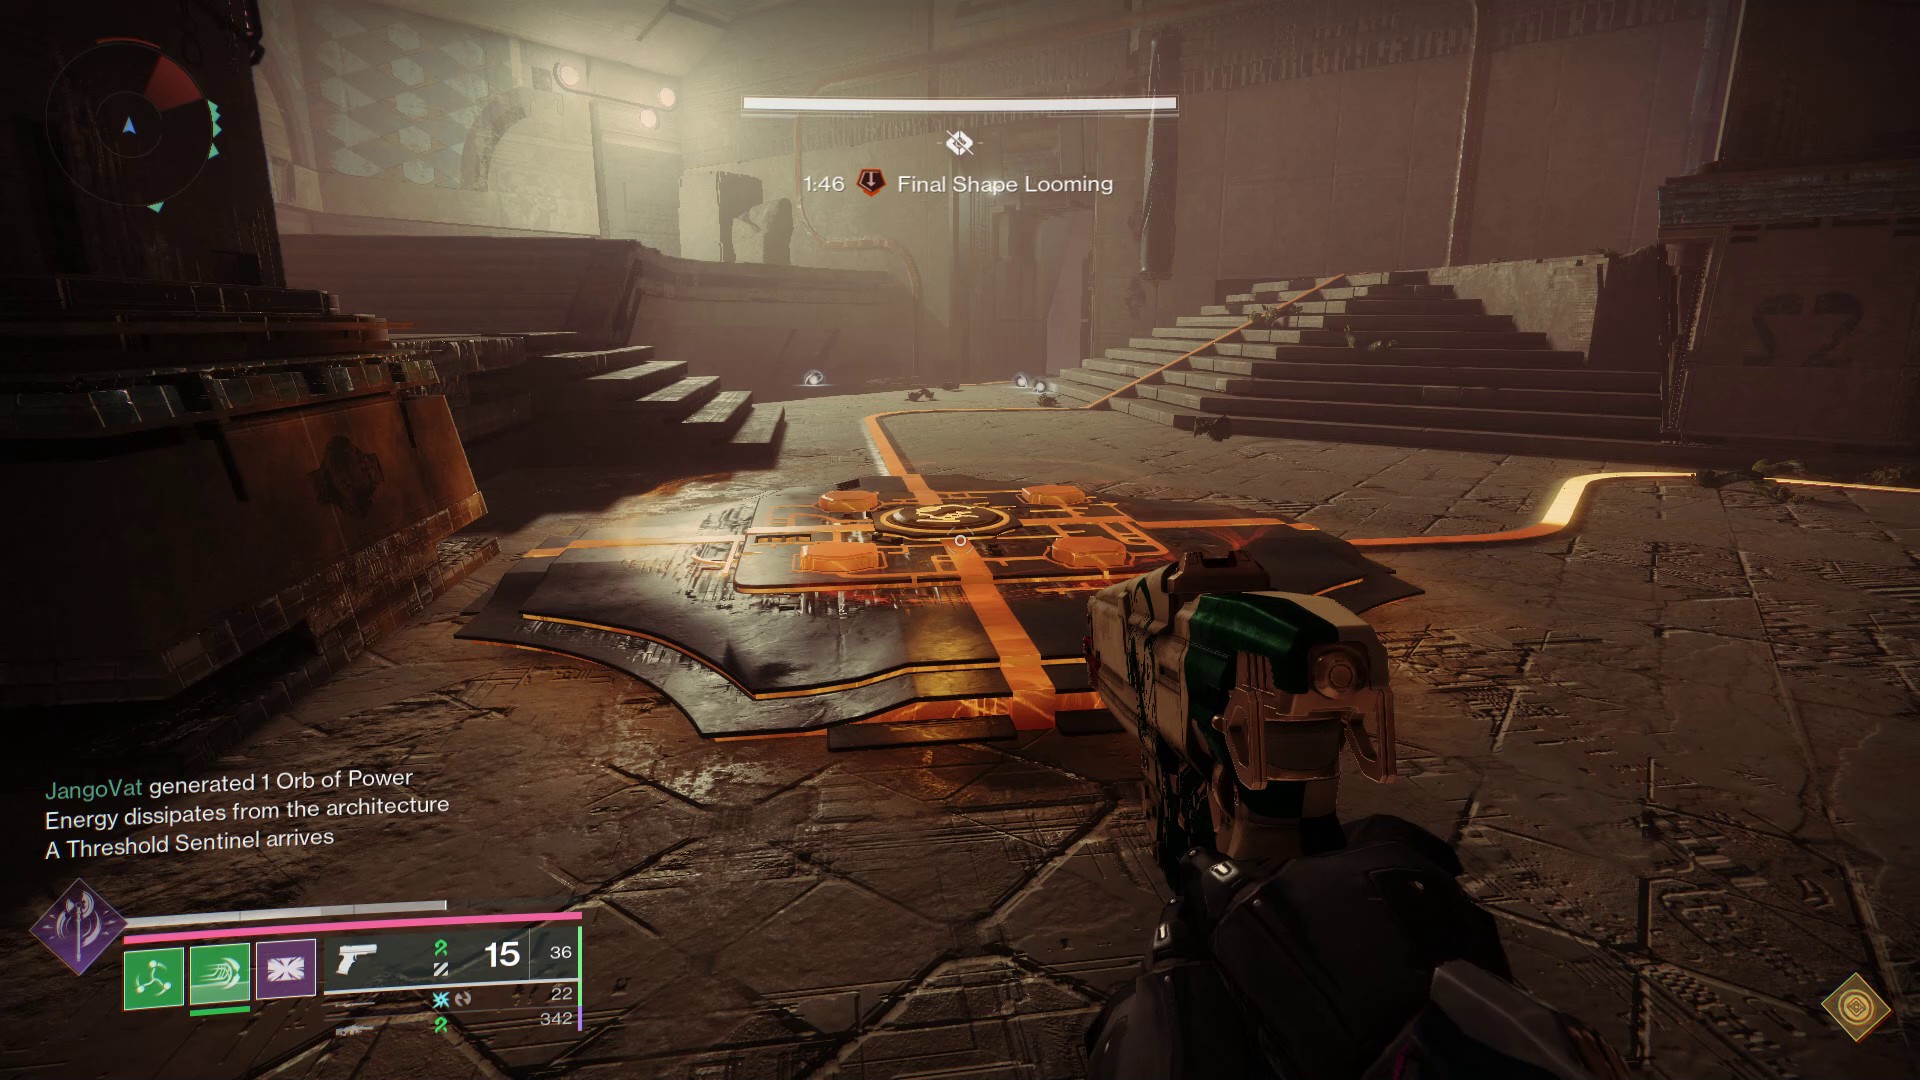
In the third room, one team will encounter an Overload Minotaur Champion named “Devotee of the Witness”. Defeating this Champion spawns a Tormentor in the central room, designated “Threshold Sentinel”. Regroup your entire Fireteam in the central room and eliminate the Tormentor.
Upon the Tormentor’s defeat, a message “energy flows into the architecture” will appear. This indicates that one of the two plate pairs and conduits required for the next phase is now active.
Charging the Conduits
Alt text: Destiny 2 Guardian aiming weapon at an active conduit during the Salvation’s Edge raid encounter.
Repeat the initial process: send teams into newly opened doors, managing Supplicants. This time, one team will encounter either an active conduit or a lit-up plate. The team encountering a charged plate and open conduit should initiate energy bouncing between plates to generate Resonance, while the other team focuses on eliminating enemies and their Champion.
While one team generates Resonance, the other team should return to the central room to defeat the second Tormentor that has spawned. This action will activate the second conduit and plate pair. This team then begins generating their own Resonance.
Alt text: Destiny 2 Guardian standing on a charging plate, generating Pyramidal Resonance during Salvation’s Edge raid.
As Resonance is generated, some will appear in each team’s room, with more accumulating in the central chamber. Plate operators should maintain energy bouncing until a prompt indicating “all Resonance has been spawned” appears, or the timer approaches critical levels (under one minute). Non-plate holders in each team should collect Resonance from the central chamber and assist plate operators in eliminating Subjugators that appear in their rooms.
Once both teams are prepared – everyone has collected up to three Resonance stacks or as many as time allows – direct energy through the wires and lock both conduits. A player with Resonance shoots the conduit, then steps on the adjacent plate once energized to lock it.
Alt text: Destiny 2 Titan using Twilight Arsenal super ability in the Substratum encounter of Salvation’s Edge raid.
Successful conduit locking will be indicated. If both teams lock their conduits before the timer expires, a large Subjugator will spawn in the central room. Collaborate as a team to defeat it, which in turn will spawn the Resonance bank. Deposit collected Resonance to extend the timer. Maximum timer extension yields four minutes and 15 seconds, matching the initial encounter timer. If you don’t achieve maximum extension, prioritize speed in subsequent phases.
Repeat this entire process three times. If time becomes a constraint on the third cycle, reduce plate bouncing frequency and prioritize spawning the bank and depositing available Resonance quickly.
Encounter completion is signaled by a massive staircase descending from the ceiling in the main room. Ascend it to proceed to the raid’s first boss encounter.
Dissipation Encounter Guide: Defeating Taniks, the Herald of Finality
Alt text: Destiny 2 Guardian looking into the arena for the Dissipation encounter against Taniks, Herald of Finality, in Salvation’s Edge raid.
The first boss encounter pits you against the Herald of Finality, better known to veteran Destiny players as Taniks.
This close-quarters boss fight favors sword-based damage. The Lament is highly effective, as are Falling Guillotine or other high-damage swords. For enhanced damage output, especially if not using an Exotic sword, a player with an Ergo Sum sword with Wolfpack Rounds, paired with Legendary swords matching Salvation’s Edge’s weekly elemental burn, can be potent.
The encounter mechanics are similar to Substratum, but with three teams of two and a boss enemy. Divide into three teams of two and assign each team to one of three areas: middle (spawn point), left (tower area), and right.
Breaking Taniks’ Weak Spot
Alt text: Destiny 2 Guardian fighting a Taken Trammel enemy during the Dissipation encounter against Taniks in Salvation’s Edge raid.
Initiate the fight by destroying the large Taken Blight in the room’s center. This spawns Taniks, Herald of Finality, in the central arena. Taniks will remain in this arena throughout the fight. Your objective is to deposit Resonance in a bank to break his immunity shield and engage him in direct combat.
However, the bank disappears upon fight initiation and must be reactivated.
Teams should position themselves on their assigned sides and clear the initial three waves of enemies. The third wave includes a boss-level Taken enemy called a Trammel. Middle area gets a Taken Phalanx, left gets a Taken Wizard, and right gets a Taken Ogre. Defeating the Trammel charges the plates and opens the conduit. Note that the conduit initially displays a distorted symbol, disregard it for now.
During this phase, three Fireteam members – one per side – will be summoned to Taniks’ arena and receive the “Call to Reckoning” buff.
Alt text: Destiny 2 Guardian shooting Taniks, Herald of Finality, in the forehead critical spot during the Dissipation encounter.
Upon defeating the Trammel on your side, anyone with “Call to Reckoning” should enter Taniks’ arena and begin shooting his forehead. It’s recommended that all players with “Call to Reckoning” participate in damaging Taniks, as Blight spawns may be delayed otherwise.
After dealing some damage, Taniks’ weak spot will glow, and he’ll summon a Taken Blight to shield himself. These Blights can spawn on the side platforms or within Taniks’ arena. Locate and destroy these Blights. Once Taniks’ head shield dissipates, continue shooting until his weak spot is broken. This will grant you the “Stolen Favor” debuff.
Exit the pit and return to your assigned side. Observe the conduit, which will now display either a triangle or circle symbol. This indicates the required Resonance buff – Pyramidal or Spherical – needed to activate the conduit.
Charging and Interpreting Conduits
Alt text: Destiny 2 Guardian inspecting a conduit displaying a circle symbol in the Dissipation encounter against Taniks, Herald of Finality.
With “Stolen Favor” and the conduit symbol identified, designate one plate on your side for yourself and the other for your teammate. The plate furthest from Taniks will initially have energy after Trammel defeat. The plate closer to Taniks is associated with the conduit.
Replicate the plate bouncing process from the Substratum encounter, while managing Stasis enemies and Taken Knights. Each plate bounce generates Pyramidal Resonance on one side of the arena and Spherical Resonance on the other.
Alt text: Destiny 2 Guardian stepping onto a charging plate to initiate energy transfer in the Dissipation encounter of Salvation’s Edge raid.
For the plate player furthest from Taniks, Resonance type is irrelevant, provided you leave at least one of the required Resonance type for your teammate.
However, the plate player near the conduit needs to be strategic with Resonance collection. A useful tactic is to collect the opposite Resonance type of your conduit symbol initially. This grants one stack of incorrect Resonance, which can then be converted to two stacks of the correct Resonance by picking up the correct type next.
Important Note: Missing a plate bounce (allowing energy to dissipate) will respawn the Trammel on your side and relock the conduit. Defeating the Trammel resets the conduit, potentially changing its symbol. Re-verify the symbol after Trammel defeat.
Once sufficient Resonance is collected, lock the conduits. The bank will spawn near the edge of Taniks’ arena, near the time bomb and The Witness’ hand. Prepare for the damage phase.
Damaging Taniks
Alt text: Destiny 2 Guardian depositing Spherical Resonance into the bank to initiate the Taniks damage phase in Salvation’s Edge raid.
With Resonance banked and timer replenished, enter the now-glowing arena and engage Taniks with swords. Warlocks should deploy Well of Radiance or Song of Flame for team survivability. A healing turret from the Speaker’s Mask Exotic is also highly beneficial.
Continue attacking Taniks until he becomes immune. Upon immunity, exit the arena and repeat the entire process.
Alt text: Destiny 2 Taniks, Herald of Finality, entering his final stand phase during the Dissipation encounter in Salvation’s Edge raid.
Reaching the final portion of his health bar triggers Taniks’ final stand. He will briefly become immune, so conserve ammo. He summons the three Trammel bosses for assistance, but these are minimal threats, even on Contest mode. Ignore them and focus solely on Taniks until his defeat.
Collect loot from the chest and proceed to the middle area. Turn left to find massive green columns leading to the next encounter. Navigate the path carefully, following the lights, to reach the third encounter…
Repository Encounter Guide: Opening the Path Through the Monolith
Alt text: Destiny 2 Guardian surveying the arena for the Repository encounter in Salvation’s Edge raid.
Having progressed this far in Salvation’s Edge, you possess the core knowledge required for the Repository encounter.
Similar to the Dissipation encounter, the arena is divided into three sides, each with its own plate system. Assign teams of two to each side: left, middle, and right. Each team is responsible for defeating a Tormentor, a Subjugator, and other enemies on their side. They must also generate Resonance, collect excess Resonance, and lock a conduit.
Initiate the encounter by collecting the square Resonance – Hexahedron Resonance – in the room’s center and banking it. This spawns three Tormentors, one at the end of each plate set. Teams should collaborate to defeat their Tormentor. The player who secures the killing blow on the Tormentor gains the “Stolen Favor” buff from the previous encounter. This buff allows visibility of the conduit’s required Resonance type and initiates energy flow into the architecture.
Alt text: Destiny 2 Guardian engaging a Tormentor enemy in the Repository encounter of Salvation’s Edge raid.
The player without “Stolen Favor” should return to the home plate – closest to the entrance – which will be ready to transmit energy. The player with “Stolen Favor” stands on the plate near the conduit. Bounce energy between plates to generate circle, triangle, or square Resonance. Each Resonance type spawns in a specific quadrant of the room; coordinate with your team to locate the required type.
After three or four bounces, ample Resonance will be available. Allow plate energy to dissipate and collect the required Resonance. Teammates without “Stolen Favor” should avoid collecting Resonance until buffed players have secured their needs. Once you have three Resonance stacks and allowed time for allies to collect excess, defeat the Subjugator near your conduit and lock the conduit.
Upon locking all three conduits, the Resonance bank will appear in the room’s center – alongside deadly turrets. Bank Resonance to replenish the timer, open the door ahead, and spawn an Unstoppable Champion. Eliminate enemies and proceed.
This process repeats three times in three rooms, each increasing in complexity. Here’s a breakdown of each room’s specific nuances:
Clearing the First Room
In the first room, plate wires are linear, and the area is relatively open, simplifying enemy engagement. Follow the standard instructions to quickly progress through this room.
Clearing the Second Room
Alt text: Destiny 2 Guardian fighting enemies in the more complex second room of the Repository encounter in Salvation’s Edge raid.
The second room introduces increased complexity. The left plate’s wire now crosses over the middle plate. The left plate conduit player will end up on a raised platform in the middle. The middle conduit player should use a plate on the left side, near the Tormentor spawn.
Clearing the Third Room
Alt text: Destiny 2 Guardian engaging enemies in the highly complex third room of the Repository encounter in Salvation’s Edge raid, featuring pits and crossed wires.
The third room is the most challenging. Pits are prevalent, and three Tormentors spawn simultaneously at the front. Wires are significantly crossed: left conduit uses the middle plate, middle conduit uses the right plate, and right conduit uses the left plate.
Excess Resonance becomes less crucial in this room. Prioritize acquiring the needed Resonance shape and completing conduits swiftly. Once done, bank Resonance for the third time and defeat the Unstoppable Champion. The rear door will open, revealing a chest with your loot.
Follow the path to reach Verity, the puzzle-focused encounter.
Verity Encounter Guide: Dissecting and Manipulating Shapes
Alt text: Destiny 2 Guardian facing the puzzle-based Verity encounter in Salvation’s Edge raid.
Verity evokes memories of The Vault encounter from the Last Wish raid, being primarily puzzle-driven.
Encounter start randomly pulls three Fireteam members into the shadow realm. These players find themselves in solo instances mirroring the main arena. Collaboration with the light realm team is essential to solve a complex puzzle, enabling their escape from the shadow realm.
This puzzle is multi-layered, requiring careful dissection and shape manipulation.
Reversing Catatonic Decimation
Alt text: Destiny 2 Guardian experiencing Catatonic Decimation in the Verity encounter of Salvation’s Edge raid.
Before proceeding, conduct a “drip check”. This seemingly humorous step is crucial. Distinguishing Guardians and their Ghosts is vital for encounter completion.
Observe the six Guardian statues near the spawn point. These decimated statues represent Fireteam members, mirroring their armor sets.
Each Fireteam member should customize their appearance and document it (notepad, Discord, etc.). Additionally, equip a distinct Ghost Shell and note it alongside your name. This information needs to be readily accessible.
Twice per phase (six times per fight), some or most of your Fireteam will be decimated by The Witness. Decimation “kills” and freezes players in place. Shadow realm players’ Ghosts appear in the light realm; light realm players’ Ghosts appear near their bodies during intermissions.
Alt text: Destiny 2 Guardian undergoing the process of Catatonic Decimation in the Verity encounter of Salvation’s Edge raid.
Non-decimated Guardians must retrieve these Ghosts and return to the statues. Decimated players’ statues will be missing. However, decimated players can spectate through non-decimated teammates’ perspectives. Using spectate, each decimated player can identify one missing statue (never their own) and relay this information to allies to match the correct Ghost to the correct Guardian.
Upon reaching their Guardian’s statue, the Ghost can resurrect the decimated Guardian (without using a revive token).
Example:
- Fireteam works on puzzle to free shadow realm allies.
- Shadow realm Guardians are decimated.
- Their Ghost Shells appear in the light realm.
- Light realm team members examine Ghosts, referencing fashion notes. “Bunny Ghost Shell with dino Titan, anyone see dino Titan statue?”
- Holding bunny Ghost Shell, light realm members return to statues with other Ghosts and similar calls (“Trials Ghost with sword Hunter?”, “Shark Ghost with Root of Nightmares Warlock?”).
- Decimated players spectate and call out glowing statues. Dino Titan might say, “Root of Nightmares Warlock is three,” indicating shark Ghost holder is at the third podium from left.
- Shark Ghost holder dunks Ghost at third podium, resurrecting Root of Nightmares Warlock.
- Repeat process to reunite other decimated Guardians with their Ghosts and bodies.
This process is repeated each phase as shadow realm players attempt escape, and on a larger scale during the intermission phase.
Escaping the Shadow Realm
Alt text: Destiny 2 Guardian picking up a square shape in the shadow realm during the Verity encounter of Salvation’s Edge raid.
Initiating the encounter by interacting with the “free Guardian” prompt on a statue pulls three random players into the shadow realm. These Guardians are in solo instances of the normal arena and must cooperate with the light realm team.
Shadow realm players will see three statues around the central stage, each representing a shadow realm Guardian and holding a shadowy shape. Shadow realm players must relay these shapes to the light realm team.
Example: Left statue square, middle circle, right triangle. Call out “SCT” (square, circle, triangle, left to right).
Your goal is to become “lord” of your statue’s shape and gather them within your shadow realm room.
Alt text: Destiny 2 Guardian observing the shape display screen in the shadow realm during the Verity encounter of Salvation’s Edge raid.
Observe the large screen at the back of your shadow realm room. It alternates between two shapes with a loading spiral. This indicates the shapes currently in your room, held by Hive Knights. If the screen shapes match your statue’s shape, you’re set. If not, trading is necessary.
Defeat Knights and collect shapes that don’t match your statue. If your room has a square and a circle and you’re the square Guardian, defeat Knights until a circle appears and collect it. Communicate with the circle Guardian statue player, indicating you’re ready to trade. They should also have your shape. Coordinate a countdown for simultaneous trade. This timing isn’t strictly required, but it helps synchronize shape exchanges, especially for new players.
Collect and dunk shapes one at a time. Picking up two creates a 3D object. Dunking a 3D object resets your shapes, returning them to Knights. This can be used to reset if you accidentally collect the wrong shape.
Trade with shadow realm teammates until everyone has their own shape. Two or three trades should suffice. Once everyone is “lord” of their shape, prepare to share. The ultimate goal is to acquire the two shapes your statue isn’t holding. As the square lord, you need to give away squares and acquire a circle and a triangle to escape.
Alt text: Destiny 2 Guardian picking up a pyramid shape in the shadow realm during the Verity encounter of Salvation’s Edge raid.
Repeat the trading process. Grab one of your shapes and indicate trade readiness. Again, countdowns aid synchronization for new players. Agree on trade partners and approach their statue. Countdown and trade. Observe the screen for changes. Repeat until you have the required shapes and allies do as well.
When ready, defeat Knights and collect both shapes simultaneously to gain a 3D shape buff (combination of the two shapes). With the 3D shape buff, proceed to the back of the room, normally blocked by a shattered glass barrier. If light realm allies have completed dissection outside, you can pass through and rejoin them.
Note: The Witness’ Catatonic Detonation can occur during shape trading. Shapes held during detonation remain after resurrection. Be mindful of death locations due to Ogres and Knights upon respawn. Shadow realm deaths result in another player replacing you.
Dissecting 3D Shapes
Alt text: Destiny 2 Guardian battling a Hive Knight in the light realm during the Verity encounter of Salvation’s Edge raid.
When the encounter begins and three players enter the shadow realm, three remain in the light realm. Designate two enemy slayers and one dissector. Team roles are random, so at least four players should understand dissection for encounter progression.
Alt text: Destiny 2 Guardian collecting a Square splinter in the light realm during the Verity encounter of Salvation’s Edge raid.
Light realm players assist shadow realm escape. Dissection involves creating 3D objects for shadow realm statues, mirroring collected shapes.
As enemies spawn, light realm statues transform into shadow realm Guardians, each holding a 3D object (shape buff combinations). Terminology:
- Cube (square + square)
- Sphere (circle + circle)
- Pyramid (triangle + triangle)
- Cylinder (circle + square)
- Cone (circle + triangle)
- Prism (triangle + square)
Shadow realm allies call out their shape order (left to right). Example: “circle, square, triangle”. This indicates lordships and shape order.
Dissection removes “lord” shapes from light realm statues’ 3D objects. In the “circle, square, triangle” example, if the left statue has a sphere, cylinder, or prism (all containing a circle), a circle needs to be removed for the shadow realm circle lord to escape.
Alt text: Destiny 2 Guardian dunking a shape to dissect a 3D object in the light realm during the Verity encounter of Salvation’s Edge raid.
Dunk shapes to dissect. Light realm Knights (three spawn) drop one shape each. In the example, take a circle and dunk it into the leftmost statue to dissect a circle. The statue glows, indicating dissection readiness. To complete dissection, dunk a different shape into another statue. Dunked shapes trade places, removing from the original 3D object and adding to the other. You cannot dunk a shape into a statue lacking that shape (e.g., circle into a cube statue).
Efficient dissection involves dunking the first of each called shape (left to right). In the “circle, square, triangle” example, dunk circle left, square middle, triangle right. This pulls at least one shape from the left and middle statues and prepares the right statue.
Alt text: Destiny 2 Guardian engaging Unstoppable Ogre enemies in the Verity encounter of Salvation’s Edge raid.
When Knights are defeated, two Unstoppable Ogres spawn on the left and right. Dissector assists with stunning Ogres; bodyguards handle elimination. After Ogres, three more Knights spawn, restarting the loop.
After the second Knight set, determine the right statue’s remaining needed shape and dunk it in another incomplete 3D object. Typically, two dissections suffice for required 3D objects.
Verify dissection by checking if the original called shapes are absent from the listed 3D objects.
Dissector’s primary role is shape manipulation, assisting with Ogres and Ghost resurrection if needed.
Complex Example (STC – square, triangle, circle callout):
Starting 3D Objects:
- Cube (square + square)
- Pyramid (triangle + triangle)
- Sphere (circle + circle)
Dissection Order:
- Dunk square in left statue.
- Dunk triangle in middle statue.
- Verify left and middle statues become prisms.
- Dunk circle right statue.
- Defeat Unstoppable Ogres.
- Address decimated allies if needed.
- Dunk square left statue.
- Verify left statue becomes a cone, right becomes a cylinder.
- Dunk triangle in middle statue.
- Dunk circle on right statue.
- Verify middle statue becomes a cylinder, right becomes a prism.
- Double-check objects: cone (no square), cylinder (no triangle), prism (no circle).
Alternatively, use the handy dissection tool by Reddit users seratne and interxenon.
Proceeding to the Next Phase
Alt text: Destiny 2 Guardian reviving a decimated Fireteam member in the Verity encounter of Salvation’s Edge raid.
Upon Fireteam reunion, the phase timer disappears, signaling transition to the next phase. Proceed to the back of the room and prepare for an onslaught. Two Unstoppable Ogres spawn on each side (potential simultaneous spawn at the back). Eliminate all enemies and spread out in the spawn area.
The Witness will decimate five of six Fireteam members, freezing all but one. The survivor waits for allies to identify the first seen Guardian, retrieves their Ghost, and matches it. Work collaboratively to resurrect allies within one minute.
Repeat this entire process two more times (three phases total). After the final revive in phase three, collect loot. The central hole becomes an elevator, leading to The Witness encounter.
Ascend, climb roots to the fortress, jump on columns by the door, and enter the arena for the final boss of Destiny 2‘s Light and Darkness saga.
The Witness Boss Fight Guide: Confronting the Final Shape
Alt text: Destiny 2 Guardian standing before The Witness in the final boss encounter of Salvation’s Edge raid.
Upon entering the final arena, The Witness stands patiently at the back. The arena is split in two, with a central pit leading to a root platform.
Optimal Loadout for The Witness
Alt text: Destiny 2 Hunter using Cayde’s Retribution Golden Gun super against The Witness in the final boss encounter of Salvation’s Edge raid.
To initiate the fight, approach The Witness. However, team setup is crucial. The Witness has immense health, requiring high damage output and burst damage for the tight final stand window.
Hunters are ideal for burst damage. Pair Celestial Nighthawk with Marksman Golden Gun and the Still Hunt sniper rifle for chained shots on The Witness.
For other classes, options are limited. Precision weapons like linear fusion rifles are viable, but boss fight movement necessitates alternatives. Microcosm, the heavy trace rifle from The Final Shape, is recommended. It deals high damage and even more damage after Super use. Warlocks use Well of Radiance or Song of Flame, Titans use Twilight Arsenal or other quick Supers.
Machine guns are useful for enemy clearing, and pulse rifles for ranged targets.
Breaking The Witness’ Glyphs
Alt text: Destiny 2 Guardian shooting a Resonance bangle on one of The Witness’ hands in Salvation’s Edge raid.
Encounter start reveals six glyph buttons on The Witness’ jacket, protecting its weak spot. Breaking these glyphs requires the Glyphbreaker buff.
Divide into two teams: Glyphbreaker players and enemy slayer players (three each).
Enemy slayer players position themselves left, right, and alternating as needed. Primary threats are Subjugators (occasional spawns) and Screebs (constant threat). Prioritize clearing enemies for the Glyphbreaker team and prepare for damage phase.
Glyphbreaker players focus on The Witness’ hands, which become damageable in this encounter.
Assign each Glyphbreaker player to a hand type for simplicity:
- Down hand (ceiling): Pyramidal Resonance buff, triangle bombs.
- Up hand (floor): Spherical Resonance buff, circle airstrikes.
- Wall hand (wall): Hexahedron Resonance buff, beam attack.
Alt text: Destiny 2 Guardian destroying one of The Witness’ hands to gain the Glyphbreaker buff in Salvation’s Edge raid.
Each player starts by locating their hand type and standing in its target area (circle for up hand, etc.). While inside, shoot the Resonance bangle on your hand. This reveals a green (Pyramidal), red (Hexahedron), or yellow (Spherical) bangle underneath, indicating the required buff.
Identify the hand that grants the needed buff. For example, if wall hand reveals a need for Pyramidal buff, stand in the down hand’s attack area briefly to gain Pyramidal Resonance. Return to your assigned hand, stand in its aura, and shoot the bangle immediately to destroy the hand and gain Glyphbreaker.
Phase Notes:
- Prolonged standing in your own hand’s aura can grant unwanted buff stacks. Be swift checking the bangle.
- Hand timers are short. If a hand repositions, its bangle changes, requiring restart. Enemy slayers can reset hand timers by shooting Resonance bangles, but excessive resets summon more hands.
- Only enter enemy hand auras for buff acquisition when attacks are not imminent. Attacks are lethal. Dip in, get buff, get out.
- Hand destruction grants a stack of its buff. Max Resonance stacks are three. If you have three stacks, someone else must shoot your hand.
- Excessive Resonance stacks disrupt fight flow. Be deliberate and avoid accidental aura entry. Buff overrides and stack increase are possible.
- Hand destruction can trigger The Witness’ trap (explained next section).
Alt text: Destiny 2 Guardians destroying glyphs on The Witness’ jacket during the final boss encounter of Salvation’s Edge raid.
When all Glyphbreaker players have the buff, jump to the root platform and destroy glyphs together. Platform glyph destruction cleanses buffs and resets. If allies have accidental Resonance stacks, join you on the cleansing plate.
Repeat this process to destroy all six glyphs. Sixth glyph destruction initiates the damage phase. Ensure team readiness and enemy clear on sides.
Surviving The Witness’ Trap
Alt text: Destiny 2 Guardians working together to foil The Witness’ trap by creating the correct Resonance shape in Salvation’s Edge raid.
Once per phase (every six glyphs), The Witness deploys a trap upon hand destruction and Glyphbreaker gain. This trap cannot occur on the first or sixth hand.
“The Witness tests you” prompt appears upon trap trigger. Upon hand destruction, check for this prompt. The last hand destroyed is key to the solution. If hands are destroyed too closely together, identifying the solution becomes difficult.
Determine the hand type triggering the test. Glyphbreaker players observe the room’s center. Resonance crystals float in mid-air before The Witness. Create a shape (square, circle, or triangle) matching the triggering hand type.
Refer to Mactics’ map for shape references.
Example: Wall hand triggers trap. Destroy all crystals not part of the square shape. Shooting incorrect crystals is lethal. Leave correct shape crystals untouched. Correct shape triggers “The Witness’ trap is foiled” prompt.
Trap foil doesn’t guarantee safety. Trap end triggers a Witness shockwave attack. The Witness rears back, pushes hands forward, creating a ground-level shockwave. Entire Fireteam must jump. Witness eyes glow and sword-drawing sound precede this attack. Jump upon visual/audio cues and avoid ground contact until attack ends.
Damaging The Witness
Alt text: Destiny 2 Hunter using Golden Gun super ability to damage The Witness during the final boss encounter of Salvation’s Edge raid.
Damage phase rhythm requires practice. A keen-eyed player (or Divinity user for a wider view) calls out movement directions.
The Witness’ crit spot is the glowing slit in its chest, opening when the platform reaches max height. Shoot immediately upon opening, but watch Witness hands and eyes. Witness fires massive beams covering half the platform at a time. Shift left/right accordingly. Wipe mechanic from the trap and eye glow also occur, requiring jump readiness. Simultaneous beams and wipe mechanics are challenging. Healing grenades are effective for beam survival – throw at feet if clipped.
Alt text: Destiny 2 Guardian dodging beam attacks and ground wipes from The Witness during the final boss encounter of Salvation’s Edge raid.
The Witness tires briefly after 3-4 attacks. During this downtime, focus solely on damage. The Witness will resume beam attacks and floor wipes. “Dead DPS is zero DPS” – prioritize survival.
Eventually, The Witness rears back slowly to slam the platform down. Jump off the back and immediately eliminate enemies, otherwise The Witness will wipe the team. Repeat the process until final stand, but only three damage phases are available. Maximize damage output per phase.
For final stand, The Witness becomes briefly immune. Chest reopens for continued damage, attacks persist. After 15-20 seconds, wipe occurs unless The Witness is defeated. Maximize damage output, use all available resources.
“Defeating” The Witness triggers its retreat and grants a large loot chest. Pursue The Witness with fellow Guardians in the campaign’s final mission, “Excision.”
Raid complete? Explore how to get the Khvostov Exotic, collect Motes of Light, and locate all Visions of the Traveler.
See More: