You’ve likely heard the saying, “There’s more than one way to skin a cat,” but for guitarists, a more relevant adage might be, “There’s more than one way to wire a Les Paul.” The iconic Gibson Les Paul, along with its siblings like the SG and ES-335, and countless other guitars, utilizes a two-pickup, four-potentiometer setup. This traditional configuration, featuring dedicated volume and tone controls for each pickup, opens up a vast landscape of tonal possibilities. For those who love to tinker and explore, the world of guitar wiring modifications is endlessly fascinating. Over the years, guitar enthusiasts have experimented extensively with different wiring schemes, some of which have become so popular they’ve earned their own names.
Among these wiring variations, two main schematics stand out for Les Pauls: ’50s style wiring and modern wiring. We’ll delve into these in detail, providing a comprehensive Seymour Duncan Wiring Guide to help you understand and implement these classic circuits. Beyond the basics, we’ll also explore some unique and creative wiring techniques to further shape the sound of your Les Paul or similar guitar.
Before we dive into the Les Paul wiring diagrams, let’s address some frequently asked questions that often arise when discussing guitar electronics.
What Kind of Wire Should You Use for Les Paul Wiring?
For Les Pauls and similar guitars, 22AWG wire is the standard choice. Traditionally, cloth-covered, braided 2-conductor wire is favored for its vintage aesthetic and shielding properties. However, you can also use single-core 22AWG wire effectively. It’s generally recommended to stick with 22AWG or thicker wire, ensuring it matches or exceeds the gauge of the wire coming from your pickups. This maintains signal integrity and prevents any bottlenecks in your guitar’s electrical path. Using quality wire is a fundamental aspect of any good Seymour Duncan wiring guide and ensures optimal performance.
Understanding the Wires on a Humbucker Pickup
With the exception of models like the Les Paul Junior and Les Paul Special, Les Pauls are typically equipped with humbucker pickups. Humbuckers come with either single-conductor or four-conductor wiring.
-
Single-conductor wire: This configuration features two wires: hot and ground. The hot wire, also known as the conductor, carries the pickup’s signal and is wired to the corresponding volume potentiometer. The ground wire is usually soldered to the back of a potentiometer casing, establishing a ground connection.
-
Four-conductor wire: This more versatile setup provides five wires, significantly expanding your wiring options. While wire colors can vary between manufacturers, you’ll generally find north-start, north-end, south-start, and south-end wires, along with a ground wire. Four-conductor wiring allows for traditional wiring schemes where each pickup has dedicated volume and tone controls. It also unlocks more adventurous modifications like coil-splitting, series/parallel switching, and phase reversal, all of which are detailed in various Seymour Duncan wiring guide resources.
Essential Les Paul Wiring Components
To effectively navigate Les Paul wiring diagrams and understand the nuances of different wiring schemes, it’s crucial to familiarize yourself with the key components involved. Understanding these components is a core element of any Seymour Duncan wiring guide.
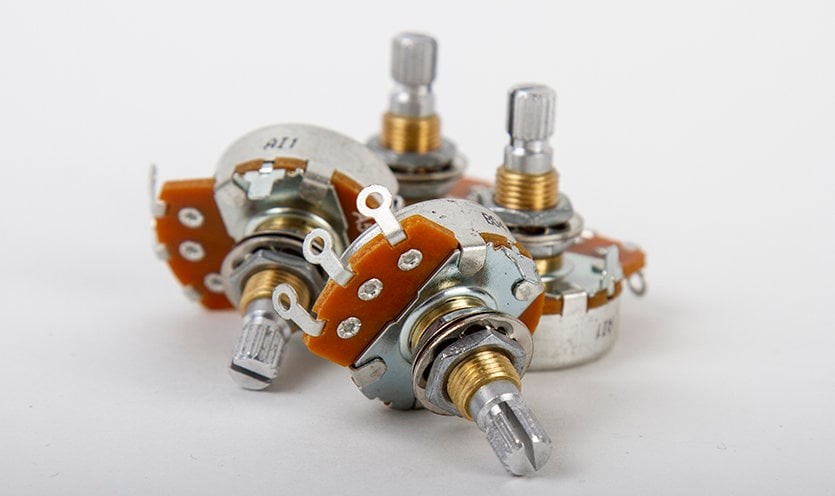
Potentiometers (Pots)
“Pot” is short for potentiometer, a variable resistor used for volume and tone controls. Internally, a pot consists of a circular resistor track with three lugs:
- Start (Supply Voltage/Current In): One outer lug, acting as the input.
- End (Ground): The other outer lug, connected to ground.
- Wiper (Current Out): The middle lug, also known as the output.
The magic happens with the wiper. As you turn the potentiometer knob, the wiper moves along the resistor track, acting as a bridge. In volume pots, it controls how much signal is sent to ground. When turned all the way down, the wiper bridges the signal directly to ground, silencing the guitar. At full volume, it bridges the signal directly to the output jack, bypassing the ground connection entirely. Positions in between create varying levels of resistance, sending portions of the signal to ground and reducing volume accordingly.
When wiring, visualize the potentiometer from the bottom, with the lugs facing upwards. Typically:
- Left Lug: Ground
- Middle Lug: Wiper (Output)
- Right Lug: Supply Voltage (Input)
You can swap the outer lugs, but this will reverse the knob’s rotation direction – turning clockwise will decrease volume instead of increasing it. Understanding potentiometer lugs is fundamental knowledge in any Seymour Duncan wiring guide.
Toggle Switch
Except for single-pickup guitars like the Les Paul Junior, Les Pauls feature a three-way toggle switch for pickup selection. Like potentiometers, toggle switches have lugs for wiring connections. A typical Les Paul toggle switch has two sides: one with three lugs and the other with two.
For a two-pickup Les Paul:
- Three-Lug Side:
- One end lug: Connected to the bridge pickup.
- Opposite end lug: Connected to the neck pickup.
- Middle lug: Ground.
- Two-Lug Side: These lugs are usually bent together and connected to the output jack, carrying the combined signal.
The toggle switch directs the signal from either the neck pickup, bridge pickup, or both (in the middle position) to the output jack, allowing you to select your desired pickup configuration. Toggle switch wiring is clearly depicted in Seymour Duncan wiring guide diagrams.
Capacitors
Capacitors in guitar wiring act as high-pass filters, primarily affecting the tone control circuit. Stock Les Paul wiring and many other guitars commonly use 0.022 µF (microfarad) capacitors. However, experimenting with different capacitor values can significantly alter your guitar’s tone:
- 0.047 µF: Produces a “beefier” sound, especially useful for brighter pickups as it rolls off more high-end.
- 0.015 µF: Offers finer, more subtle control over the high frequencies, allowing for a brighter overall tone when the tone knob is rolled back.
Capacitors also come in various materials, including ceramic, paper-in-oil, and polypropylene. Some guitarists believe different materials impart subtle tonal characteristics, although others find the type of capacitor less critical than its value. For a deeper dive into the effect of capacitors on your guitar’s tone, Seymour Duncan offers resources like articles explaining capacitor types and their sonic impact, often referenced in a comprehensive Seymour Duncan wiring guide.
Output Jack
The output jack is the final link in the Les Paul wiring chain, connecting your guitar to your amplifier. Two main types exist:
- Mono (TS – Tip-Sleeve): Standard for most guitars.
- Stereo (TRS – Tip-Ring-Sleeve): Less common in guitars, typically found in instruments with stereo outputs or active electronics (e.g., some Ernie Ball Music Man guitars).
Your Les Paul will almost certainly use a mono (TS) output jack. It features two lugs:
- Inner Lug: Ground connection, typically wired to the bridge ground.
- Outer Lug: Hot signal connection, receiving the signal from the toggle switch.
The output jack cleanly transmits your guitar’s signal to your amplifier. Correct output jack wiring is essential and always covered in a reliable Seymour Duncan wiring guide.
Why Did Gibson Transition to Modern Wiring?
In the 1960s, Gibson shifted from their original wiring schematics to what is now known as “modern wiring.” The precise reasons for this change remain somewhat speculative. It’s theorized that guitarists of that era may have preferred the “meatier” midrange focus of modern wiring over the brighter, high-end emphasis of ’50s wiring. Modern wiring can also be perceived as easier to dial in, offering a more predictable response. Regardless of the exact motivation, the change occurred, and guitarists today can easily switch between modern and ’50s wiring with a basic understanding of soldering and pickup wiring techniques, often learned through resources like a Seymour Duncan wiring guide or tutorials.
Understanding Les Paul Wiring Diagrams from Seymour Duncan
Now that you have a solid grasp of the components and terminology, deciphering Les Paul wiring diagrams becomes much more straightforward, especially when using a Seymour Duncan wiring guide. Seymour Duncan diagrams are designed for clarity, labeling each wire and clearly indicating its connection point. Remember that potentiometers in these diagrams are typically viewed from the bottom, as this is the common orientation during wiring.
Wiring Pickups to the Volume Pot: Traditional and Alternative Methods
The conventional method for wiring pickups to the volume pot in a Les Paul involves connecting the pickup’s hot signal wire to the outer lug (input) of the volume potentiometer. The middle lug (wiper/output) then allows you to control the volume level. In this configuration, the pot functions as a voltage divider, attenuating the signal as you turn down the volume.
However, an alternative approach exists. Wiring the pickup’s hot signal to the middle lug (wiper) creates what’s known as the “independent volume mod.” In this setup, the load “behind” the input determines the volume reduction when you roll down the volume knob. This is termed “independent” because in the middle switch position (both pickups selected), you can theoretically dial in the exact blend of tones from each pickup without one volume knob completely cutting out the other. While this sounds appealing, a significant drawback is a noticeable loss of high-end frequencies as you reduce the volume. Most Seymour Duncan wiring guide resources focus on traditional wiring but may briefly mention alternative mods.
Les Paul Vintage (’50s) Wiring vs. Modern Wiring: The Core Difference
When discussing Les Paul ’50s wiring versus modern wiring, the primary distinction lies in how the tone capacitor is connected to the potentiometer lugs. While subtle variations might exist depending on the specific guitar and era, the tone capacitor wiring is the defining characteristic that differentiates these two classic schemes. Both are thoroughly explained in any comprehensive Seymour Duncan wiring guide.
Les Paul ’50s Wiring: Vintage Tone and Interaction
Les Paul ’50s wiring is celebrated for its rich tonal complexity and interactive controls. There’s a greater sense of blending and interplay between the pickups. Notably, it retains more high-end clarity as you decrease the volume, resulting in a brighter tone at lower volumes. However, a characteristic of ’50s wiring is that you may experience some volume loss when you turn down the tone pot.
Implementing ’50s Les Paul wiring is relatively simple. In essence, the tone potentiometer’s outer lug is connected to the volume potentiometer’s middle lug (wiper) via a 0.022uf capacitor. This creates the unique tonal characteristics associated with this vintage wiring style.
Image alt text: Seymour Duncan wiring diagram illustrating Les Paul 50s style wiring, highlighting capacitor placement for vintage tone.
Les Paul Modern Wiring: Volume Consistency with Treble Roll-off
Les Paul modern wiring prioritizes maintaining overall volume as you roll down the volume knob. However, this volume consistency comes at the expense of some high-end frequencies. As you decrease the volume, you’ll notice a more pronounced treble roll-off compared to ’50s wiring. This characteristic can be advantageous with brighter pickups, as it can tame potentially harsh high frequencies at lower volumes, preventing the tone from becoming overly piercing.
The modern wiring approach involves connecting the tone potentiometer to the outer lug of the volume potentiometer – the same lug where the hot lead from the pickup is typically connected. This seemingly small change in capacitor placement yields the distinct tonal and functional differences between modern and ’50s wiring.
Image alt text: Seymour Duncan wiring diagram showcasing Les Paul modern wiring, emphasizing the tone capacitor connection for volume maintenance.
Exploring More Les Paul Wiring Diagrams and Modifications
As mentioned earlier, the possibilities for wiring a Les Paul are extensive. While ’50s and modern wiring are the most common starting points, particularly for those following a Seymour Duncan wiring guide, you can delve much deeper, especially if your humbuckers have four-conductor wiring.
Les Paul Coil Split Wiring Diagram: Humbucker Versatility
Coil splitting is an immensely popular modification for humbucker-equipped guitars. It allows you to effectively transform your humbuckers into single-coil pickups and back again, typically using push-pull or push-push potentiometers integrated into your volume or tone controls. This dramatically expands your tonal palette, offering both thick humbucker tones and brighter, snappier single-coil sounds from the same guitar.
Unlike switching between ’50s and modern wiring, coil splitting requires replacing at least two potentiometers with special push-pull (or push-push) pots, ideally 500k value for volume controls. Standard potentiometers can be used for tone.
When selecting push-pull pots, pay close attention to their dimensions. You’ll need pots with a taller design and a longer shaft to protrude adequately through the often thicker maple cap of a Les Paul. Also, verify that the shaft diameter matches your knobs, as both metric and imperial sizes exist, and mismatched shafts and knobs won’t fit correctly. Consult a detailed Seymour Duncan wiring guide for specific push-pull pot recommendations.
The diagram above illustrates a straightforward coil-splitting implementation. With Seymour Duncan pickups, the black wire is typically the north start (hot output) and is wired identically to standard ’50s and modern Les Paul wiring – to the voltage control lug of your volume pot. The switch and output jack wiring also remain the same.
The divergence occurs in the coil-splitting circuitry itself. The south finish wire and the ground wire are soldered to the corresponding middle lug on the push-pull pot. Then, the north finish and south stop wires are soldered to the corresponding bottom lug, as shown in the diagram. After wiring the push-pull pots and your tone pots, the coil split modification is complete, adding significant tonal versatility to your Les Paul.
What Is Jimmy Page Les Paul Wiring? Unleashing 21 Tones
Jimmy Page Les Paul wiring represents a more complex and ambitious wiring scheme, famously associated with the legendary Led Zeppelin guitarist. Instead of relying on multiple guitars with different wiring setups, this ingenious technique aims to create a vast array of 21 unique tones – including 10 distinct humbucking tones – within a single Les Paul. It achieves this sonic versatility using two four-conductor humbuckers, two single-pole, single-throw (SPST) push-pull potentiometers, and two double-pole, double-throw (DPDT) push-pull potentiometers.
While a full exploration of all 21 tones is beyond the scope of this overview, Jimmy Page Les Paul wiring fundamentally enables the following sonic manipulations:
- Coil Split: Splits both humbuckers into single-coil pickups.
- Series/Parallel Pickup Routing: Routes pickups (either humbuckers or split single coils) in series or parallel configurations.
- Phase Switching: Runs pickups in or out of phase with each other, creating thin, nasal tones or thick, powerful sounds.
Seymour Duncan’s extensive wiring diagram library includes several variations of Jimmy Page Les Paul wiring diagrams. Below is one example, demonstrating the complexity of this advanced wiring scheme. Implementing Jimmy Page wiring is a more intricate project, requiring meticulous soldering and careful attention to detail. It’s crucial to proceed slowly and double-check all solder points before fully committing, ensuring a successful and sonically rewarding outcome. A Seymour Duncan wiring guide specifically for Jimmy Page wiring is highly recommended for this advanced modification.
Image alt text: Seymour Duncan wiring diagram for Jimmy Page Les Paul wiring, an intricate circuit offering 21 unique tonal combinations through advanced switching.
Seeking More Wiring Diagrams? Explore the Seymour Duncan Resource Library
This Seymour Duncan wiring guide has covered the fundamentals of three popular Les Paul wiring methods: ’50s, modern, coil split, and Jimmy Page. However, this is just the tip of the iceberg when it comes to the potential of two humbuckers, two volume knobs, and two tone knobs. To further explore the expansive world of guitar wiring, Seymour Duncan provides a comprehensive library of wiring diagrams for guitars equipped with humbuckers, single coils, and various other pickup configurations. This vast resource is readily available to help you discover and implement the perfect wiring scheme to unlock your ideal guitar tone. Visit the Seymour Duncan website to access their full library and continue your journey into the fascinating world of guitar wiring.