Warlord’s Ruin emerges as the latest gripping dungeon in the expansive universe of Destiny 2. Nestled within the treacherous mountains near the EDZ, this dungeon plunges Guardians into a newly unveiled Ahamkara threat. Prepare to navigate through three distinct, loot-rich boss encounters and uncover a myriad of hidden secrets and cunning traps that lie within.
This comprehensive Destiny 2 guide is designed to equip you with the knowledge to successfully traverse the Warlord’s Ruin dungeon. We will provide step-by-step instructions to conquer the final boss, Hefnd’s Vengeance, Blighted Chimaera, and reveal the locations of both elusive secret chests.
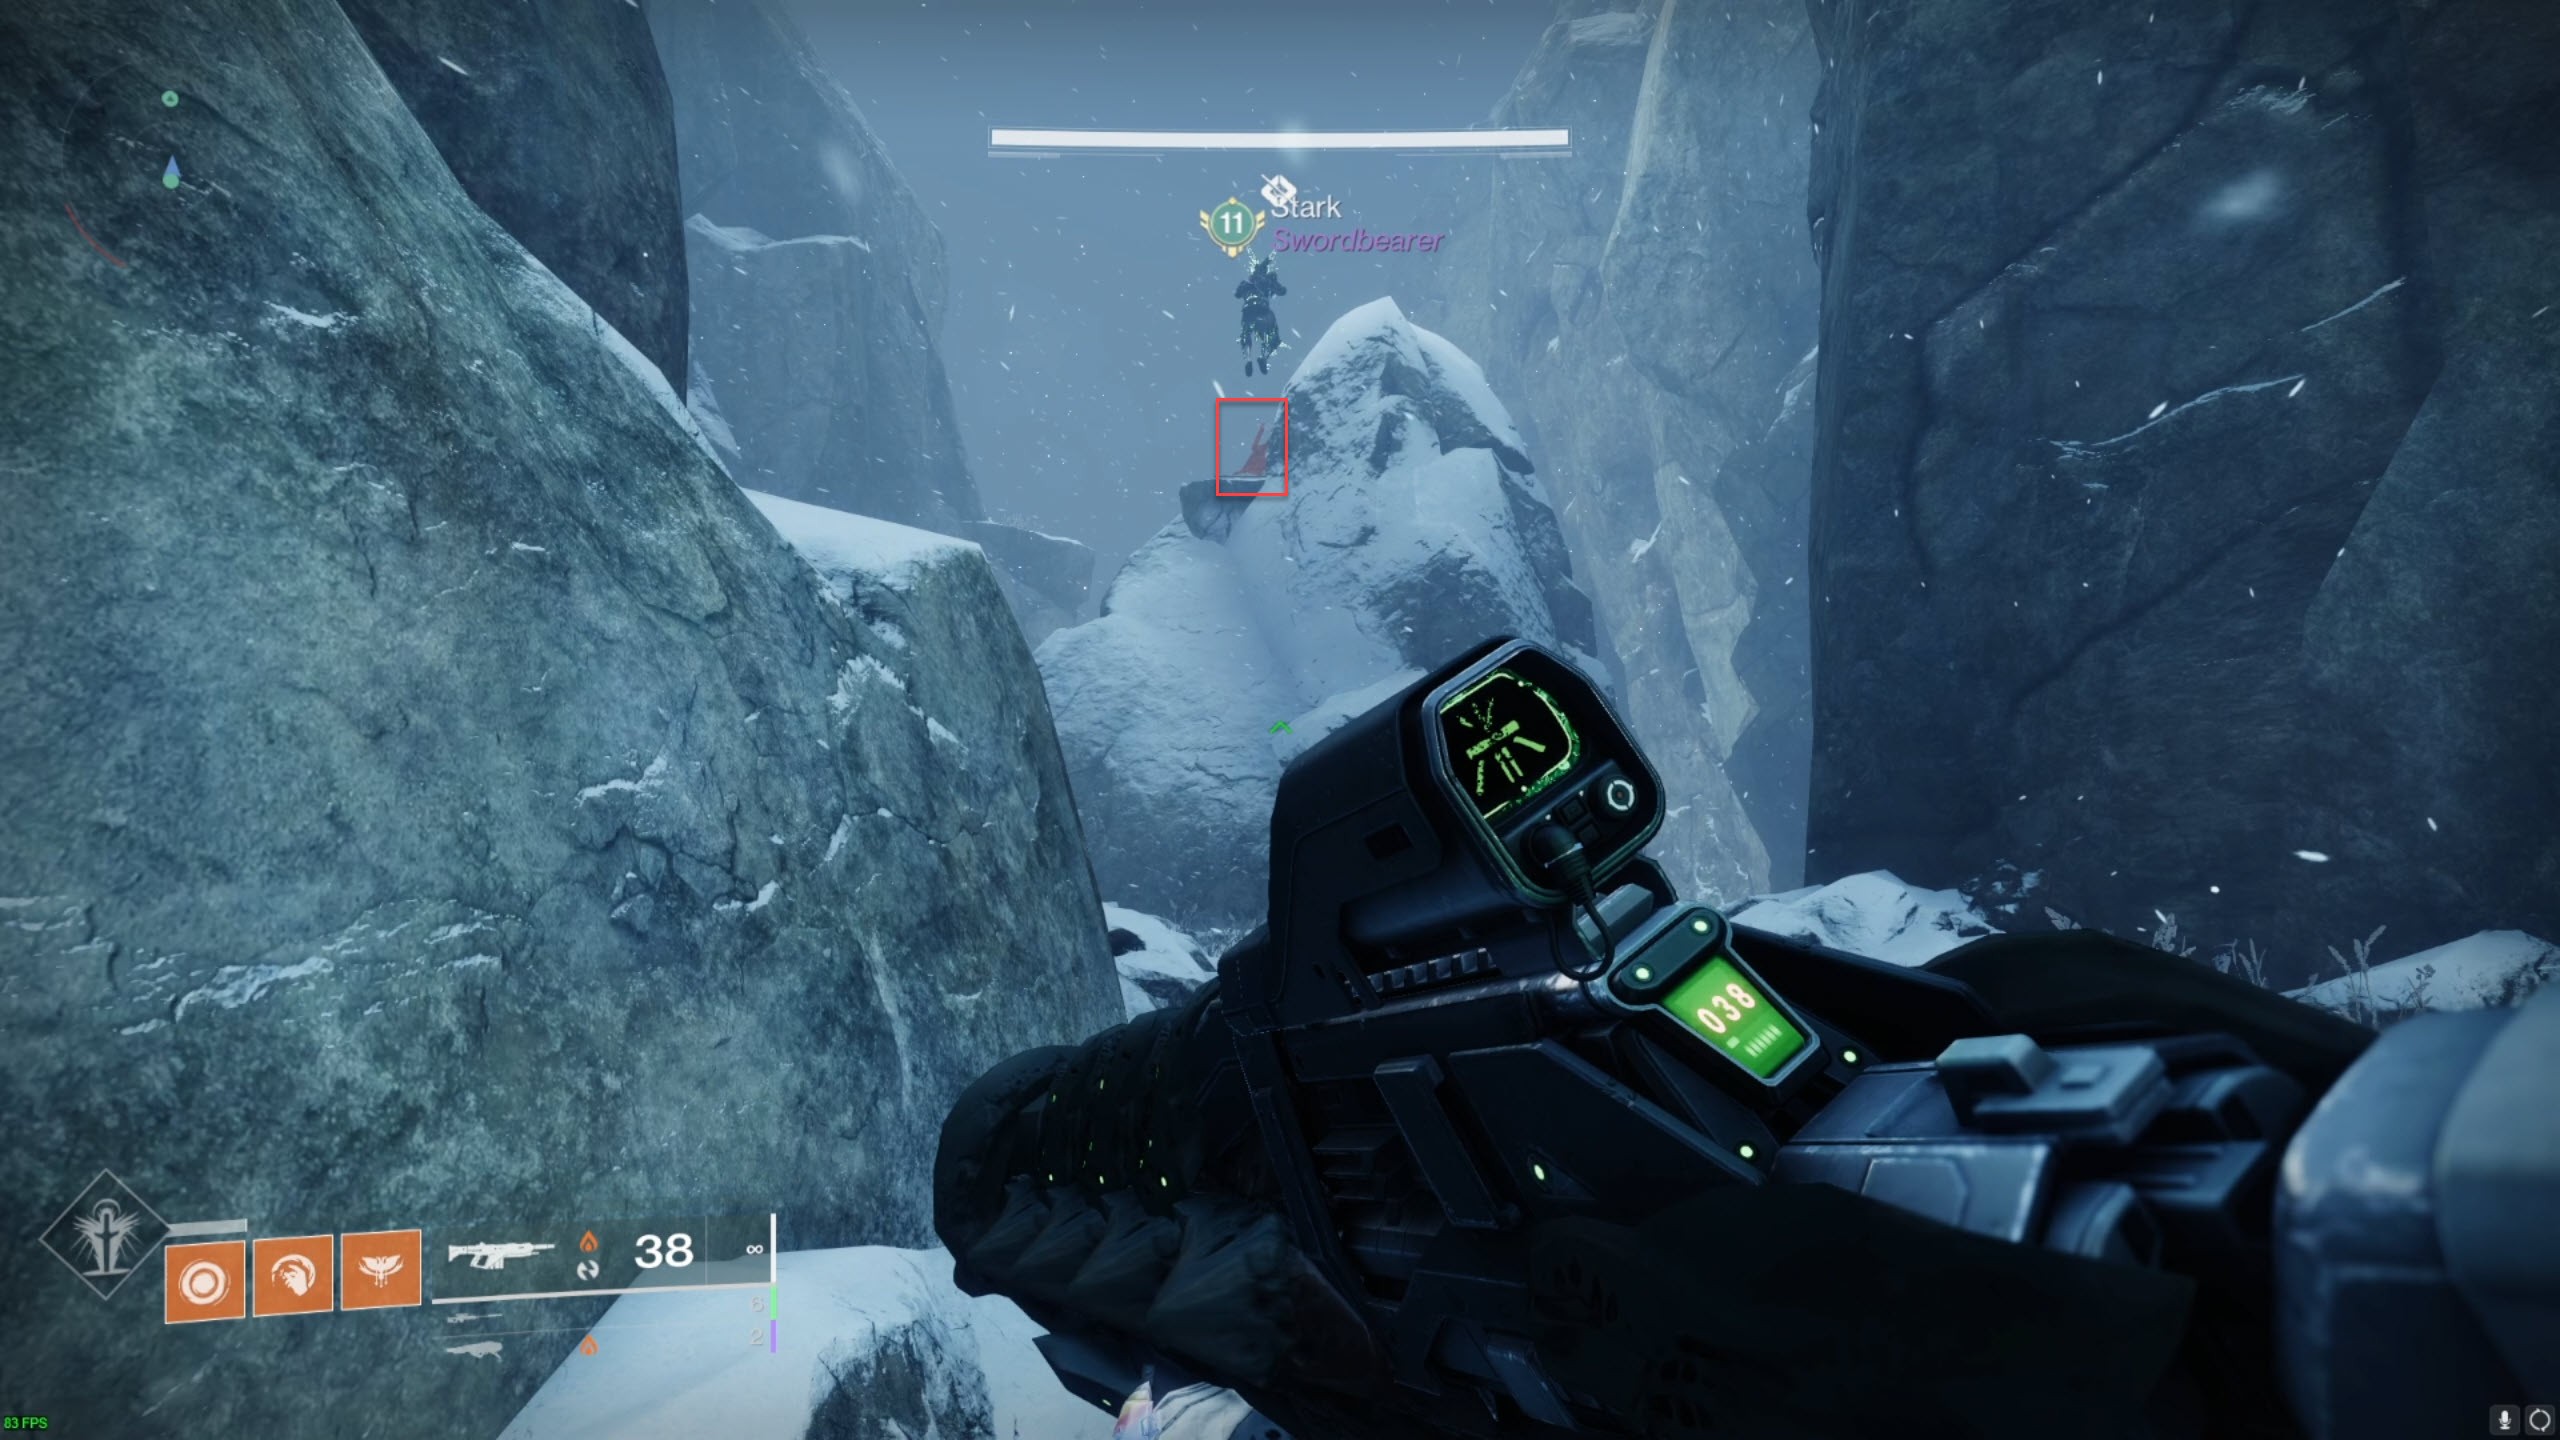
First Encounter: Defeating Rathil, Broken Knight Chieftain
Unlike many dungeons that ease you in, Warlord’s Ruin thrusts you almost immediately into its first encounter. Your initial task is to ascend the mountain and infiltrate the stronghold that awaits.
Image: Bungie via Polygon
The path ahead is relatively linear. However, should you find yourself disoriented, heed the guidance of the red flags scattered along the way, as depicted above, to ensure you remain on the correct course.
Once you breach the stronghold’s confines, you’ll be poised to confront Rathil, Broken Knight Chieftain. This initial encounter, while concise, is crucial for understanding the core mechanics of the Warlord’s Ruin dungeon, particularly the use of Scorn lanterns.
Image: Bungie
Understanding Scorn Lanterns
Throughout each of the three encounters in Warlord’s Ruin, keep an eye out for Scorn lanterns. These are dropped by bosses or specific enemies onto the battlefield. The key element to focus on is the small Taken Blight nestled at the center of each lantern.
Image: Bungie via Polygon
Each lantern emits a white circle, defining its area of effect.
Image: Bungie via Polygon
By standing within this white circle, you will cause the Taken Blight to dissipate, transforming into a blue light with spectral bones swirling inside. This process typically takes about five seconds, but speeds up with more players inside the radius. Your objective in every encounter is to activate these lanterns before the “Imminent Wish” timer, located on the left side of your screen, reaches zero.
Image: Bungie via Polygon
Escaping the Cages
The first encounter follows a straightforward cycle. The boss will periodically teleport you into one of the bird cages suspended above the arena.
Image: Bungie via Polygon
Around each cage containing a Guardian, you’ll observe three Taken eyes. Eliminating these three eyes will unlock the cage door, allowing you to jump back down to the arena floor.
Be warned: failure to destroy the Taken eyes swiftly will result in the cage ascending into a spiked ceiling, leading to your demise. Once you and your team are free from the cages, activate the Scorn lanterns by standing within their radii. Activating just one lantern before the wish timer expires is sufficient to initiate the damage phase (DPS). However, activating multiple lanterns will grant you an extended DPS window, allowing for greater damage output.
Damage Phase (DPS)
With the boss’s shield neutralized, the damage phase commences. Rathil possesses a relatively low health pool, enabling you to employ your preferred weaponry. Rockets are consistently effective, offering substantial burst damage.
Image: Bungie via Polygon
You can inflict damage until the “Naeem’s Wish Empowerment” buff, visible on the left side of your screen, depletes. Once the shield regenerates, simply repeat the process of cage escape and lantern activation until Rathil, Broken Knight Chieftain, is defeated.
Warlord’s Ruin Cell Puzzle Solution
Upon vanquishing Rathil, you will be teleported into a prison complex, requiring you to orchestrate an escape. In two of the cells, you’ll notice sets of Roman numerals etched beside skeletons.
Image: Bungie via Polygon
These two numbers, let’s designate them as X and Y, will invariably sum to six.
Image: Bungie via Polygon
Scattered around the prison area, you’ll find six dials that are interactive when shot.
- A single shot activates the dial, causing it to spin counterclockwise.
- A second shot will halt its spinning.
- A third shot will initiate clockwise rotation.
Your objective is to configure X dials to spin clockwise and Y dials to spin counterclockwise. For instance, if the numerals indicate a sum of six split evenly, you would set three dials to spin counterclockwise and three to spin clockwise.
Image: Bungie via Polygon
Once all dials are correctly oriented, shoot the glowing key positioned in front of one of the cells, as illustrated above. This will unlock the cell doors. Proceed through the ensuing maze and ascend the mountain path until you reach the second encounter. Along your journey, you may stumble upon…
Finding the First Secret Chest in Warlord’s Ruin
Warlord’s Ruin is replete with chests, yet only two are secret chests containing valuable loot. The rest are decoy chests that trigger Screebs, which explode upon proximity, posing a lethal threat. The first secret chest with loot will be found in one of three possible locations after you navigate the prison escape. The chest containing loot for your current run will be identifiable by the absence of a blue glowing effect. This effect may take a few moments to manifest, so exercise patience for five to ten seconds before approaching a chest.
The first potential location for the chest is within the maze, requiring you to climb over a small section of collapsed hallway.
Image: Bungie via Polygon
After descending the prominent stairs pictured above, turn right, then another right. If you can already see the chest through a gate, you’ve progressed too far. Retrace your steps and follow the path over the rubble until you encounter the first possible chest location.
Image: Bungie via Polygon
The second possible chest location is within a room in the maze, situated directly after the first potential location.
Image: Bungie via Polygon
You’ll recognize the correct room by the spawning of a group of Scorn enemies upon entry.
Image: Bungie via Polygon
The third possible chest location is accessible after crossing the large bridge.
Image: Bungie via Polygon
Upon reaching the substantial set of stairs just before the second encounter area, enter the keep instead of proceeding along the path to the left.
Image: Bungie via Polygon
The first secret chest will be situated at the summit of these stairs.
Second Encounter: Surviving the Tempest and Defeating the Taken Ogre
Image: Bungie
The second encounter challenges you to endure a fierce snowstorm while igniting pyres. These pyres will provide essential shielding as you battle a massive Taken Ogre. This process involves activating four Scorn lanterns, which in turn spawn four “Burning Desire” orbs. Transport these orbs to the four pyres situated around the main boss area to initiate the DPS phase.
Surviving the Biting Cold
The onset of the fight necessitates spawning Scorn Lanterns. This is achieved by eliminating all of the Taken eyes that materialize around the boss. Upon their demise, two Scorn Broken Knights will appear—one on each flank of the arena. These enemies drop a lantern upon defeat and may spawn an additional lantern if they remain alive for an extended duration.
Image: Bungie via Polygon
The appearance of these knights triggers the wish timer, similar to the first encounter. Concurrently, a snowstorm will engulf the arena.
Image: Bungie via Polygon
The combat log will display “The bones call forth a freezing tempest” when the storm begins. This tempest inflicts stacks of the “Biting Cold” debuff. Reaching 10 stacks of Biting Cold is fatal. The debuff dissipates once the Imminent Wish timer concludes.
Image: Bungie via Polygon
To reduce stacks of Biting Cold, seek refuge near the torches positioned along the rear perimeter of the arena.
Lighting the Pyres and Starting DPS
Image: Bungie via Polygon
The quantity of Scorn Lanterns you activate dictates the number of Burning Desire orbs that spawn in the center, near the rally flag location. Efficiency in lantern activation can yield three or four orbs, accelerating your path to the DPS phase.
Image: Bungie via Polygon
Carry each orb to one of the pyres encircling the boss. Activating all four pyres will initiate the DPS phase.
Damage Phase Strategy
For the DPS phase, congregate near the last pyre you activated. Each pyre provides approximately 15 seconds of DPS time, during which you can damage the boss. Remaining close to the pyres is crucial as the snowstorm will resume, and these pyres offer protection from Biting Cold. As the timer expires, rotate to the next pyre.
A simple strategy is to rotate to the left consistently. This boss is considerably resilient, so optimizing your DPS for a sustained encounter is advisable. Recommended weaponry includes rockets and robust secondary DPS options such as the kinetic sniper rifle Succession or the Solar Eremite fusion rifle. Linear fusion rifles also present a viable alternative. After exhausting the time on the fourth pyre, repeat the lantern and pyre lighting process until the boss is defeated.
Location of the Second Secret Chest
Image: Bungie via Polygon
The second secret chest is located after the second encounter. You will enter a room containing six chests. To claim your loot, open the chest that is not emitting a blue glow.
Final Encounter: Defeating Hefnd’s Vengeance, Blighted Chimaera
The final encounter of Warlord’s Ruin pits your fireteam against the essence of a long-deceased Ahamkara, manifested as a Taken Chimera. This battle mirrors the mechanics of the preceding encounters, requiring activation of Scorn lanterns to dispel the boss’s shield.
Spawning Lanterns and Removing Shields
Similar to the previous encounter, spawning the Scorn Broken Knight enemy, which in turn spawns the Scorn Lanterns, is achieved by eliminating the Taken eyes. Upon vanquishing all Taken eyes, the Scorn Broken Knights will materialize. As before, prolonged survival of these knights may result in the spawning of an additional lantern.
Image: Bungie via Polygon
Activating just one lantern is sufficient to lower the boss’s shield. However, activating multiple lanterns will extend the DPS timer, indicated by the “Naeem’s Wish Empowerment” buff on the left of your screen.
Managing Vengeful Corruption
Image: Bungie via Polygon
Instead of battling a snowstorm while activating lanterns, you must contend with the debuff “Hex of Vengeful Corruption.” Retaining this debuff when the timer expires will result in death.
To dispel “Hex of Vengeful Corruption,” melee an enemy called a “Corrupted Hex Drinker.” Be cautious, as if they melee you in retaliation after you transfer the debuff, they will pass it back to you. Maintain distance after removing the debuff to avoid immediate re-application.
Climbing the Arena and DPS Phases
Image: Bungie via Polygon
Inflicting sufficient damage to the boss, marked by the white portion of the boss’s health bar at the bottom of the screen, will prompt it to ascend to the next section of the arena.
Repeat the process of spawning lanterns and dealing damage to facilitate further ascent. This sequence is performed three times, culminating in reaching the summit and the true DPS phase initiation.
Once you reach the top, the full DPS phase begins.
Image: Bungie via Polygon
Continue dealing damage until the message “My hide is thick, O vengeance mine” appears in the combat log. This indicates that your current platform will be engulfed in Taken corruption, rendering the boss immune to damage.
Image: Bungie via Polygon
Rotate to one of the other large platforms (there are three in total). This action will remove the boss’s shield, allowing you to resume damage infliction. You can extend the damage window by eliminating the Taken eyes orbiting the boss.
Upon the re-emergence of “My hide is thick, O vengeance mine” in the chat, rotate to the final platform. Continue damage output until the boss becomes immune once more.
Subsequently, you will be teleported back to the bottom, necessitating a repetition of the entire process until you reduce the boss’s health below the final stand threshold. Note that this health gate can be crossed during the ascent phases; it is not exclusively confined to the top DPS phase.
Final Stand Strategy
Once you deplete the boss’s health to the final stand threshold, you’ll be transported to an open platform where you must defeat Hefnd’s Vengeance before it overwhelms you.
Image: Bungie via Polygon
The Taken eyes can pose a significant threat during this phase. Balance your focus between damaging the boss and neutralizing the eyes. Utilizing the pillars for cover can provide tactical advantages. Upon defeating the final boss of Warlord’s Ruin, you will be teleported to the rooftop to collect your well-earned loot.
For first-time completion, you will receive the “In the Shadow of the Mountain” quest, tasking you with locating various collectibles across multiple dungeon runs. Our guide to all Warlord’s Ruin collectibles can assist you in tracking them down.
See More: