What Does Guide Mean On Cricut? Understanding the guide feature in Cricut Design Space is essential for crafting enthusiasts. This guide, brought to you by CONDUCT.EDU.VN, provides a detailed explanation, application tips, and creative ideas for using the guide feature effectively. Explore precision design, layout assistance, and annotation capabilities with this comprehensive resource.
Table of Contents
- Introduction to the Cricut Guide Feature
- Understanding the Basics of Guides in Cricut Design Space
- Step-by-Step Guide to Using the Guide Feature on Cricut
- Creating Templates with the Guide Feature
- Enhancing Card Designs Using Guides
- Leaving Notes and Annotations with Guides
- Advanced Techniques for Using Guides in Cricut Projects
- Troubleshooting Common Issues with Guides
- The Benefits of Using Guides in Your Cricut Projects
- Frequently Asked Questions (FAQs) About the Cricut Guide Feature
1. Introduction to the Cricut Guide Feature
The Cricut Guide feature in Design Space is a powerful tool that allows users to create non-printing guidelines on their canvas. These guides are invaluable for planning layouts, creating templates, and adding annotations to projects without affecting the final cut or print. The guide feature streamlines the design process, ensuring precision and efficiency. At CONDUCT.EDU.VN, we believe in empowering creators with the knowledge to maximize their tools, enhancing creative workflows and project outcomes.
Understanding and using the Guide feature can significantly improve the quality and precision of your Cricut projects. Whether you are creating intricate card designs, custom templates, or simply need a way to leave notes on your canvas, the Guide feature offers a versatile solution. This feature supports various design needs, from simple layout planning to complex project assembly instructions.
2. Understanding the Basics of Guides in Cricut Design Space
Guides in Cricut Design Space function as non-printing lines or shapes that help you align, size, and position elements within your design. Unlike regular design elements, guides are not cut, drawn, or printed when you send your project to your Cricut machine. Instead, they serve as visual aids during the design process, providing a framework for your creative work.
Key Characteristics of Guides:
- Non-Printing: Guides do not appear on the final product. They are purely for design and layout purposes.
- Versatile Shapes: You can convert various shapes, text, or images into guides.
- Customizable: Guides can be resized, rotated, and repositioned as needed.
- Layer Management: Guides can be placed on different layers to manage complexity in your designs.
How Guides Differ from Other Design Elements:
| Feature | Guides | Regular Elements (Cut, Draw, Print) |
|---|---|---|
| Function | Layout assistance, alignment, annotation | Cutting, drawing, printing |
| Visibility | Visible on canvas, not in final product | Visible on canvas and in final product |
| Material Use | No material usage | Requires material (vinyl, paper, etc.) |
| Operation | Set via “Operation” dropdown menu | Set via “Operation” dropdown menu |
Use Cases for Guides:
- Template Creation: Create accurate templates for various surfaces or objects.
- Card Embellishments: Plan and align embellishments on cards.
- Layout Planning: Visualize the final layout of your project before cutting.
- Annotations: Add notes and reminders to your canvas without affecting the final output.
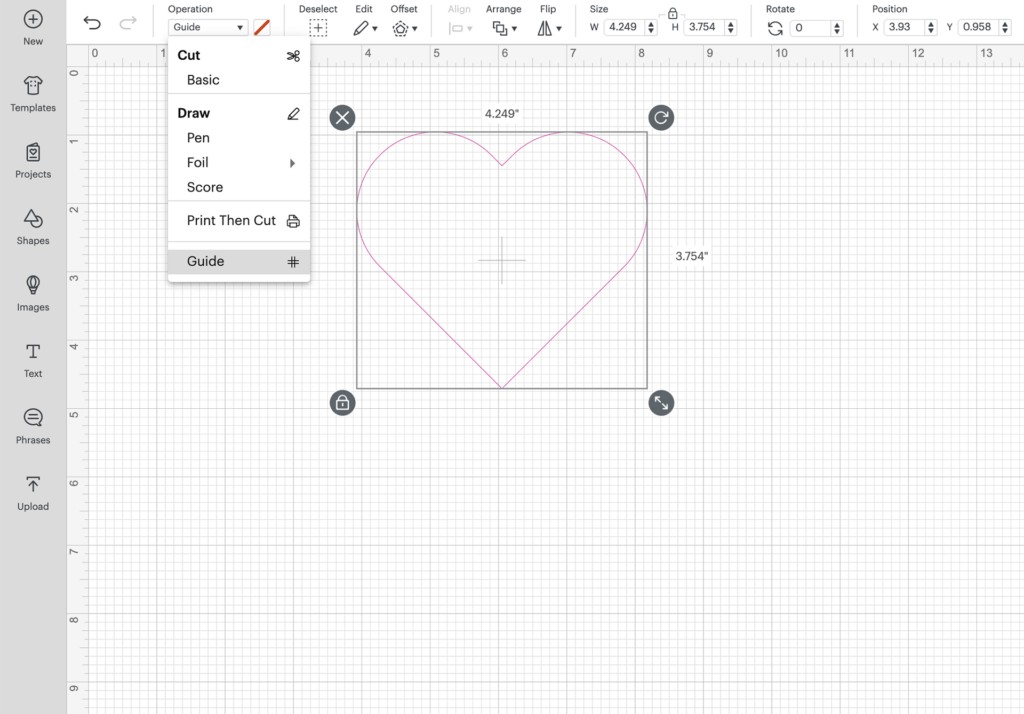
Image showing how to change a shape into a guide in Cricut Design Space.
3. Step-by-Step Guide to Using the Guide Feature on Cricut
Using the Guide feature in Cricut Design Space is straightforward. Follow these steps to incorporate guides into your projects:
Step 1: Open Cricut Design Space
Launch Cricut Design Space on your desktop or mobile device and start a new project by clicking on the “New Project” button.
Step 2: Insert a Shape or Image
Select a shape or image from the Design Space library or upload your own. This element will be converted into a guide.
Step 3: Adjust Size and Position
Resize and position the shape or image to your desired dimensions. This will determine the size and location of your guide.
Step 4: Change the Operation to “Guide”
With the shape or image selected, go to the “Operation” dropdown menu in the top left corner of the screen. Change the operation from “Basic Cut” (or any other operation) to “Guide.”
Step 5: Use the Guide for Layout
The selected element is now a guide. It will appear on your canvas but will not be cut or printed. Use it to align and position other elements in your design.
Step 6: Add Additional Elements
Insert and arrange other design elements around the guide to achieve your desired layout. The guide will help you maintain proper alignment and spacing.
Step 7: Hide or Delete the Guide
Once you have finalized your design, you can either hide the guide by clicking the “eye” icon in the layers panel or delete it entirely. Hiding the guide keeps it available for future adjustments, while deleting it removes it permanently.
Detailed Example: Creating a Guide from a Circle Shape
- Insert a Circle: Click on the “Shapes” icon in the left panel and select a circle.
- Resize the Circle: Adjust the size of the circle to your desired dimensions by dragging the corner handles.
- Change to Guide: In the “Operation” menu, select “Guide.”
- Use the Circle Guide: Use the circle as a guide to position text or other design elements around it.
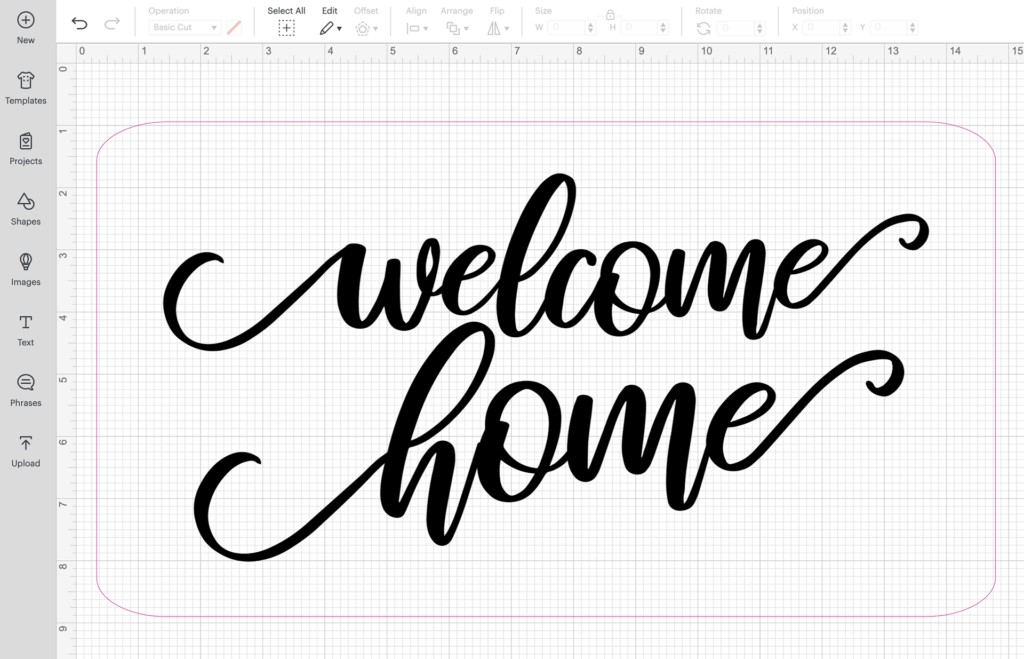
Image showing how the guide feature helps in arranging design elements.
4. Creating Templates with the Guide Feature
The Guide feature is particularly useful for creating templates. Templates help you visualize the final product on a specific surface before you start cutting or printing. This ensures that your design fits perfectly and looks exactly as you intended.
Steps to Create a Template Using Guides:
- Measure Your Surface: Accurately measure the dimensions of the surface you will be applying your design to (e.g., a doormat, a t-shirt, a mug).
- Create a Shape in Design Space: Insert a shape that matches the outline of your surface. For example, if you are designing for a rectangular doormat, insert a rectangle.
- Resize the Shape: Resize the shape to match the exact measurements of your surface.
- Convert to Guide: Change the operation of the shape to “Guide.”
- Design Within the Template: Create your design within the boundaries of the guide. This will give you a clear idea of how the design will look on the actual surface.
- Hide or Delete the Guide: Once you are satisfied with your design, hide or delete the guide before sending your project to the Cricut machine.
Example: Designing a Template for a Doormat
- Measure the Doormat: Suppose your doormat measures 24 inches by 36 inches.
- Insert a Rectangle: Insert a rectangle shape in Design Space.
- Resize the Rectangle: Resize the rectangle to 24 inches by 36 inches using the size input fields.
- Convert to Guide: Change the operation of the rectangle to “Guide.”
- Design Placement: Design your doormat graphic within the rectangle guide to ensure proper fit and alignment.
Benefits of Using Templates:
- Accuracy: Ensures your design fits the intended surface perfectly.
- Visualization: Allows you to see how the final product will look before cutting.
- Material Savings: Reduces the risk of wasting materials due to incorrect sizing or placement.
- Time Efficiency: Streamlines the design process by providing a clear framework.
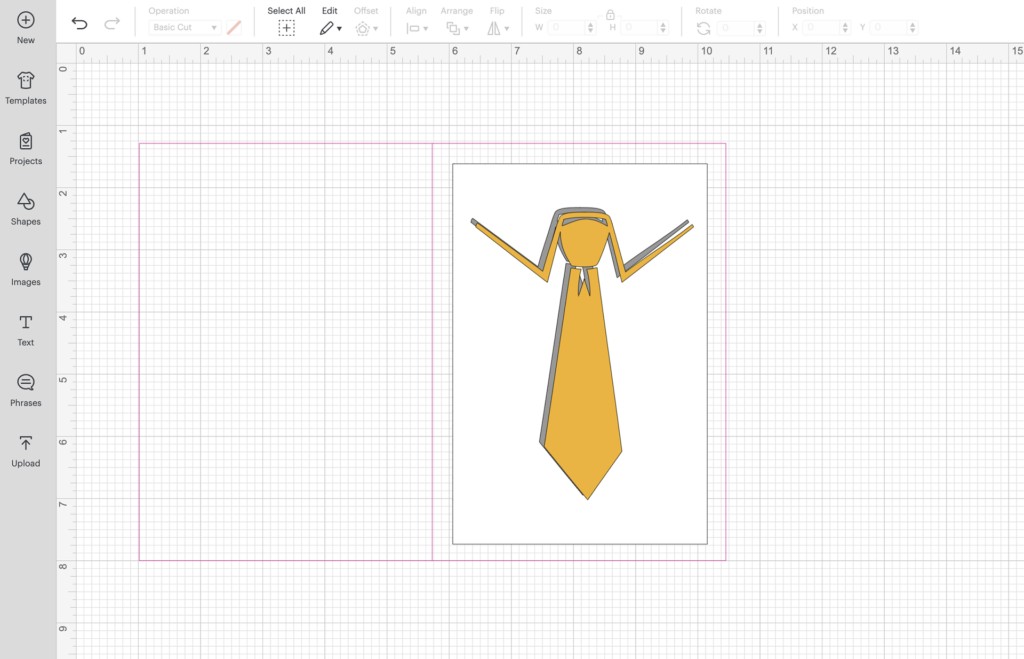
Image showcasing how to use guides to create templates for various surfaces.
5. Enhancing Card Designs Using Guides
Creating personalized cards is a popular Cricut project. The Guide feature can greatly enhance the card-making process by helping you plan and align embellishments, text, and other design elements.
Steps to Enhance Card Designs with Guides:
- Create a Card Base: Design or import a card base template in Design Space.
- Add Guides for Embellishments: Use shapes as guides to mark where you want to place embellishments, such as stickers, gems, or cut-out elements.
- Align Text: Use lines or rectangles as guides to align text perfectly on the card.
- Visualize the Final Design: The guides help you visualize the final card design before cutting and assembling.
- Hide or Delete the Guides: Once you are satisfied with the layout, hide or delete the guides before sending the project to your Cricut machine.
Example: Designing a Birthday Card
- Card Base: Import a pre-made card template or create your own.
- Guide for Text: Insert a rectangle guide to mark the area for the birthday message.
- Guide for Embellishments: Use circular guides to indicate where to place decorative elements like balloons or stars.
- Arrange Elements: Arrange the text and embellishments within the guides to create a balanced design.
- Finalize and Cut: Hide or delete the guides and proceed with cutting the card.
Tips for Using Guides in Card Designs:
- Use Different Shapes: Experiment with different shapes as guides to create unique layouts.
- Color-Code Guides: Use different colors for different types of guides to stay organized.
- Consider Symmetry: Use guides to ensure symmetrical placement of elements for a professional look.
Image demonstrating how guides can aid in precise card design and embellishment placement.
6. Leaving Notes and Annotations with Guides
Another innovative use of the Guide feature is to leave notes and annotations directly on your canvas. This is particularly helpful when working on complex projects that require specific assembly instructions or reminders.
Steps to Leave Notes and Annotations:
- Insert a Text Box: Insert a text box on your canvas.
- Write Your Note: Type your note or instruction in the text box.
- Convert to Guide: Change the operation of the text box to “Guide.”
- Position the Note: Place the note near the relevant part of your design.
- Hide or Delete the Note: The note will not be cut or printed but will remain visible on the canvas until you hide or delete it.
Example: Adding Assembly Instructions
- Text Box: Insert a text box and type “Attach the red piece to the top right corner.”
- Convert to Guide: Change the operation to “Guide.”
- Placement: Place the note near the red piece in your design.
- Assembly Reminder: When you open the project later, the note will remind you where to attach the piece.
Benefits of Using Guides for Notes:
- Organization: Keeps all project-related notes in one place.
- Clarity: Provides clear instructions directly on the design canvas.
- Efficiency: Reduces the need for separate notes or documents.
Image showcasing how to add assembly notes using the guide feature.
7. Advanced Techniques for Using Guides in Cricut Projects
Beyond the basics, there are several advanced techniques for using guides that can significantly enhance your Cricut projects.
Using Guides for Precise Alignment:
- Center Alignment: Use guides to find the exact center of your design or surface. Draw lines from corner to corner and use the intersection as the center point.
- Grid Systems: Create a grid system using multiple guides to align elements with precision. This is particularly useful for complex layouts.
Creating Custom Shapes as Guides:
- Combine Shapes: Use the “Combine” tools (Weld, Subtract, Intersect) to create custom shapes that can be used as guides.
- Import Custom Designs: Import custom designs from other software and convert them into guides.
Layering Guides for Complex Designs:
- Organize Guides by Layer: Use layers to organize different sets of guides. This makes it easier to manage complex designs with multiple guidelines.
- Lock Layers: Lock layers with guides to prevent accidental movement or changes.
Example: Creating a Symmetrical Mandala Design
- Center Point: Find the center of your canvas using intersecting line guides.
- Circular Guides: Create concentric circles as guides to plan the layers of the mandala.
- Radial Guides: Add radial lines from the center to guide the placement of symmetrical elements.
- Design Placement: Place the mandala elements along the guides to create a balanced and symmetrical design.
Tips for Advanced Guide Usage:
- Experiment with Combinations: Combine different guide techniques to achieve unique effects.
- Use Keyboard Shortcuts: Learn keyboard shortcuts for resizing and positioning elements to work more efficiently with guides.
- Consult Online Resources: Explore online tutorials and forums for more advanced guide techniques and inspiration.
8. Troubleshooting Common Issues with Guides
While the Guide feature is generally user-friendly, you may encounter some issues. Here are common problems and their solutions:
Guide Not Appearing on Canvas:
- Check Operation: Ensure the operation is set to “Guide” and not another function.
- Check Layer Visibility: Make sure the layer containing the guide is visible (the “eye” icon is active).
- Canvas Zoom: Adjust the zoom level of your canvas to ensure the guide is within view.
Guide Interfering with Design Elements:
- Layer Order: Adjust the layer order to ensure guides are behind the design elements.
- Lock Guides: Lock the guide layer to prevent accidental selection and movement.
Guide Disappearing After Cutting:
- Remember Guides Don’t Cut: Guides are designed not to be cut. If you want an element to be cut, ensure it is not set as a guide.
- Save Your Project: Always save your project with the guides if you plan to use them again.
Example: Troubleshooting a Misaligned Design
- Problem: Design elements are not aligned as expected.
- Check Guides: Verify that the guides are correctly positioned and aligned.
- Adjust Placement: Readjust the placement of design elements using the guides as a reference.
- Test Cut: Perform a test cut on scrap material to ensure the alignment is correct.
General Troubleshooting Tips:
- Restart Design Space: Sometimes, simply restarting Design Space can resolve minor glitches.
- Update Software: Ensure you are using the latest version of Design Space to avoid bugs.
- Contact Support: If you encounter persistent issues, contact Cricut support for assistance.
9. The Benefits of Using Guides in Your Cricut Projects
Incorporating guides into your Cricut projects offers numerous benefits, enhancing both the design process and the final product.
Enhanced Precision:
- Accurate Alignment: Guides ensure precise alignment of design elements.
- Consistent Spacing: Guides help maintain consistent spacing between elements.
- Perfect Sizing: Guides allow for accurate sizing of designs to fit specific surfaces.
Improved Efficiency:
- Streamlined Design Process: Guides streamline the design process by providing a clear framework.
- Reduced Errors: Guides minimize errors by ensuring correct placement and sizing.
- Time Savings: Guides save time by eliminating the need for manual measurements and adjustments.
Professional Results:
- Polished Designs: Guides help create polished, professional-looking designs.
- Symmetrical Layouts: Guides facilitate the creation of symmetrical and balanced layouts.
- High-Quality Products: Guides contribute to the overall quality and appeal of your finished products.
Creative Flexibility:
- Experimentation: Guides encourage experimentation with different layouts and designs.
- Customization: Guides allow for easy customization of projects to meet specific needs.
- Innovation: Guides inspire innovation by providing a platform for exploring new design possibilities.
Real-World Applications:
- Home Decor: Create custom wall decals, stencils, and templates for home decor projects.
- Fashion: Design personalized t-shirts, bags, and accessories with precise layouts.
- Gifts: Craft unique and thoughtful gifts with perfectly aligned and sized elements.
10. Frequently Asked Questions (FAQs) About the Cricut Guide Feature
Q1: What is the Cricut Guide feature?
- The Cricut Guide feature is a tool in Design Space that allows you to create non-printing guidelines for layout, alignment, and annotation purposes.
Q2: How do I turn an element into a guide?
- Select the element on your canvas, go to the “Operation” dropdown menu, and choose “Guide.”
Q3: Can I use text as a guide?
- Yes, you can convert text into a guide to leave notes or instructions on your canvas.
Q4: Do guides appear in the final cut or print?
- No, guides are purely for design purposes and do not appear in the final product.
Q5: Can I change the color of a guide?
- No, guides do not have customizable colors. They appear as light gray lines on the canvas.
Q6: How do I hide a guide?
- Click the “eye” icon next to the guide layer in the layers panel to hide it.
Q7: Can I use guides on the Cricut mobile app?
- Yes, the Guide feature is available on both the desktop and mobile versions of Design Space.
Q8: Are there any limitations to using guides?
- Guides are purely visual aids and do not interact with other design elements. They cannot be used for cutting, drawing, or printing.
Q9: How can guides help with creating templates?
- Guides allow you to create accurate templates by matching the dimensions of your surface and providing a framework for your design.
Q10: Where can I find more information about using guides?
- Visit the Cricut website, online forums, and tutorial channels for more tips and tricks on using the Guide feature. You can also find detailed guides and support at CONDUCT.EDU.VN, your trusted resource for ethical guidelines and best practices in design and crafting.
At CONDUCT.EDU.VN, we are dedicated to providing you with the most comprehensive and reliable information. For further assistance, please contact us at:
Address: 100 Ethics Plaza, Guideline City, CA 90210, United States
WhatsApp: +1 (707) 555-1234
Website: conduct.edu.vn
By using the Guide feature effectively, you can elevate your Cricut projects to new levels of precision and creativity. Explore, experiment, and enjoy the process of bringing your visions to life.