Customizing your Heads-Up Display (HUD) in Final Fantasy XIV is essential for an optimal gameplay experience. A well-organized HUD can significantly improve your reaction time, awareness, and overall enjoyment of Eorzea. This guide will walk you through the steps to personalize your UI, ensuring you have all the crucial information right where you need it.
Accessing the HUD Layout Menu
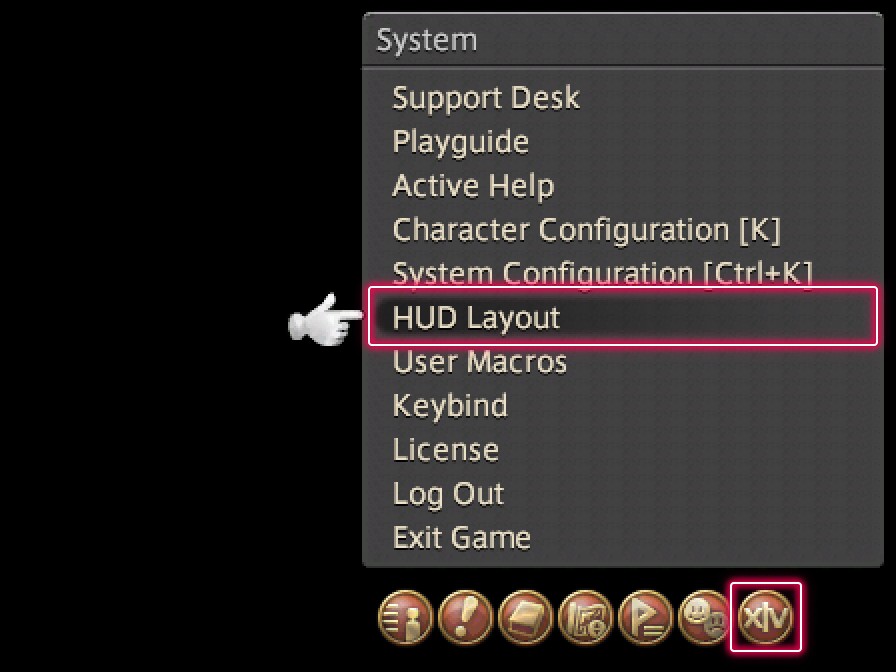
To begin customizing your HUD, you first need to enter the HUD Layout menu. This is your command center for all UI adjustments.
For Mouse and Keyboard Users:
- Press the ESC key to open the Main Menu.
- Select System Menu.
- Click on HUD Layout.
For Controller Users:
- Press the START button (or equivalent button on your controller) to open the Main Menu.
- Navigate to System Menu.
- Select HUD Layout.
Once you access the HUD Layout menu, the game screen will transition into customization mode, allowing you to modify almost every element displayed on your screen.
Selecting and Customizing UI Elements
The HUD Layout interface is intuitive and allows for granular control over individual UI elements.
-
Choose a Category: At the top of the HUD Layout window, you’ll see categories such as “Basic,” “System,” “Hotbars,” and “Duty.” These categorize different types of UI elements. Select the category relevant to the element you want to adjust.
-
Select an Element: Use the dropdown menu below the categories to choose the specific UI element you wish to customize. Once selected, the chosen element will be highlighted in gold on your screen, making it easy to identify.
Positioning
Mouse and Keyboard: Simply click and drag the gold-outlined UI element to reposition it anywhere on your screen.
Controller: Use your controller’s right stick to move the selected element to your preferred location.
Toggling Display (Hiding Elements)
Sometimes, less is more. You might want to hide certain UI elements to declutter your screen.
- Access Settings: Click the cog icon located next to the UI element dropdown menu. This opens the “UI Element Settings” menu for the selected element.
- Hide Element: In the settings menu, uncheck the box labeled “Display Element.” The label of hidden UI elements in the dropdown menu will turn purple as a visual indicator. Alternatively, you can quickly toggle display by right-clicking directly on any HUD element.
Size Adjustment
Adjusting the size of UI elements is crucial for readability and screen real estate management. There are a couple of ways to resize elements:
- UI Element Settings Menu: As mentioned before, clicking the cog icon opens the settings menu where you can find a size adjustment option. For Hotbars, this menu also allows you to change their orientation (horizontal or vertical).
- Keyboard Shortcut (Mouse & Keyboard): After selecting a UI element, press Ctrl + Home to cycle through the available size presets quickly.
- Controller Shortcut: After selecting a UI element, use Right Thumb-click (R3 on PS5™/PS4™, Right Thumb-click on Xbox Series X|S) to toggle through size options.
Transparency Settings
Many HUD elements allow you to adjust their transparency. This is useful for elements you need to see but don’t want to be too visually obtrusive, like chat logs or duty lists. Transparency settings are typically found within the “UI Element Settings” menu (cog icon).
Copying Layouts
If you want to experiment with different HUD setups or quickly apply a preferred layout to another slot, the “Copy Layout” function is invaluable.
- Open HUD Layout Settings: Click the cog icon next to the numbered tabs (at the top of the HUD Layout window, usually labeled 1, 2, 3, 4). This opens the “HUD Layout Settings” menu.
- Copy a Layout: In this menu, you can choose a source layout from one of the four base slots and copy it to a different slot. This is a fast way to duplicate or transfer a layout you’ve created.
Saving Your Changes
Once you’ve meticulously arranged and customized your HUD to your liking, it’s crucial to save your masterpiece!
- Save and Exit: In the bottom right corner of the HUD Layout window, click the “Save” button.
- Close Window: After saving, close the HUD Layout window. Your new HUD configuration will now be active in the game.
With these customization options, you can tailor your FF14 HUD to perfectly suit your playstyle and preferences, enhancing your adventures in Eorzea. Experiment with different layouts and settings to discover what works best for you!