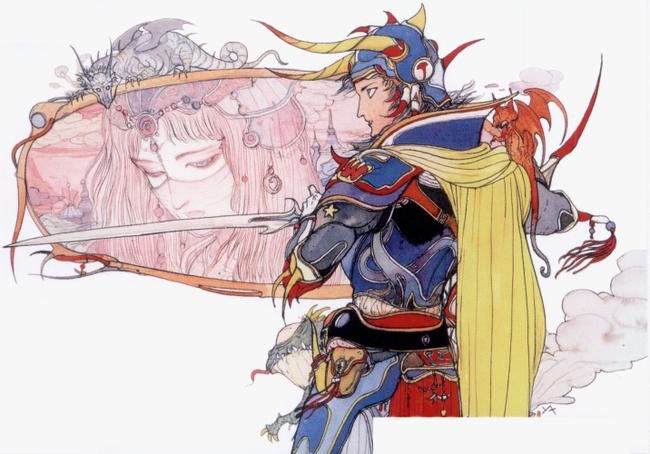
For fans of classic role-playing games, the original Final Fantasy stands as a monumental title. Final Fantasy 1 (FF1) not only established many of the iconic tropes still prevalent in the series today but also embodies the classic, sometimes cryptic, game design characteristic of 1987.
Navigating the world of FF1 can be challenging at times. Players often find themselves wondering where to go next in FF1, struggling to decipher puzzles, or needing detailed maps to traverse its intricate dungeons. This Final Fantasy 1 Guide is designed to be your comprehensive companion, offering step-by-step directions, helpful tips, and featuring meticulously crafted FF1 maps originally created by RPG Site’s founders on UFFSite, a precursor dedicated to Final Fantasy.
This guide prioritizes clear direction over intricate battle strategies. While we have dedicated resources for advanced topics like team composition and boss strategies, this final fantasy 1 guide focuses on providing a straightforward, easy-to-follow walkthrough. We’ve divided the game into seventeen digestible segments to make your journey seamless.
Let’s embark on this adventure together! As the NES version boldly proclaimed, “Come!! Start your journey! Return the light of peace to our world!” To begin, here’s a handy FF1 World Map to keep you oriented throughout your quest.
Final Fantasy 1 Walkthrough – Table of Contents:
Explore More Final Fantasy 1 Guides:
Final Fantasy 1 Walkthrough: Getting Started – Party Creation
Before diving into the detailed FF1 walkthrough, you must first assemble your party. Being an old-school RPG from the 80s, Final Fantasy 1 doesn’t pre-define your heroes. You are tasked with creating your own team from scratch. This includes naming your FF1 protagonists and carefully selecting their character classes.
You’ll have six classic character classes to choose from: the resilient Fighter, the powerful Black Belt, the nimble Thief, the offensive Black Mage, the supportive White Mage, and the versatile Red Mage. Your party will consist of four characters, and you can even choose multiple characters of the same class if you desire. If you’re unsure about team composition, our dedicated guide on FF1 classes and best team configurations will provide valuable insights for your upcoming adventure.
Furthermore, each of these six classes possesses an enhanced form that can be unlocked later in the game, offering significant upgrades to your abilities. For a deeper understanding of this feature, consult our FF1 job upgrade & class promotion guide.
Once you’ve finalized your character classes and team composition, you’ll find yourself in the world of FF1, ready to begin your epic quest. And that’s precisely where this final fantasy 1 guide truly begins…
1. Cornelia and Initial Equipment
- Your journey starts on the world map, just outside the town and castle of Cornelia. Being initially weak, head north into Cornelia town immediately.
- Engaging in conversations with townspeople, including the King, will provide context to the story. However, your primary goal here is to equip your party. Utilize your starting Gil wisely to purchase essential gear from the various shops. You’ll find Weapon, Armor, and Item Shops, as well as specialized stores for Black and White Magic.
- Throughout this walkthrough, you can refer to our detailed FF1 weapon guide and FF1 Magic List to understand available equipment and spells at each stage and their locations.
- Don’t forget to explore Cornelia Castle. While some areas and chests are inaccessible initially, there are still a few valuable items to discover. Consult Cornelia’s map for item locations.
- After equipping your party, venture into the overworld around Cornelia. Engage in random encounters to level up your party to at least level 2 or 3. When your party is weakened or you’re ready to proceed, return to Cornelia. Rest at the Inn to restore your party’s health and spend any remaining Gil on additional gear or items.
- Once you’re prepared, it’s time to move on to your first major objective…
2. Garland and the Chaos Shrine
- Just north of Cornelia lies your next destination: the Chaos Shrine (also known as the Temple of Fiends or Temple of Chaos depending on the version). Upon entering, you’ll see the boss, Garland, directly ahead. However, you are not obligated to fight him immediately.
- Explore the Shrine’s left side paths to find treasure chests containing useful items. The right paths are locked at this point in the game. When you’re ready to face your first boss, approach Garland.
- Head North from the entrance to initiate the boss battle: [Boss Battle: GARLAND].
- After defeating Garland and rescuing Princess Sarah, a bridge to the North will open. Speak to Princess Sarah to receive the LUTE, a crucial key item for your journey.
3. Witch Matoya and Pravoca Town
- Cross the newly opened bridge and head as far north as possible. You’ll discover Matoya’s Cave in this area, known for its memorable music. Matoya, a witch, requires a Crystal Eye to restore her sight. Explore her cave, collect any items, and then proceed East.
- Eventually, you will reach Pravoca Town. Here is the Pravoca Town Map, although it’s a relatively small location.
- Assist the townspeople by agreeing to eliminate the Pirate threat plaguing Pravoca. [Boss Battle: PIRATES]
- As a reward for defeating the Pirates, you’ll gain access to a ship. Remember that Pravoca’s shops offer level 2 spells and new equipment. Stock up before setting sail.
4. Open Seas and the Journey to Elfheim
- With your newly acquired ship, your next destination is Elfheim. Before setting sail, it’s worth noting a mini-game accessible with the ship.
- This mini-game can be exploited to earn substantial gold and is repeatable.
- Successfully completing the mini-game can reward you with items or up to 10,000 Gil. It’s a simple sliding puzzle. Clear it in under 2 minutes for 2000 Gil, under 1 minute for 5000, or under 30 seconds for 10,000. Here’s how to access it depending on your version:
- NES: While on the ship, press A & B together 55 times.
- PS1 Origins: On the ship, press X & Circle together 55 times.
- GBA Dawn of Souls: While on the ship, press A & B together 22 times.
- PSP 20th Anniversary: On the ship, press X & Circle together 22 times.
- 2018 Mobile: On the ship, press & hold the screen with one finger and then tap 23 times while holding.
- HD Pixel Remaster: Press and hold the cancel button (IE B on an Xbox Controller, Circle on a PS Controller) and repeatedly press the Confirm button (IE A / Cross) until the game appears. Note: the Pixel Remaster version provides no rewards other than an achievement.
- When you’re ready to proceed to Elfheim, sail back to Cornelia’s dock. From there, sail south until you reach land. Disembark at the next dock to the west, and then travel south on foot to reach Elfheim.
- In Elfheim, you’ll encounter townsfolk with new problems to solve, and you can purchase upgraded weapons and magic.
- Be aware that the upcoming dungeon is filled with poison-inflicting enemies. Stock up on Potions and Antidotes in preparation.
- Visit Elfheim Castle to find the door locked. To unlock it, you’ll need to retrieve the Crown for the Prince, located to the West.
5. Marsh Cave – Retrieving the Crown
- Leave Elfheim and head West. Once you reach the coastline, proceed South. Eventually, you will find the entrance to Marsh Cave, your next dungeon. Here are the Marsh Cave Dungeon Maps:
- The Marsh Cave consists of four levels, some of which are quite expansive. Navigate through the dungeon. These are maps originally created for the NES version over a decade ago:
- On the final level, you will face demonic enemies. [Boss Battle: PISCODEMON]
- After defeating the Piscodemons, open the chest to obtain the CROWN. With the Crown in hand, return to Elfheim.
6. The Crystal Eye, Jolt Tonic, Mystic Key, and Nitro Powder Acquisition
- Return to Elfheim town, retracing your steps. Heal and resupply items as needed upon reaching the town.
- Northwest of Elfheim lies the Western Keep. Travel there and you’ll encounter another formidable foe. [Boss Battle: ASTOS]
- Defeating Astos will reward you with the CRYSTAL EYE that Witch Matoya needs to restore her sight. As you know, the next step is to return to Matoya. For safety, consider stopping at Elfheim to heal before sailing back to Cornelia and then north to Matoya’s Cave.
- Giving Matoya the Crystal Eye will earn you the JOLT TONIC. This tonic can awaken Elfheim’s Prince.
- Return to Elfheim and give the Jolt Tonic to the Prince’s attendant. Once the Prince awakens, you’ll receive the MYSTIC KEY, a very useful key item.
- At this point, you can backtrack to previously explored areas to unlock chests and rooms that were previously inaccessible with the Mystic Key.
- First, revisit Cornelia Castle to acquire valuable weapons and armor, all of which will be highly beneficial. You’ll also find NITRO POWDER (TNT in some versions), an item required for progression shortly, so it’s wise to collect it now.
- The other Mystic Key item locations are optional but rewarding:
- Return to the Chaos Shrine to obtain 2 weapons and a useful item.
- In Elfheim Castle, you can find weapons and Gil.
- Revisit the Western Keep to the northwest for a couple of weapons and a piece of armor.
- Back in the Marsh Cave dungeon, you can acquire Gil, a weapon, and a piece of armor.
7. Mt. Duergar and Melmond
- After collecting items with the Mystic Key, return to your ship and sail west of Cornelia. You’ll find a port to the west, not far from Mt. Duergar, your next destination. In older versions, this location was simply known as the Dwarf Cave. Here’s the Mt. Duergar / Dwarf Cave map.
- Dock at the port and head to the mountain. There are items to collect here, some requiring the Mystic Key to unlock.
- This is where the NITRO POWDER you obtained earlier becomes essential. Give the Nitro Powder to a dwarf inside the mountain. He will use it to blast a hole in the world, allowing your ship to sail to new areas.
- Navigate your ship through the newly created passage. Immediately through this gap, you’ll discover Melmond town, your next major destination. Unfortunately, Melmond is in a state of decay. However, Melmond offers new weapons, armor, and spells for purchase. Consider stocking up. Here’s the Melmond Town Map.
- The upcoming area features enemies that can inflict Petrification. Purchase Gold Needles in Melmond to cure this status ailment. Next, you’ll venture into the Terra Cavern, also known as the Cavern of Earth!
- Head west along the nearby coast to find the entrance to the Terra Cavern.
8. Cavern of the Earth and the Vampire
- Your next objective is the Cavern of the Earth, also known as the Terra Cavern or Earth Cave in some versions of FF1. This five-level dungeon is home to one of FF1’s Elemental Fiends, significant adversaries in the game. The dungeon levels are mapped here:
- This sprawling dungeon is rich in treasure and branching paths, as illustrated in these maps from the NES era. You can explore in various directions upon entering. While heading east will lead you towards your objective, thorough exploration is recommended.
- Navigate through the dungeon. Eventually, you’ll encounter a doorway at the end of a seemingly dead-end path. Passing through this door will initiate a boss battle. [Boss Battle: VAMPIRE].
- Defeat the Vampire to obtain the STAR RUBY. This boss encounter is relatively straightforward, as the Vampire is an undead enemy, making him vulnerable to restorative spells for damage.
- After acquiring the Star Ruby from the chest, backtrack and exit the dungeon. You cannot proceed further at this time.
9. The Sage, Terra Cavern Revisited, and Lich
- Upon exiting the Terra Cavern with the Star Ruby, your next destination is Titan’s Cave. While FF1 may not feature summons in the traditional sense, familiar figures appear in unexpected ways!
- Inside Titan’s Cave, give the STAR RUBY to the Titan. The Titan will move, granting access to treasure. Collect the available treasure.
- Exit Titan’s Cave through the exit to the left of the Titan’s previous position. Follow this path to the Sage’s Cave and speak with the Sage within. He will gift you the EARTH ROD.
- Now, return to the Terra Cavern. Consider stopping at Melmond to heal before returning to the location where you battled the Vampire boss. With the Earth Rod, you can now proceed. In some versions, you may need to use the Earth Rod on a stone tile at the dead end to open the path to the next area.
- Continue exploring through the Terra Cavern. Eventually, a door will lead to the final room, where you’ll find the Earth Crystal and face a challenging battle. [Boss Battle: LICH, FIEND OF EARTH].
- With Lich defeated, your task in the Terra Cavern is complete. You can explore further for additional treasure or leave the dungeon. Remember you can use the portal in the Crystal Room to teleport out.
10. Crescent Lake, Mount Gulg, and Marilith
- You’ll need to return to your ship, and going via Melmond is a convenient route. Heal up in Melmond, then sail south along the coast, ignoring the passage Titan created. Eventually, you’ll be able to sail east. Do so until you reach a port.
- This port is situated just north of Crescent Lake, a new town. Head south to reach it. As always, check the weapon, armor, and spell shops and replenish your consumable items.
- Use the hidden path in the top-right corner of the Crescent Lake town map to reach a secluded area on the east side where a group of Sages resides. Speak to all 12 Sages, and they will bestow upon you the CANOE.
- The Canoe enhances your world map travel, allowing you to traverse shallow waters like rivers. An obvious river path begins just outside Crescent Lake. Follow it to the foot of a volcano: Mt Gulg, your next dungeon, also known as Gurgu Volcano in some versions.
- Mt. Gulg’s defining feature is “liquid hot magma.” Lava. Walking on lava avoids random encounters but damages your party with each step. Navigating lava is necessary to progress through this dungeon, and how much you utilize it is your choice. Here’s the dungeon map:
- Partway through the dungeon, you’ll encounter a forced battle against a dragon enemy. While not a full boss encounter, we’ll include it as such. [Boss Battle: RED DRAGON].
- This dungeon contains a fair amount of treasure and is relatively manageable. Remember to heal your party frequently with items to counteract lava damage and enemy encounters.
- The final area of Mt. Gulg is a room with eight directional paths, starting from the center. Many paths lead to treasure, but the southwest path leads to the next major boss battle. [Boss Battle: MARILITH, FIEND OF FIRE].
- After defeating Marilith, interact with the Fire Crystal as required and exit the dungeon. You can explore further or use the teleporter in the crystal room.
11. Ice Cavern and Acquiring the Airship
- From fire to ice, the Ice Cavern awaits as your next destination. Return to Crescent Lake to heal, then get back on your ship. Follow the coastline north until you reach a port. Use the canoe to access another cave dungeon.
- This dungeon is simpler and smaller than recent ones. Its gimmick is cracks in the floor that drop you to lower levels. Naturally, items are scattered throughout, particularly Gil. The dungeon’s boss is easy, encouraging exploration and enduring random encounters for rewards. Here are the maps:
- In one room, stepping on a crack near three chests leads to the Ice Cavern’s objective: a room where you’ll fight the Evil Eye, one of FF1’s easiest bosses, if it can even be called a boss. [Boss Battle: EVIL EYE].
- Defeating the Evil Eye allows you to collect the LEVISTONE. This key item is crucial for progression. Exit the Ice Cavern.
- The Levistone is vital as it unlocks a Final Fantasy staple: the airship! Return to Crescent Lake and head south to a vast open desert. This is the Lykion Desert, a key location and the start of a major FF tradition.
- While in the desert, select and use the LEVISTONE from your menu. The AIRSHIP will appear in the middle of the desert!
12. Airship Adventures: Citadel of Trials & Class Promotions
- With the airship, the world opens up! You can now easily fly across the world, unlocking new locations and optional content. Here are essential airship activities:
- Restock on Gear, Spells, and Items: Fly back to any previously visited town and explore Gaia, a secluded town surrounded by mountains accessible only by airship. Gaia offers new items, including high-level magic and the invaluable Protect Ring, which guards against instant death attacks. Be aware that you’ll soon need 50,000 Gil to progress the story.
- Class Promotions: Upgrade your character classes to unlock enhanced abilities. Start this process at the Citadel of Trials, located on the western side of the top-right continent. It resembles a castle, and landing directly next to it is impossible. Land nearby and walk the remaining distance. In older versions, this was called the Castle of Ordeals. Here’s the map:
- Inside the Citadel, sit on the Throne to teleport into the Citadel proper. A teleportation puzzle awaits:
- Step on teleport tiles until you have a choice between two. Choose the southern warp point.
- Next, choose the southern warp point again.
- After that, choose the eastern warp point.
- Head east after this warp point for loot, then south via the western path. This leads to a teleportation point, then stairs.
- You’ll face a battle here [Boss Battle: DRAGON ZOMBIES], after which you can collect the RAT TAIL, a key item for class upgrades.
- Return to your airship and fly southwest of the Citadel of Trials. Islands with caves dot this area. Explore them for loot. One cave is home to Bahamut, King of Dragons, a summon with a minor story role.
- Give Bahamut the Rat Tail, and he will upgrade your character classes. Learn more about this in our FF1 job upgrade and class promotion guide.
13. Trading Quest for Underwater Breathing
- If you haven’t visited Gaia yet, do so now. With upgraded classes, you can access even better gear and magic. Remember you need 50,000 Gil to proceed.
- From Gaia, head east until you see another desert. Land your airship and find a unique desert tile bordered by trees. Enter it; this is the Desert Caravan.
- Inside, purchase the BOTTLED FAERIE for 50,000 Gil. This key item is essential.
- Return to Gaia, go to the northernmost house, then head east around it to find a small lake. Stand before the lake and use the BOTTLED FAERIE from your menu. It will be exchanged for OXYALE. You need this to breathe underwater for the next game area.
- Southeast of Gaia, surrounded by forests, is Onrac town. Fly there, land outside the forest, and walk into town. Besides new gear and spells, Onrac’s southeast area has a Submarine that takes you to the Sunken Shrine. Time to confront the water fiend!
14. The Sunken Shrine, Kraken, and the Rosetta Stone
- The Sunken Shrine is your next and largest dungeon yet, also known as the Sea Shrine.
- It spans nine maps and contains valuable treasure: weapons, armor, Gil, and the vital Ribbon item, which protects against all status effects. Here’s the map:
- Among the loot, ensure you find the ROSETTA STONE within the Sunken Shrine. It is crucial for progression and located on L5, in a room with three chests. If you miss it, you’ll need to return.
- Deep within the dungeon, you’ll find the Water Crystal chamber and its guardian, leading to a battle. [Boss Battle: KRAKEN, FIEND OF WATER]. Kraken is arguably the most challenging of the four fiends in FF1.
15. Warp Cube, Rosetta Stone, and Bell – Keys to the Flying Fortress
- After the Sunken Shrine, return outside Onrac. Use your canoe to go north from Onrac and enter the waterfall. This leads to the Waterfall Cavern mini-dungeon. Here are the maps:
- This dungeon contains good treasure, and deep inside, you’ll find a robot. Talk to it to receive the WARP CUBE, another key item needed for FF1’s next major dungeon.
- Travel across the world back to Melmond town. Give the Rosetta Stone to the scientist NPC (north, near the graves). He’ll teach you the language of Lufenia. Here’s the Lufenia Town Map:
- Lufenia is on the eastern side of the world, on a small peninsula east of the large desert. Enter the town to find new armor, weapons, and spells.
- Speak to every NPC in Lufenia. One will give you the BELL. This is the final key item needed to access the dungeon where the last elemental fiend resides.
16. Tower of Mirage and Flying Fortress
- To reach the Tower of Mirage, fly to the large desert dominating the northeastern map (west of Lufenia). The tower is the only structure there.
- Enter the Tower of Mirage, also known as Mirage Tower. Here’s the Tower of Mirage dungeon map:
- You’ll encounter a challenging forced fight against a Blue Dragon. Like other dragons, it’s not quite a boss, but it’s featured in our boss guide. [Boss Battle: BLUE DRAGON].
- Explore the tower using our map. When ready, step on the teleportation warp tile to reach the Flying Fortress, using your WARP CUBE.
- The Flying Fortress is a five-level dungeon full of loot and enemies. In other versions, it’s called the Sky Castle or Floating Castle. Teleporters are key here, not stairs. Look for warp tiles. Here are the Flying Fortress maps:
- Like the Sunken Shrine, get the ADAMANTITE loot in the Flying Fortress. It’s optional but needed for one of FF1’s best weapons.
- The Flying Fortress is home to Warmech, technically not a boss but the hardest enemy in the game. [Boss Battle: WARMECH]. Encountering it is random and avoidable if you are lucky.
- On the same floor as Warmech is the true dungeon boss: Tiamat, the Wind Fiend. [Boss Battle: TIAMAT, FIEND OF AIR].
- After completing the Flying Fortress, return to the overworld. Stock up on any missed spells or items.
- If you acquired the Adamantite, take it to Mt. Duergar and give it to the Blacksmith. He’ll craft Excalibur, the second most powerful weapon.
- Heal up in a town of your choice. The grand finale is near.
17. Temple of Chaos – The Final Showdown
- Your journey culminates where it began, in a way. Return to the Temple of Chaos north of Cornelia. Inside, use your accumulated power to time travel 2000 years into the past.
- The past Temple of Chaos is essentially another dungeon. Explore and navigate it. When you reach a stone tile, use the LUTE from your menu – the key item from Princess Sarah at the beginning – to proceed.
- You’ll now progress through themed floors leading to a boss rush. [Boss Battle: LICH, MARILITH, KRAKEN, & TIAMAT rematches]. These floors contain valuable items. Here are basic maps:
- After overcoming the Fiends of the Elements again, you’ll finally face Chaos, the final boss of Final Fantasy 1. [Boss Battle: CHAOS] Good luck! Defeating Chaos triggers the credits for this epic adventure!
Time is flowing as it should… and Chaos is vanquished. But the journey isn’t over. For the next adventure, explore our Minimalist Final Fantasy Walkthrough series: