Installing a trailer hitch on your vehicle opens up a world of possibilities, from hauling bikes to pulling small trailers. However, simply having the hitch isn’t enough – you also need to ensure your trailer lights are properly connected for safety and legal compliance. This guide will walk you through the process of trailer light wiring, drawing inspiration from a real-world installation on a Mustang Mach-E to provide a comprehensive and helpful resource.
Understanding Trailer Light Wiring Basics
Before diving into the specifics, it’s crucial to grasp the fundamentals of trailer light wiring. Most light-duty trailers utilize a 4-pin flat connector, which covers the essential lighting functions:
- Running Lights: These lights illuminate whenever your vehicle’s headlights are on, making the trailer visible in low-light conditions.
- Brake Lights: These activate when you press the brake pedal, signaling your intention to slow down or stop.
- Left Turn Signal: Indicates a left turn or lane change.
- Right Turn Signal: Indicates a right turn or lane change.
For more complex trailers, 5-pin, 6-pin, and 7-pin connectors are used, adding functions like reverse lights, electric brakes, and auxiliary power. However, for this guide, we’ll focus on the common 4-pin setup, as it’s applicable to a wide range of smaller trailers and cargo carriers.
Step-by-Step Trailer Light Wiring Process
This guide is inspired by a DIY installation, providing detailed steps and insights to help you confidently wire your trailer lights. While the example vehicle is a Mustang Mach-E, the general principles and wiring concepts apply to most vehicles. Always consult your vehicle’s wiring diagrams and your trailer wiring kit instructions for specific details related to your situation.
Part 1: Preparing Your Vehicle and Gathering Supplies
- Safety First: Disconnect your vehicle’s battery before starting any electrical work. This prevents accidental shorts and ensures your safety.
- Locate Taillights: Identify your vehicle’s taillight assemblies. You’ll need to access the wiring for the running lights, brake lights, and turn signals.
- Gather Your Supplies: You’ll need the following:
- Trailer Wiring Harness Kit: Choose a kit compatible with your vehicle and trailer connector type (4-pin flat in this case). Consider a kit like the Curt wiring adapter or similar, readily available from online retailers like Amazon or eTrailer.com.
- Wire Strippers/Crimpers: For preparing and connecting wires.
- Multimeter: Essential for testing wires and confirming connections.
- Electrical Tape and/or Heat Shrink Tubing: For insulating and protecting wire connections.
- Zip Ties: For securing wires and keeping them organized.
- Screwdrivers and Socket Set: For accessing your vehicle’s taillights and interior panels.
- Plastic Pry Tools (Optional but Recommended): To safely remove interior trim panels without damage.
- Soldering Iron and Solder (Optional but Recommended for Robust Connections): For creating more reliable wire connections, especially in exposed areas.
- Wire Connectors (e.g., Butt Connectors): If you choose not to solder, use quality wire connectors to ensure secure connections.
Part 2: Accessing Your Vehicle’s Taillight Wiring
-
Accessing the Trunk/Hatch Area: Begin by opening your vehicle’s trunk or hatch. Remove any floor mats, cargo covers, and spare tire covers to expose the interior trim panels around the taillight areas.
-
Removing Interior Trim Panels: Carefully remove the interior trim panels to access the taillight wiring. This usually involves removing plastic clips, screws, and sometimes prying panels loose. Refer to your vehicle’s repair manual or online resources for specific instructions on trim panel removal.
-
Identifying Taillight Connectors: Once the trim panels are removed, locate the connectors for your vehicle’s taillights. These are typically multi-pin connectors plugged directly into the taillight assemblies.
Part 3: Wiring the Trailer Light Converter
-
Locate a Mounting Position: Find a suitable location to mount your trailer light converter box. Choose a spot that is protected from the elements and easily accessible for wiring. In many cases, the trunk or hatch area is ideal.
-
Ground Connection: Establish a solid ground connection for the converter box. Locate a clean, unpainted metal surface near the mounting location. Use a ring terminal connector on the ground wire from the converter box and secure it to the metal surface using a screw or bolt.
-
Power Source: Identify a 12V power source in your vehicle’s rear area. Often, the 12V accessory outlet in the trunk/hatch can be used. Use your multimeter to verify the positive (+) and negative (-) terminals. Tap into the positive wire (often purple in the example vehicle) for power to the converter.
-
Routing the Trailer Pigtail: Route the 4-pin trailer pigtail wire from the converter box to the trailer hitch area. Many vehicles have rubber grommets in the floor pan that can be used to pass wires to the underside of the vehicle. Ensure the wire is securely routed and protected from chafing or damage.
Part 4: Connecting to Taillight Wires
-
Remove Taillight Assemblies: Carefully remove your vehicle’s taillight assemblies to access the wiring. This usually involves removing screws and gently prying the assembly loose from pressure clips.
-
Identify Wire Functions: Use your multimeter to identify the function of each wire in your vehicle’s taillight harness. You’ll need to determine the wires for:
- Running Lights
- Brake Lights
- Left Turn Signal
- Right Turn Signal
Refer to your vehicle’s wiring diagram if available. You can test wires by using the multimeter and activating each lighting function (headlights, brakes, turn signals) while probing the wires.
Pin # Function Wire Color (YMMV) 1 Tail / running light Brown 2 Stop Light Red 3 Steady 12V N/C 4 Turn signal (RT / LT) (Yellow / Green) 5 Steady 12V N/C 6 Ground ? N/C 7 Ground ? N/C 8 Ground ? N/C 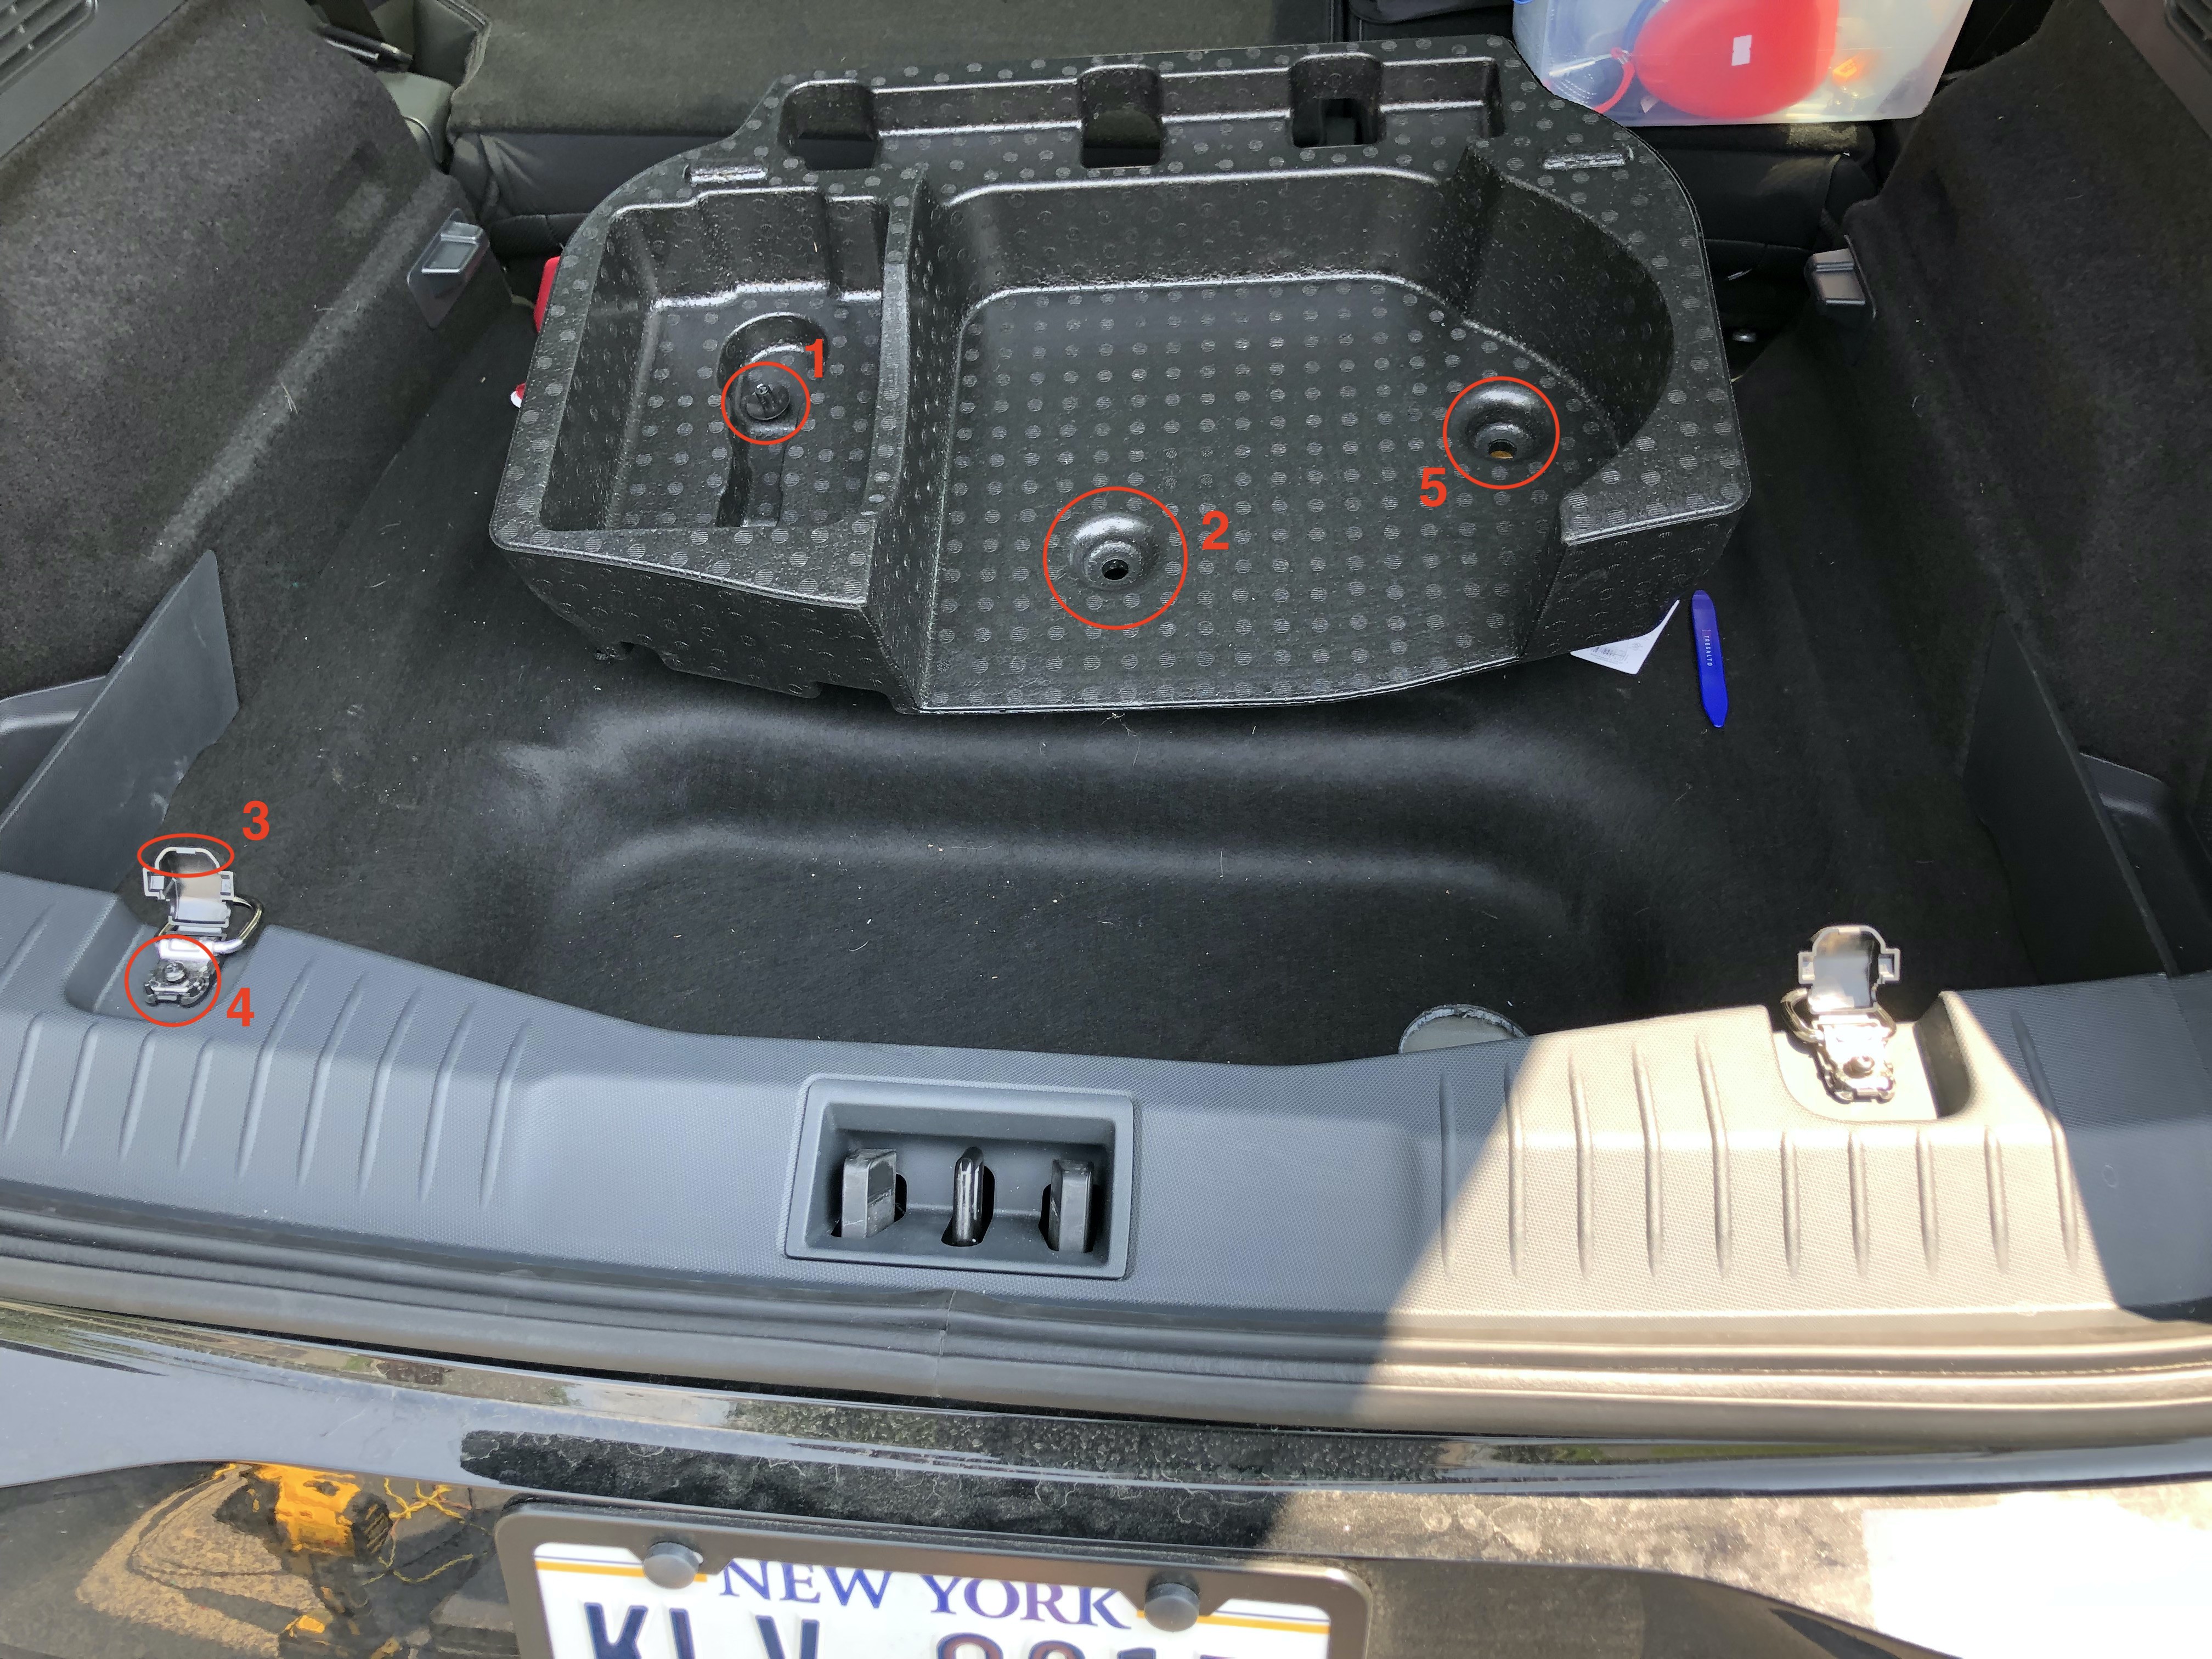
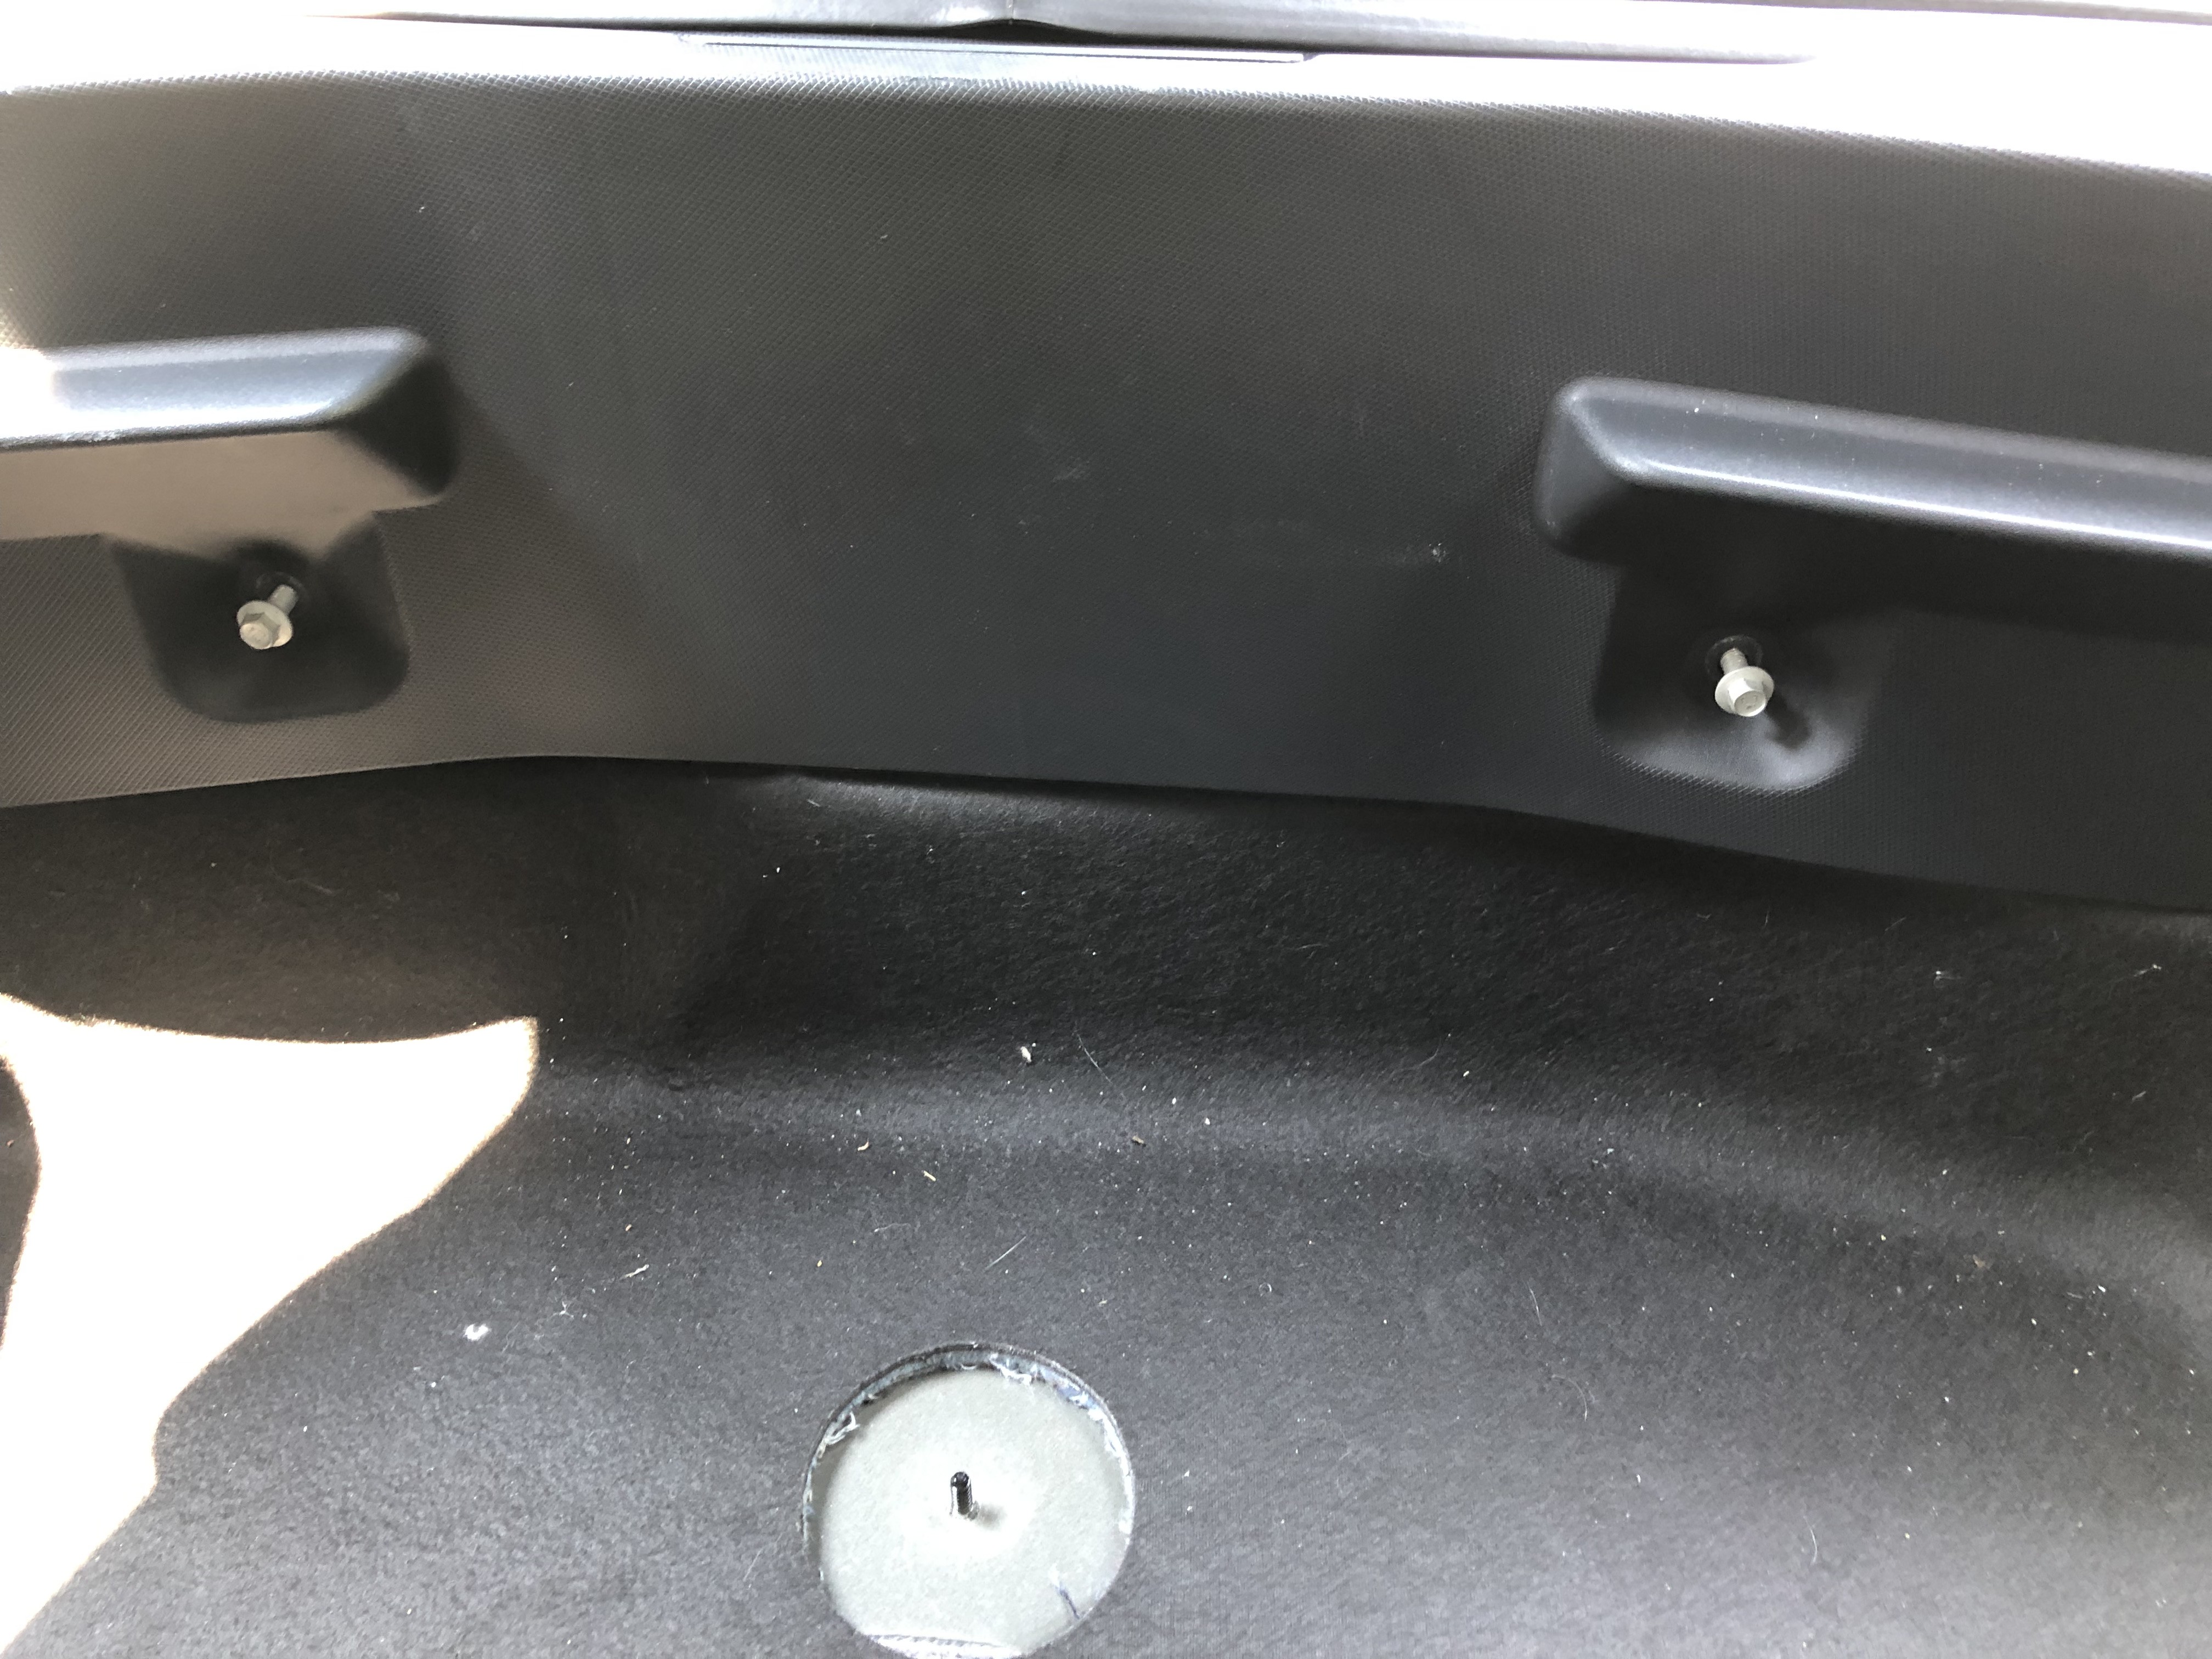
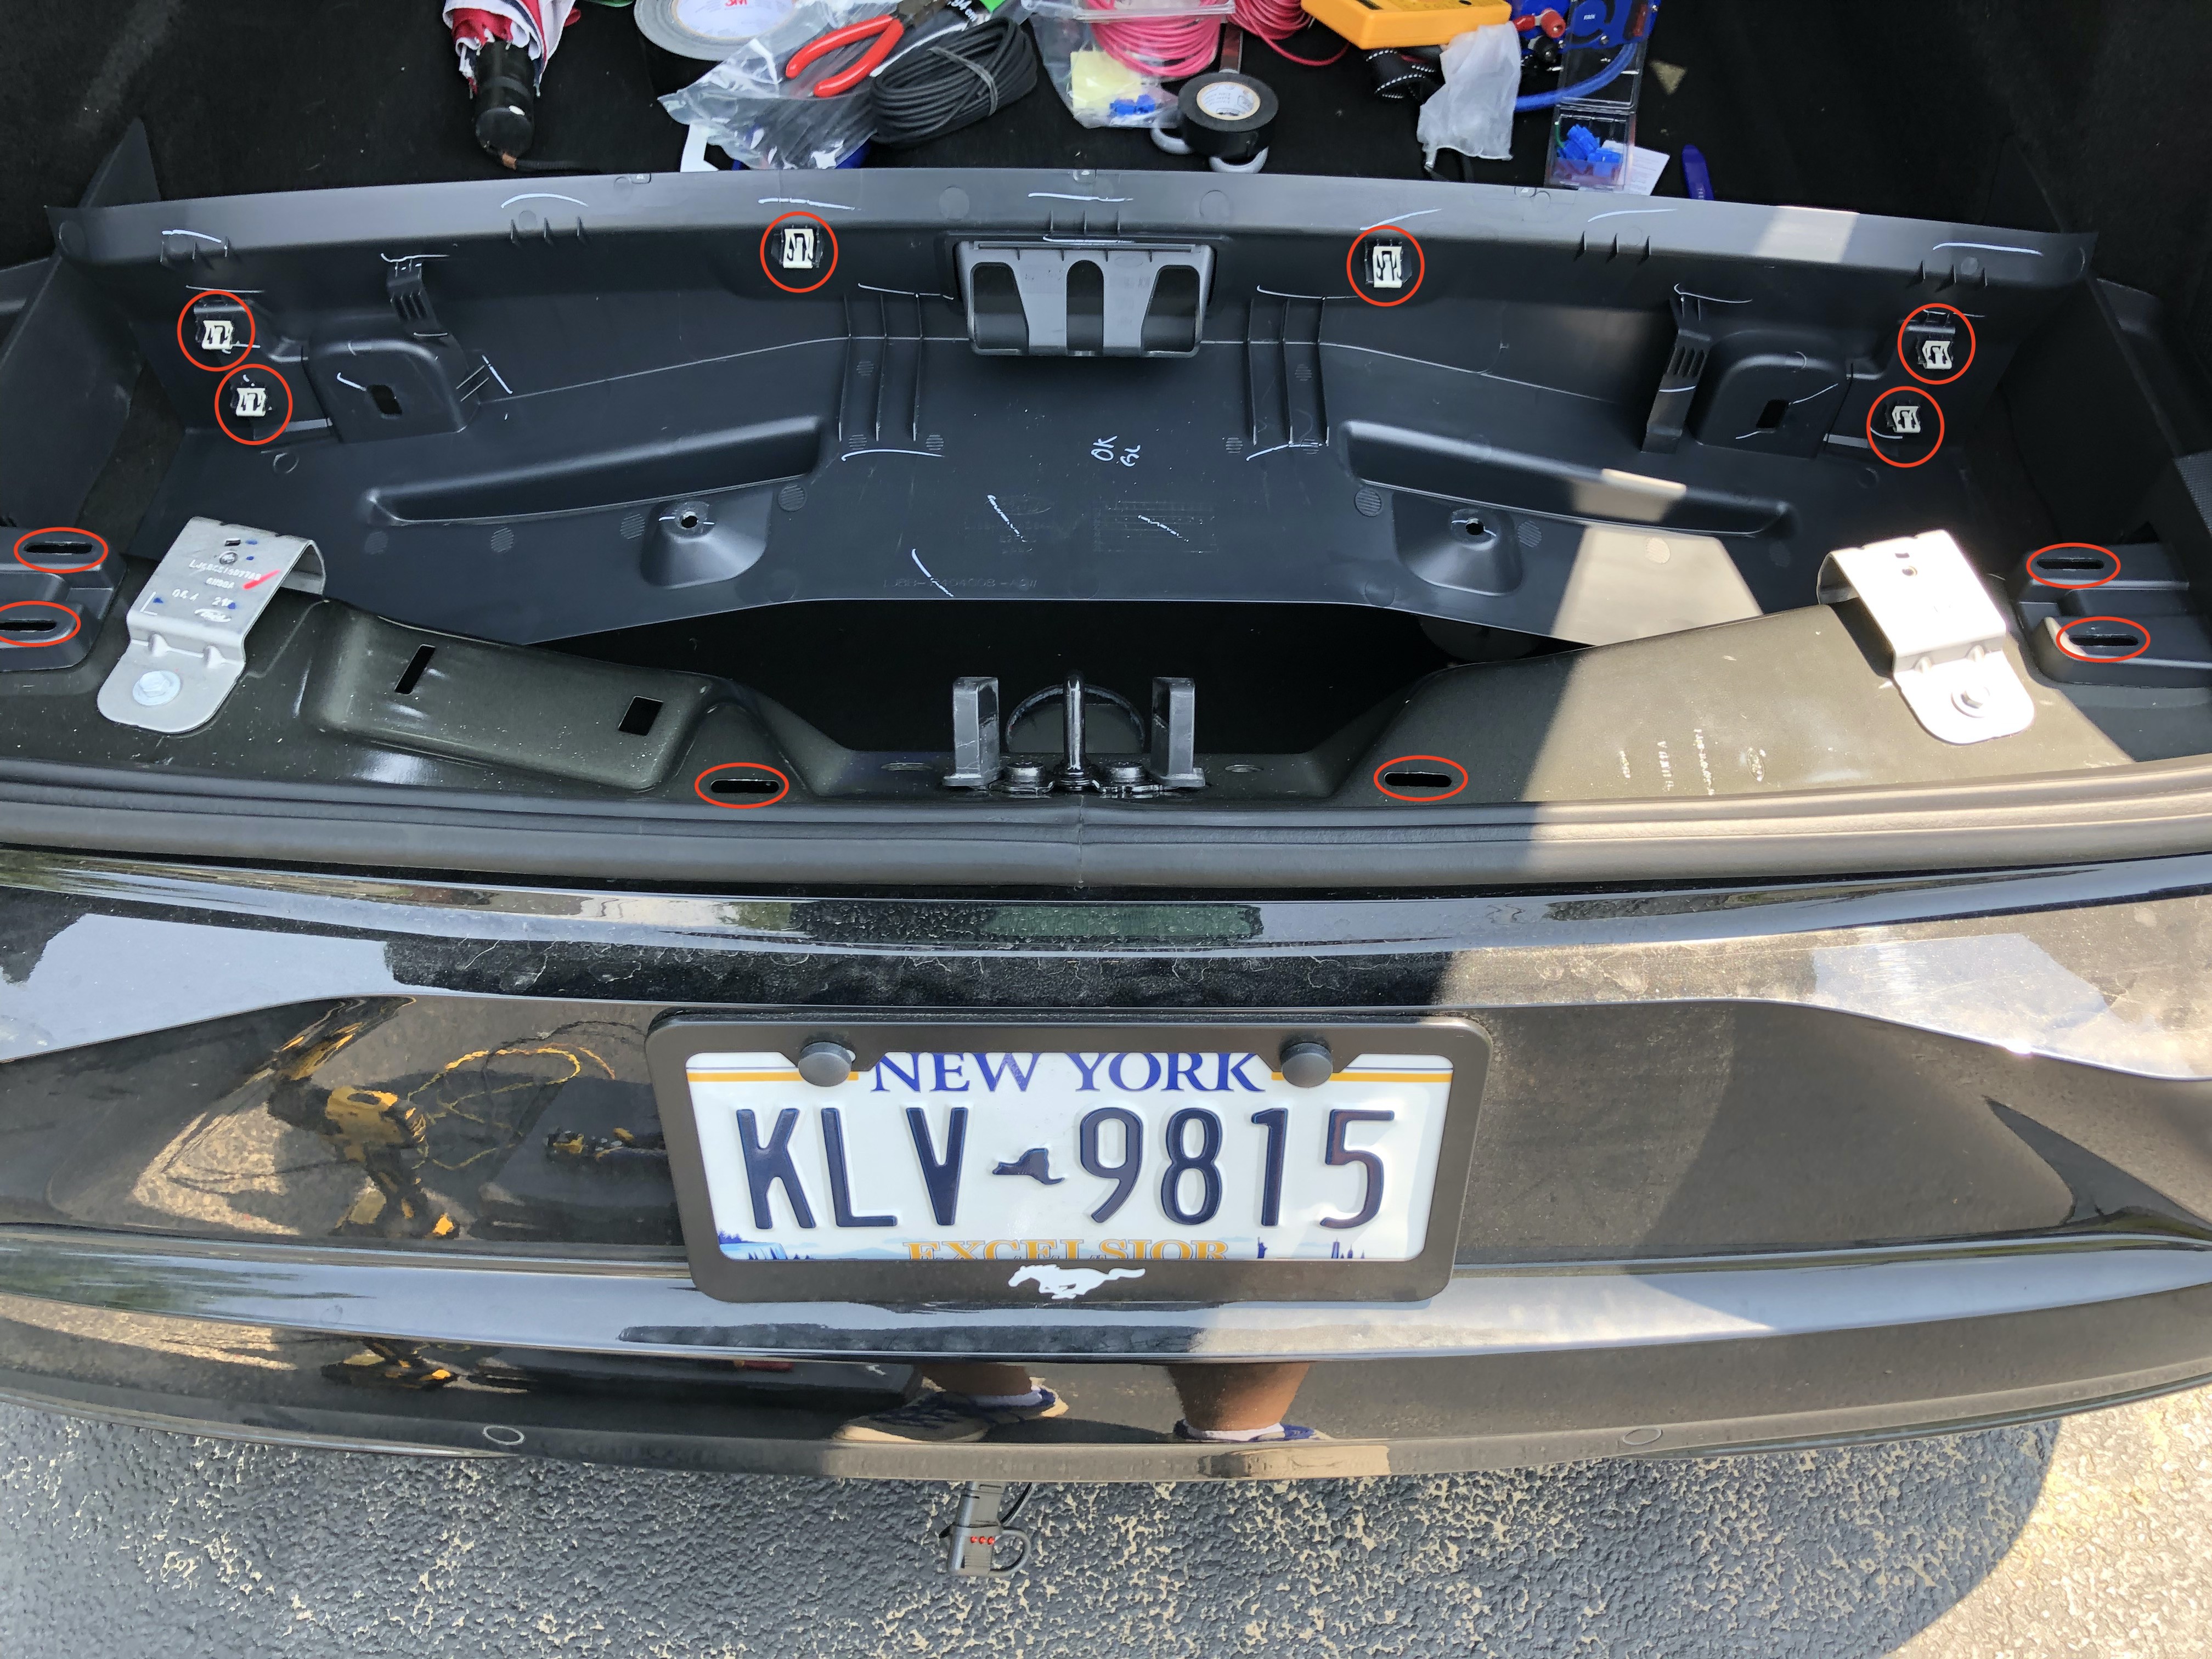
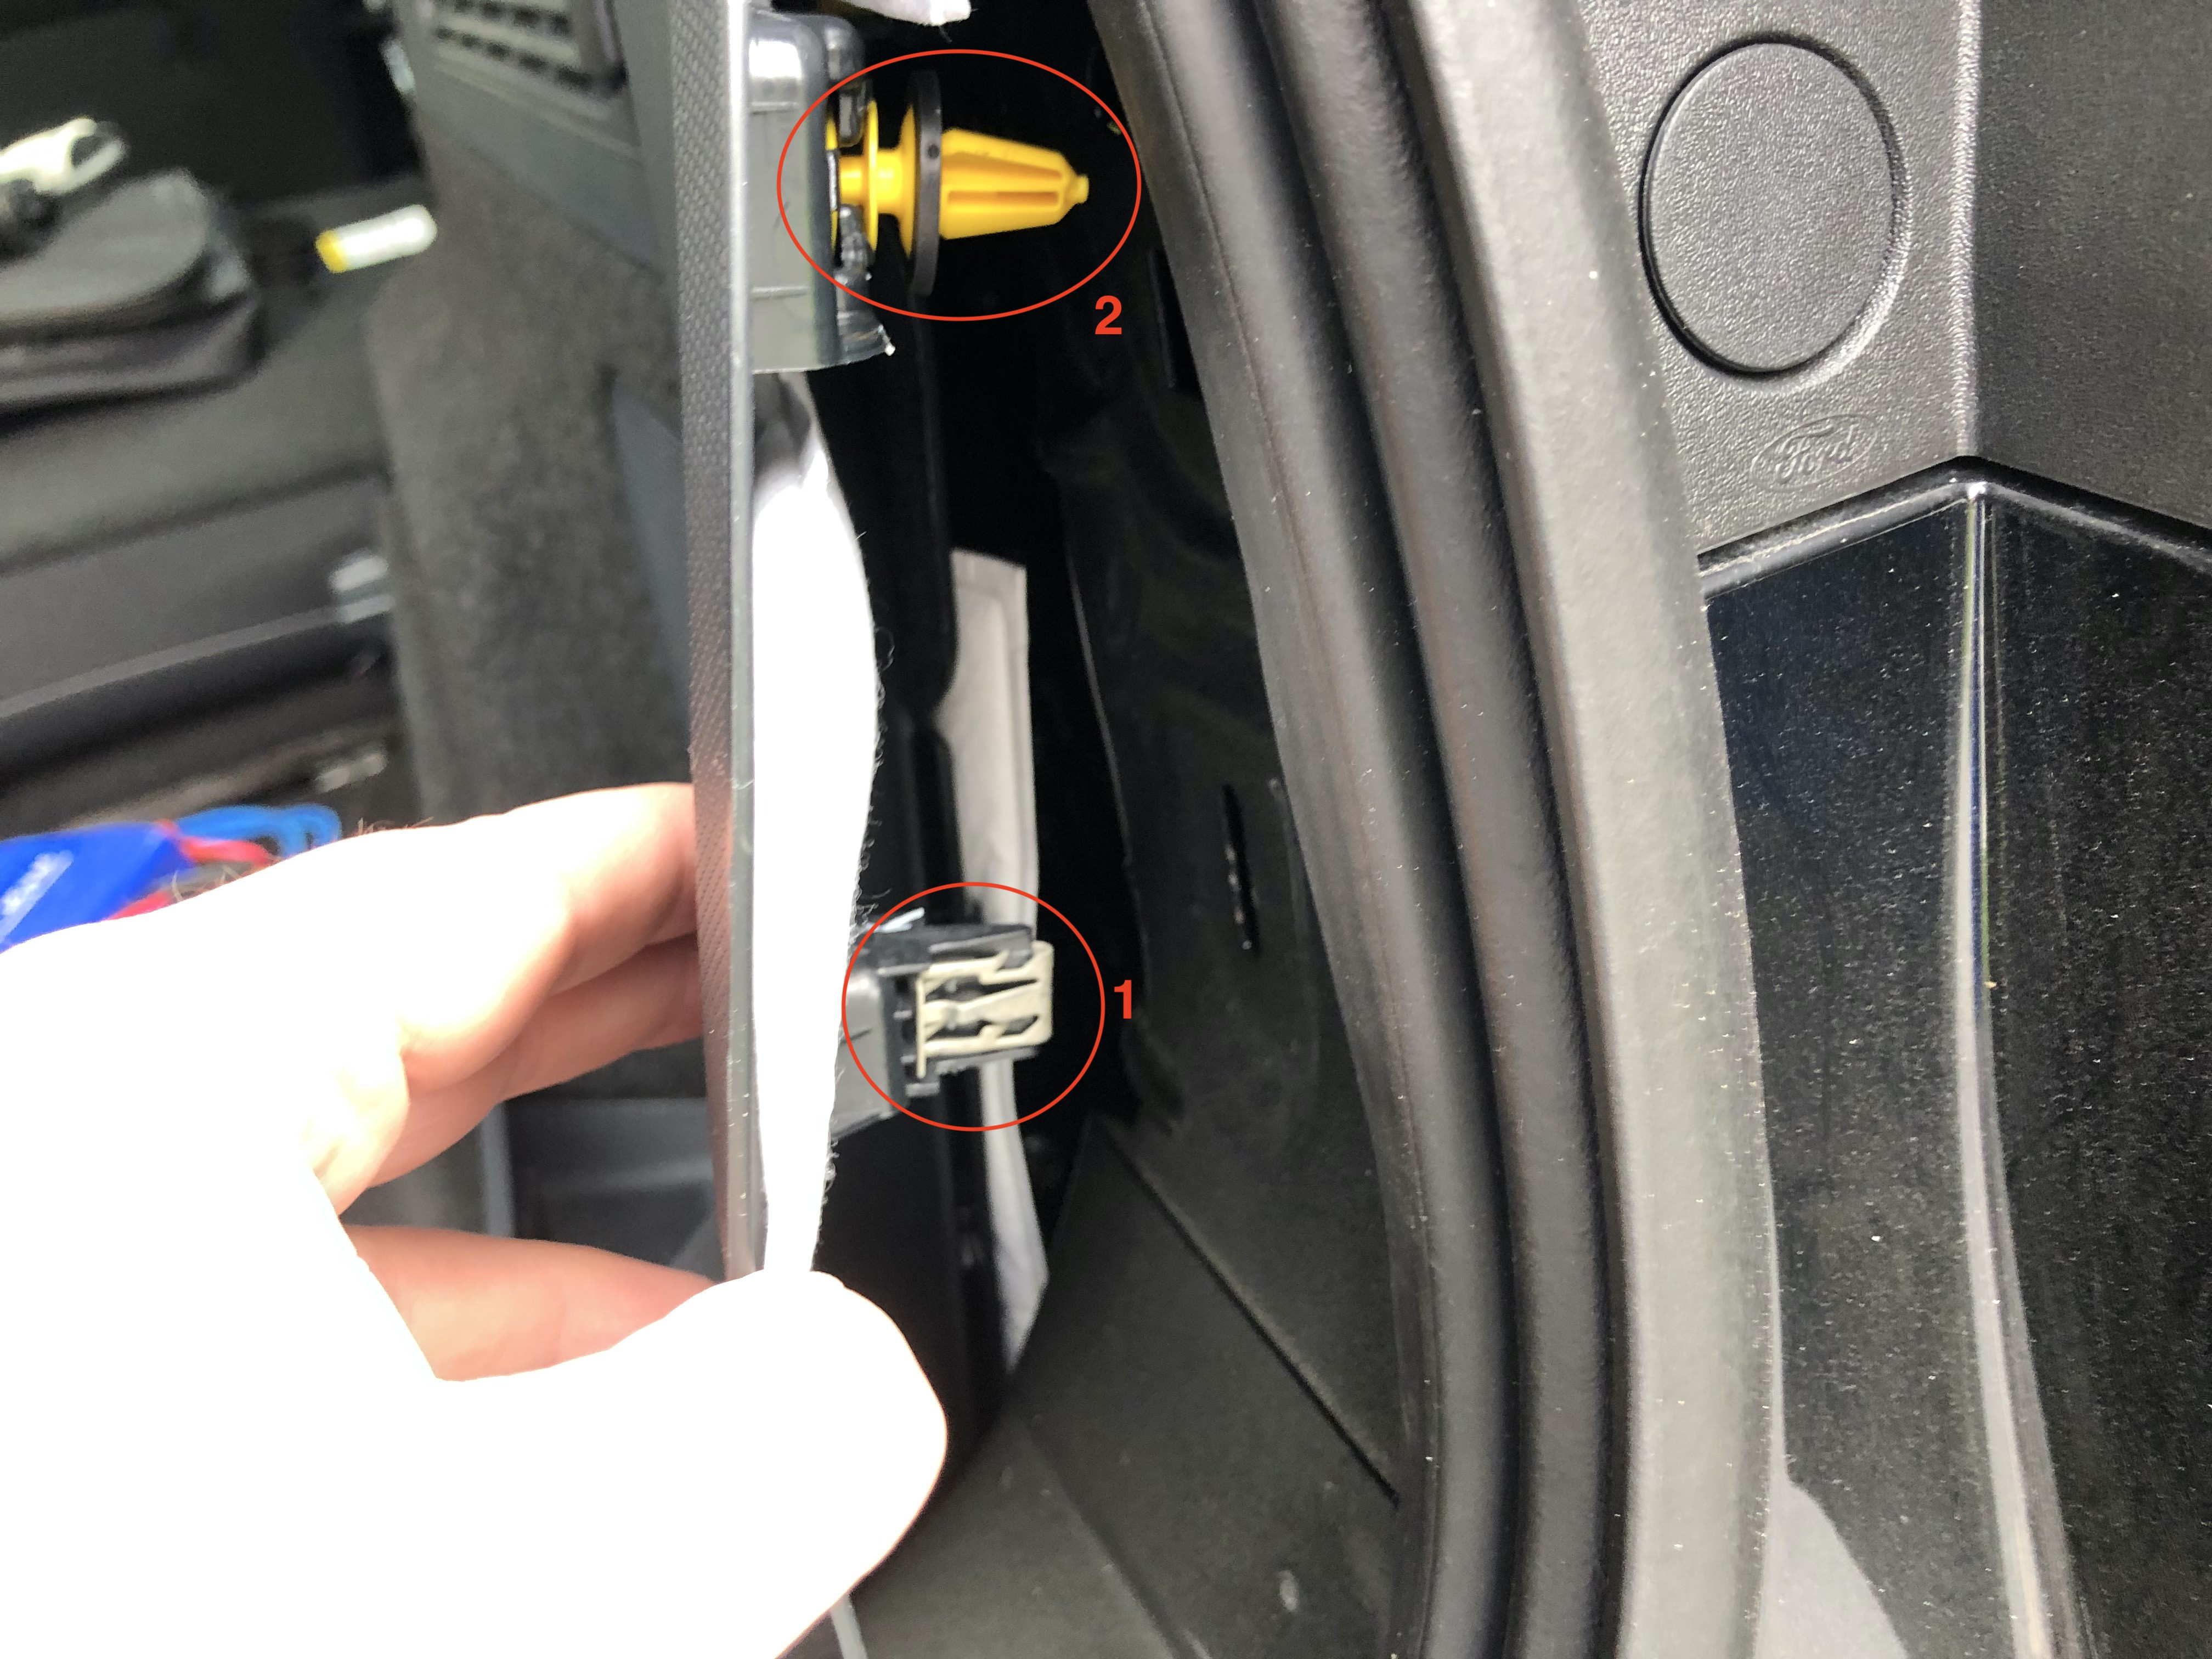
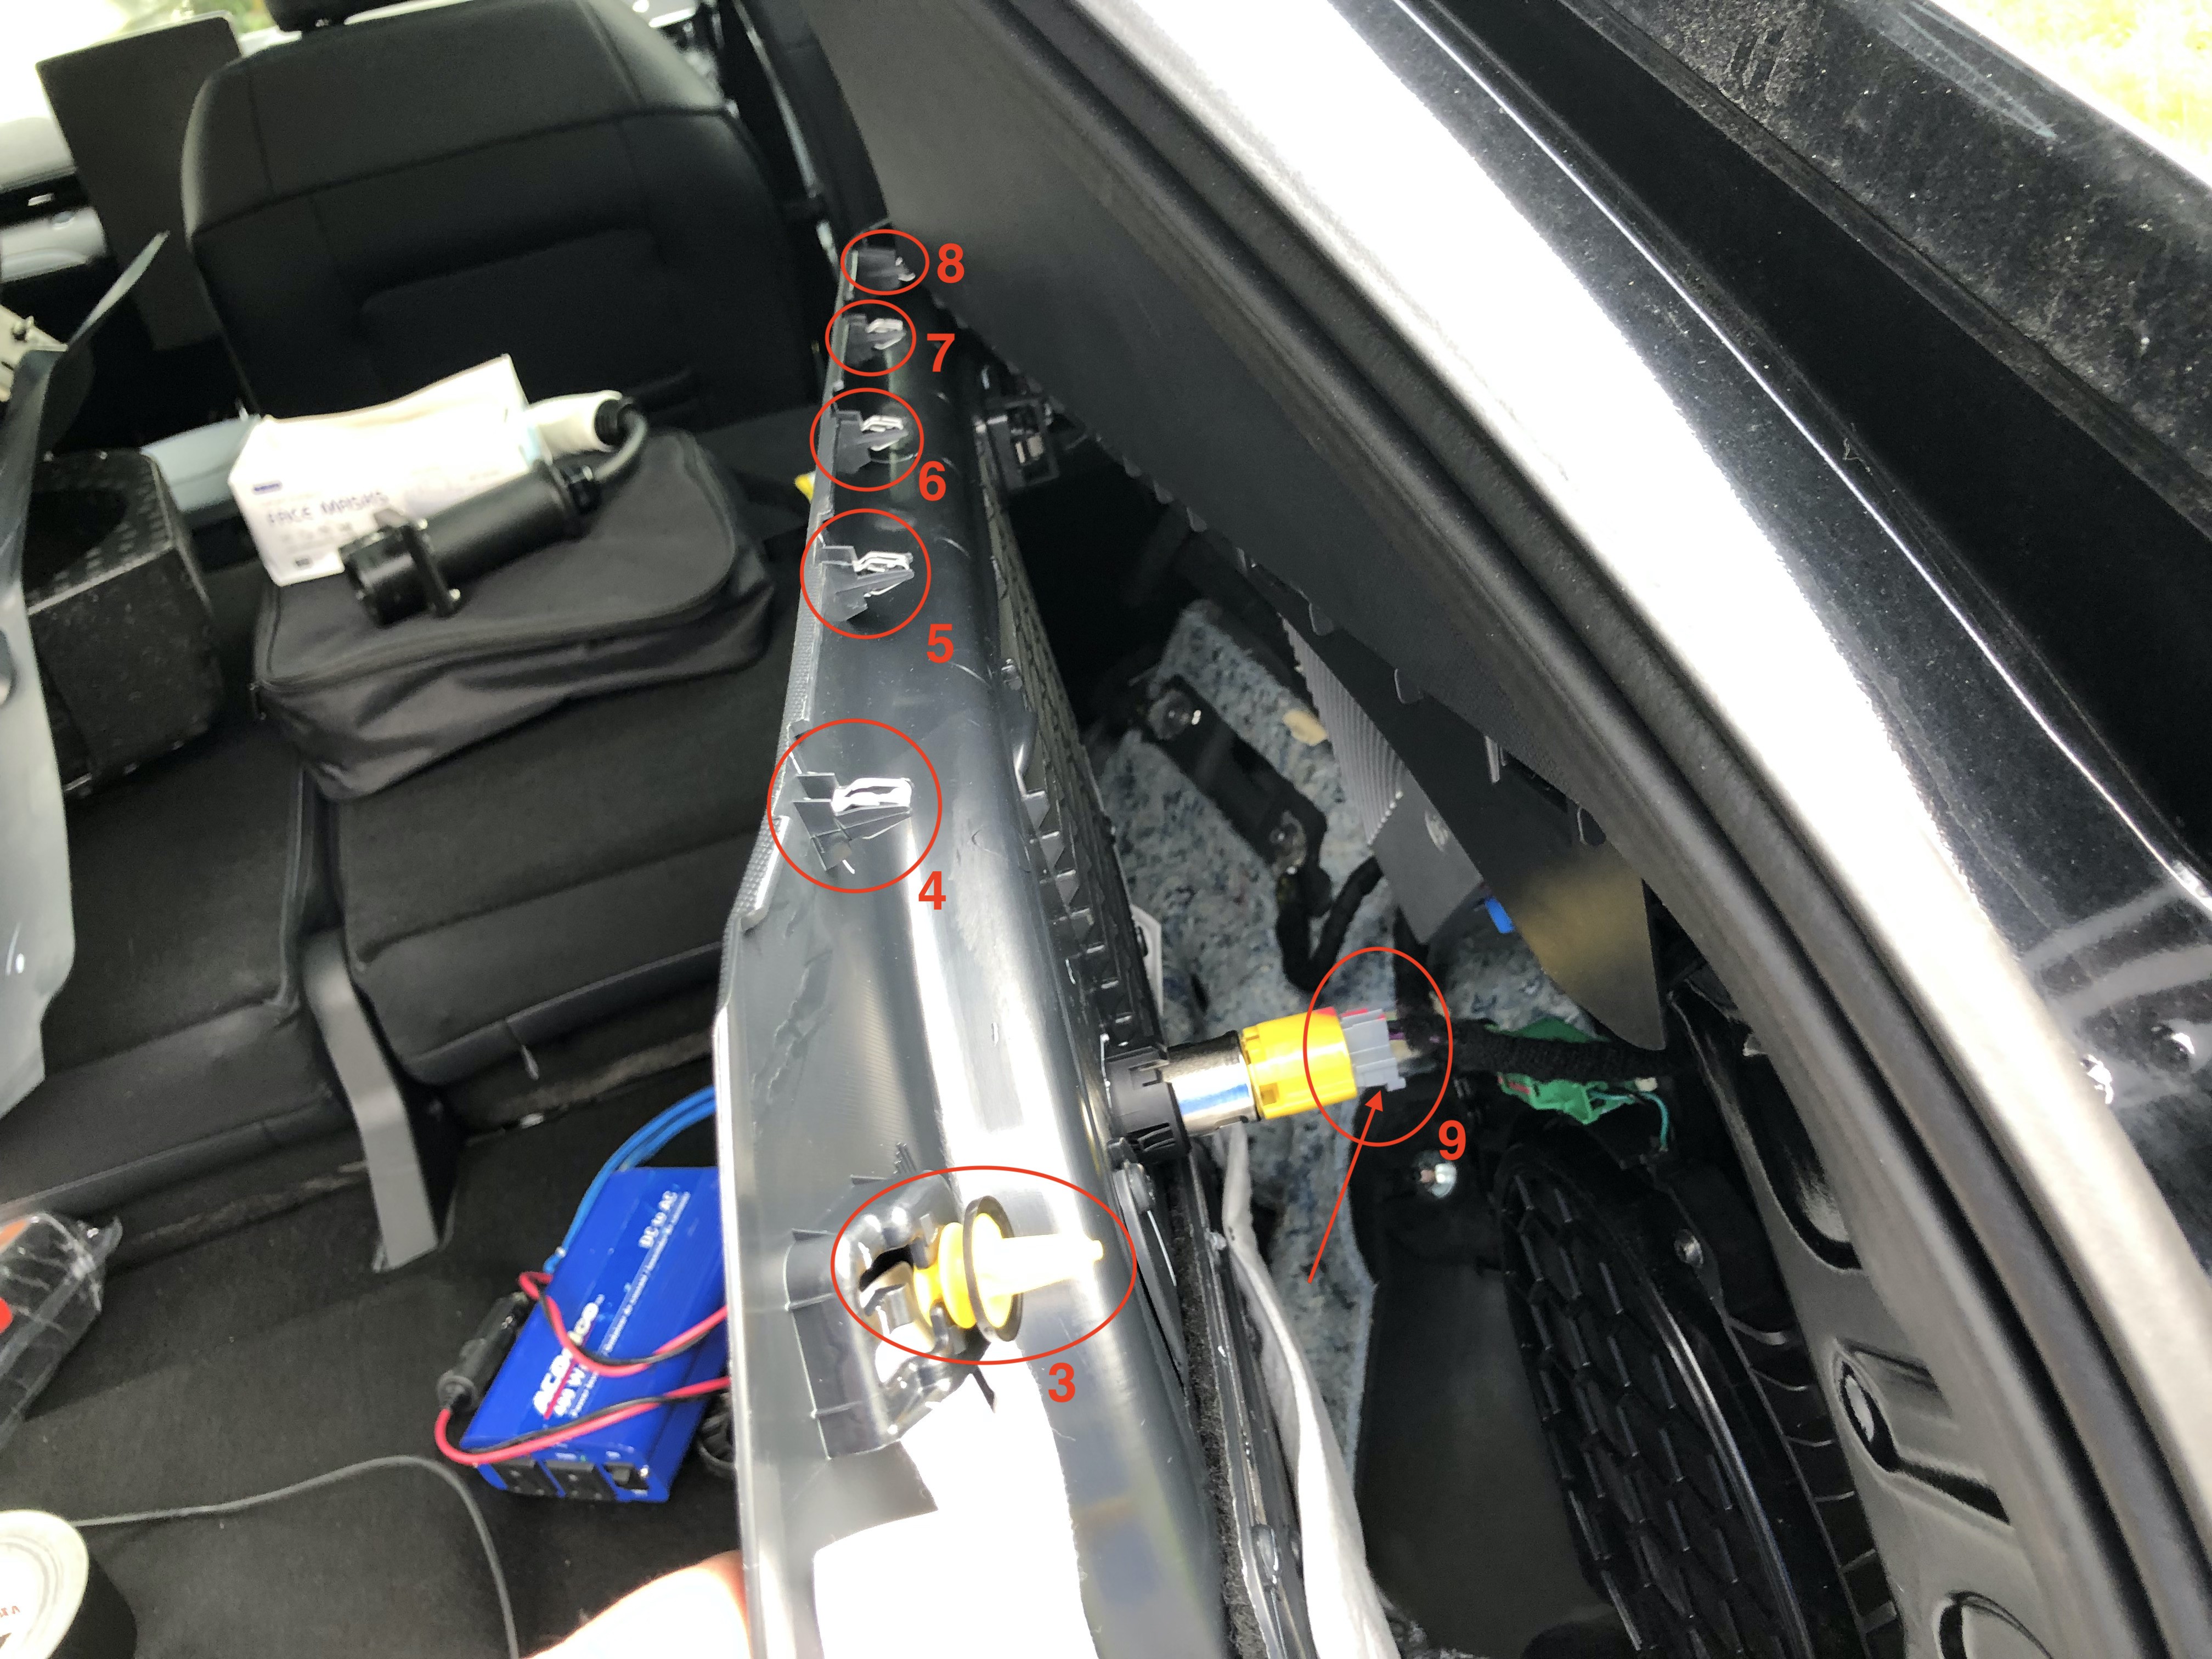

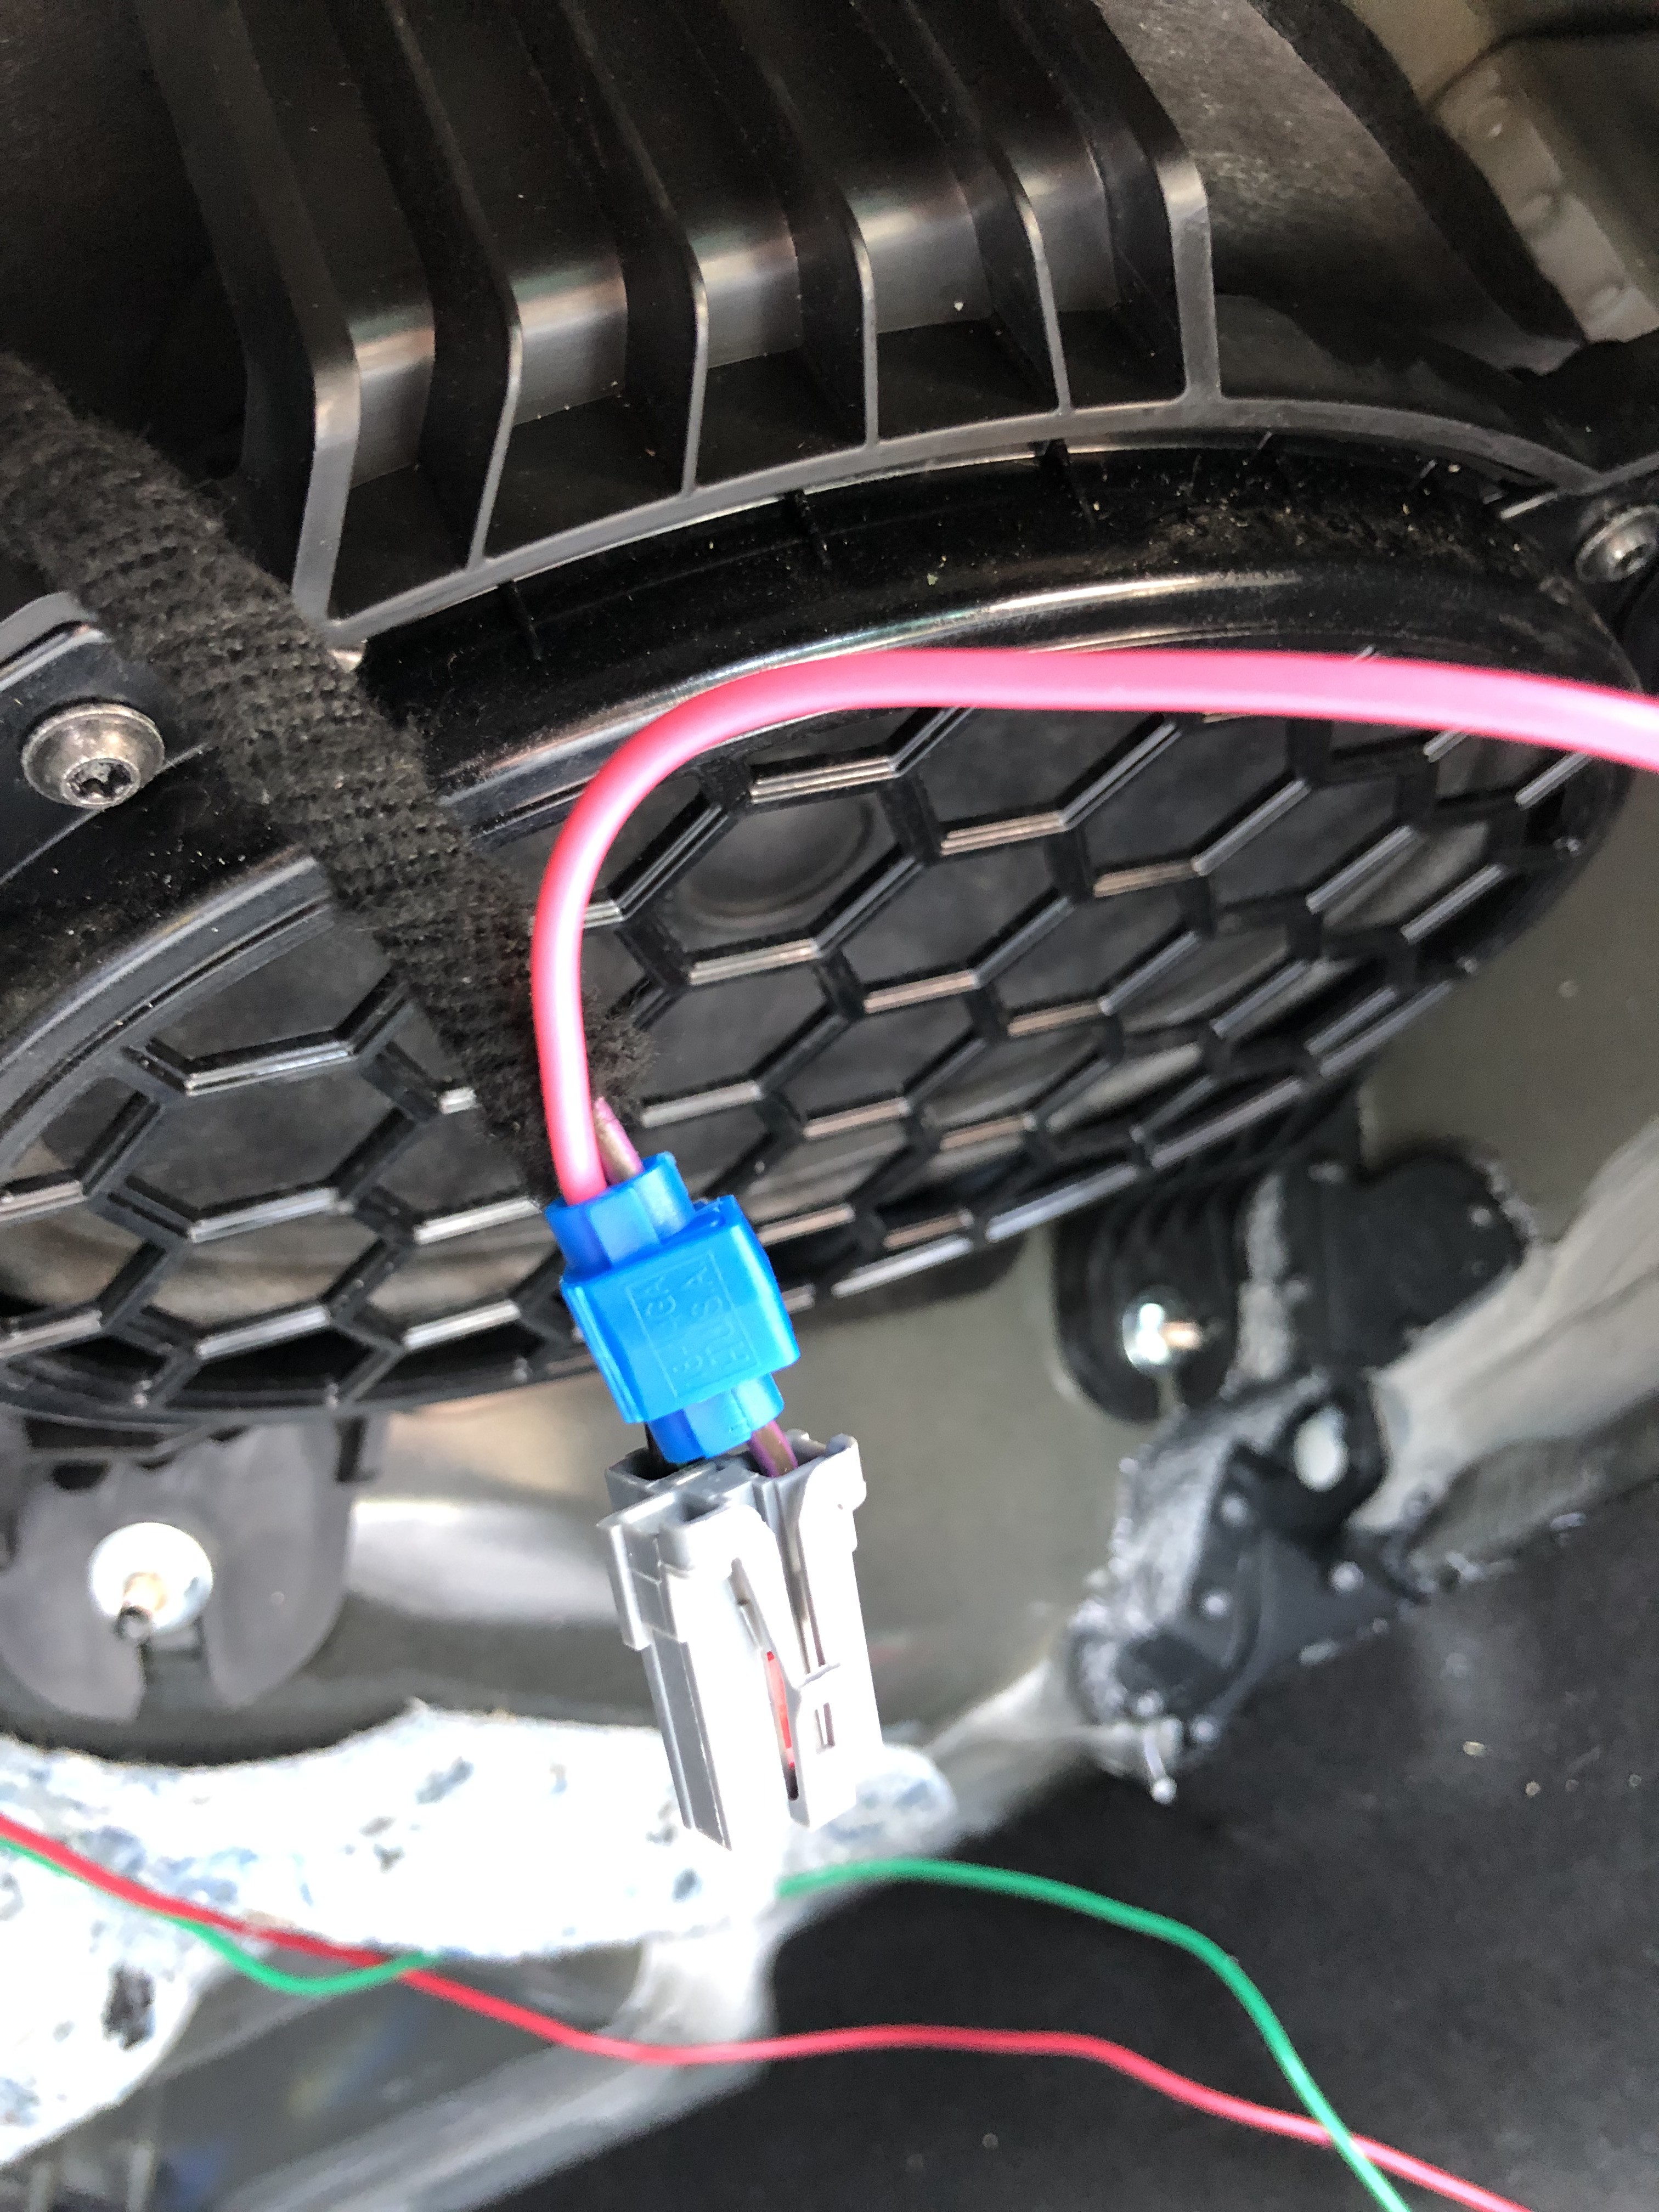
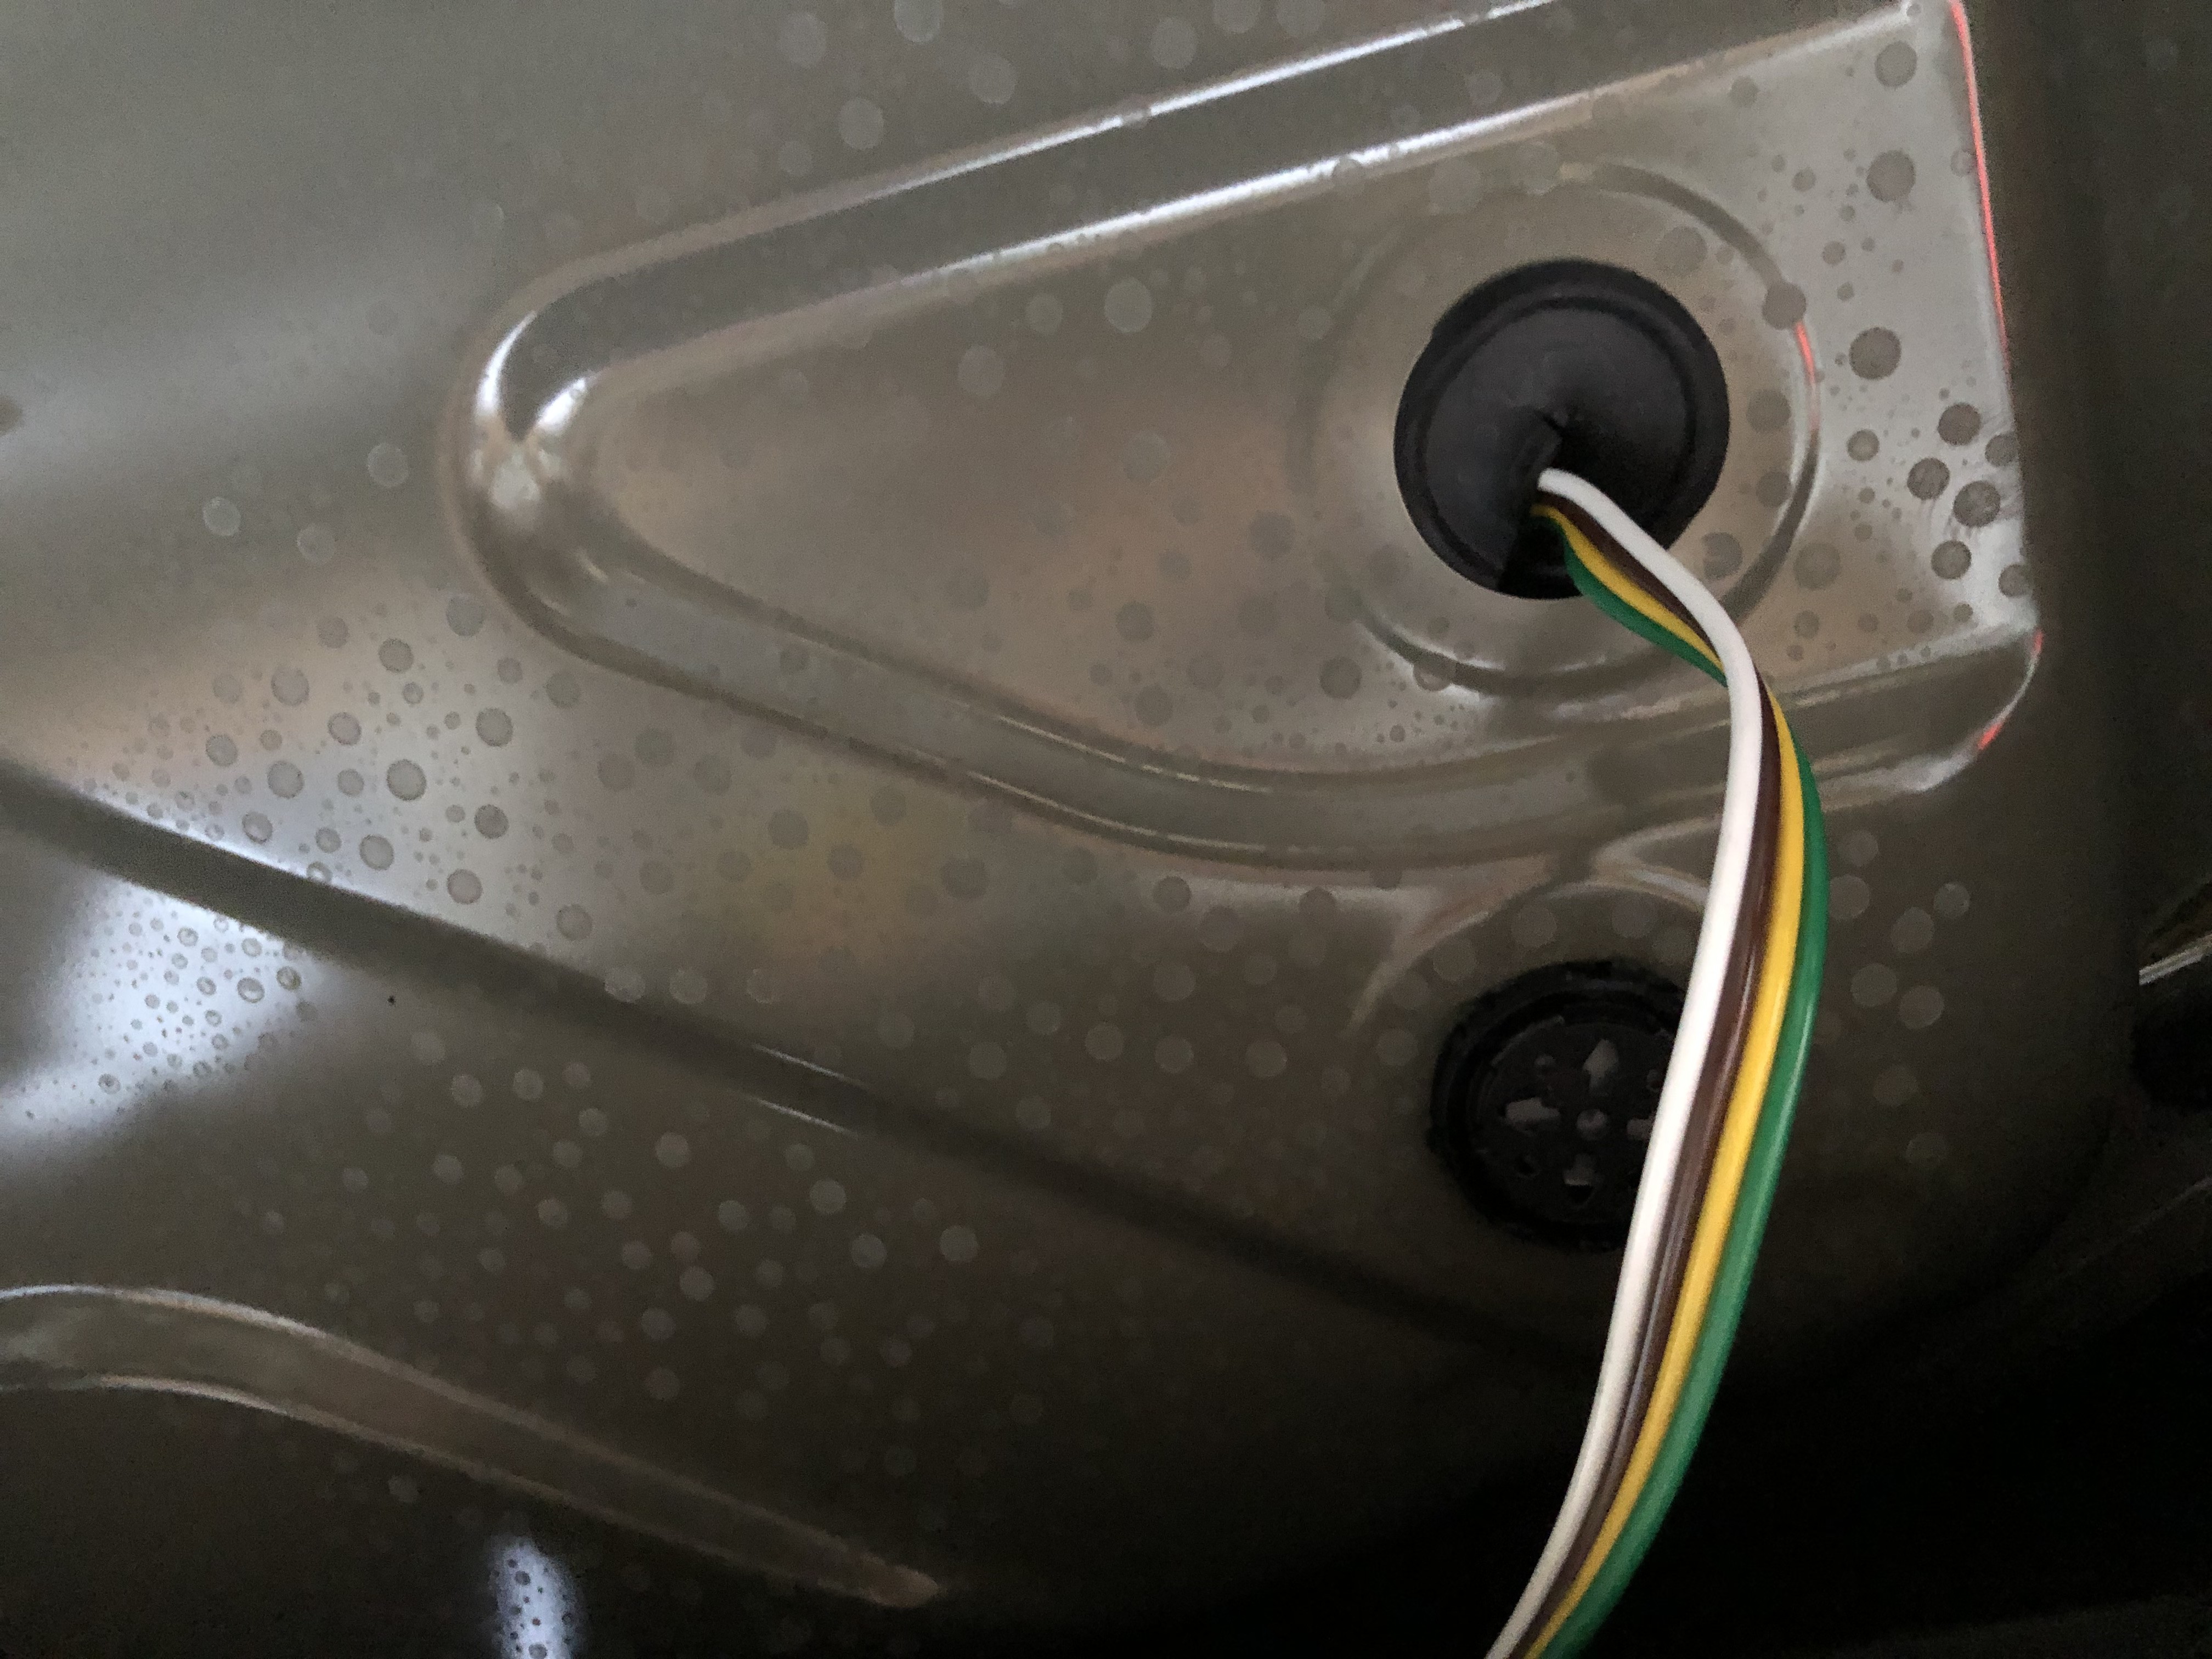


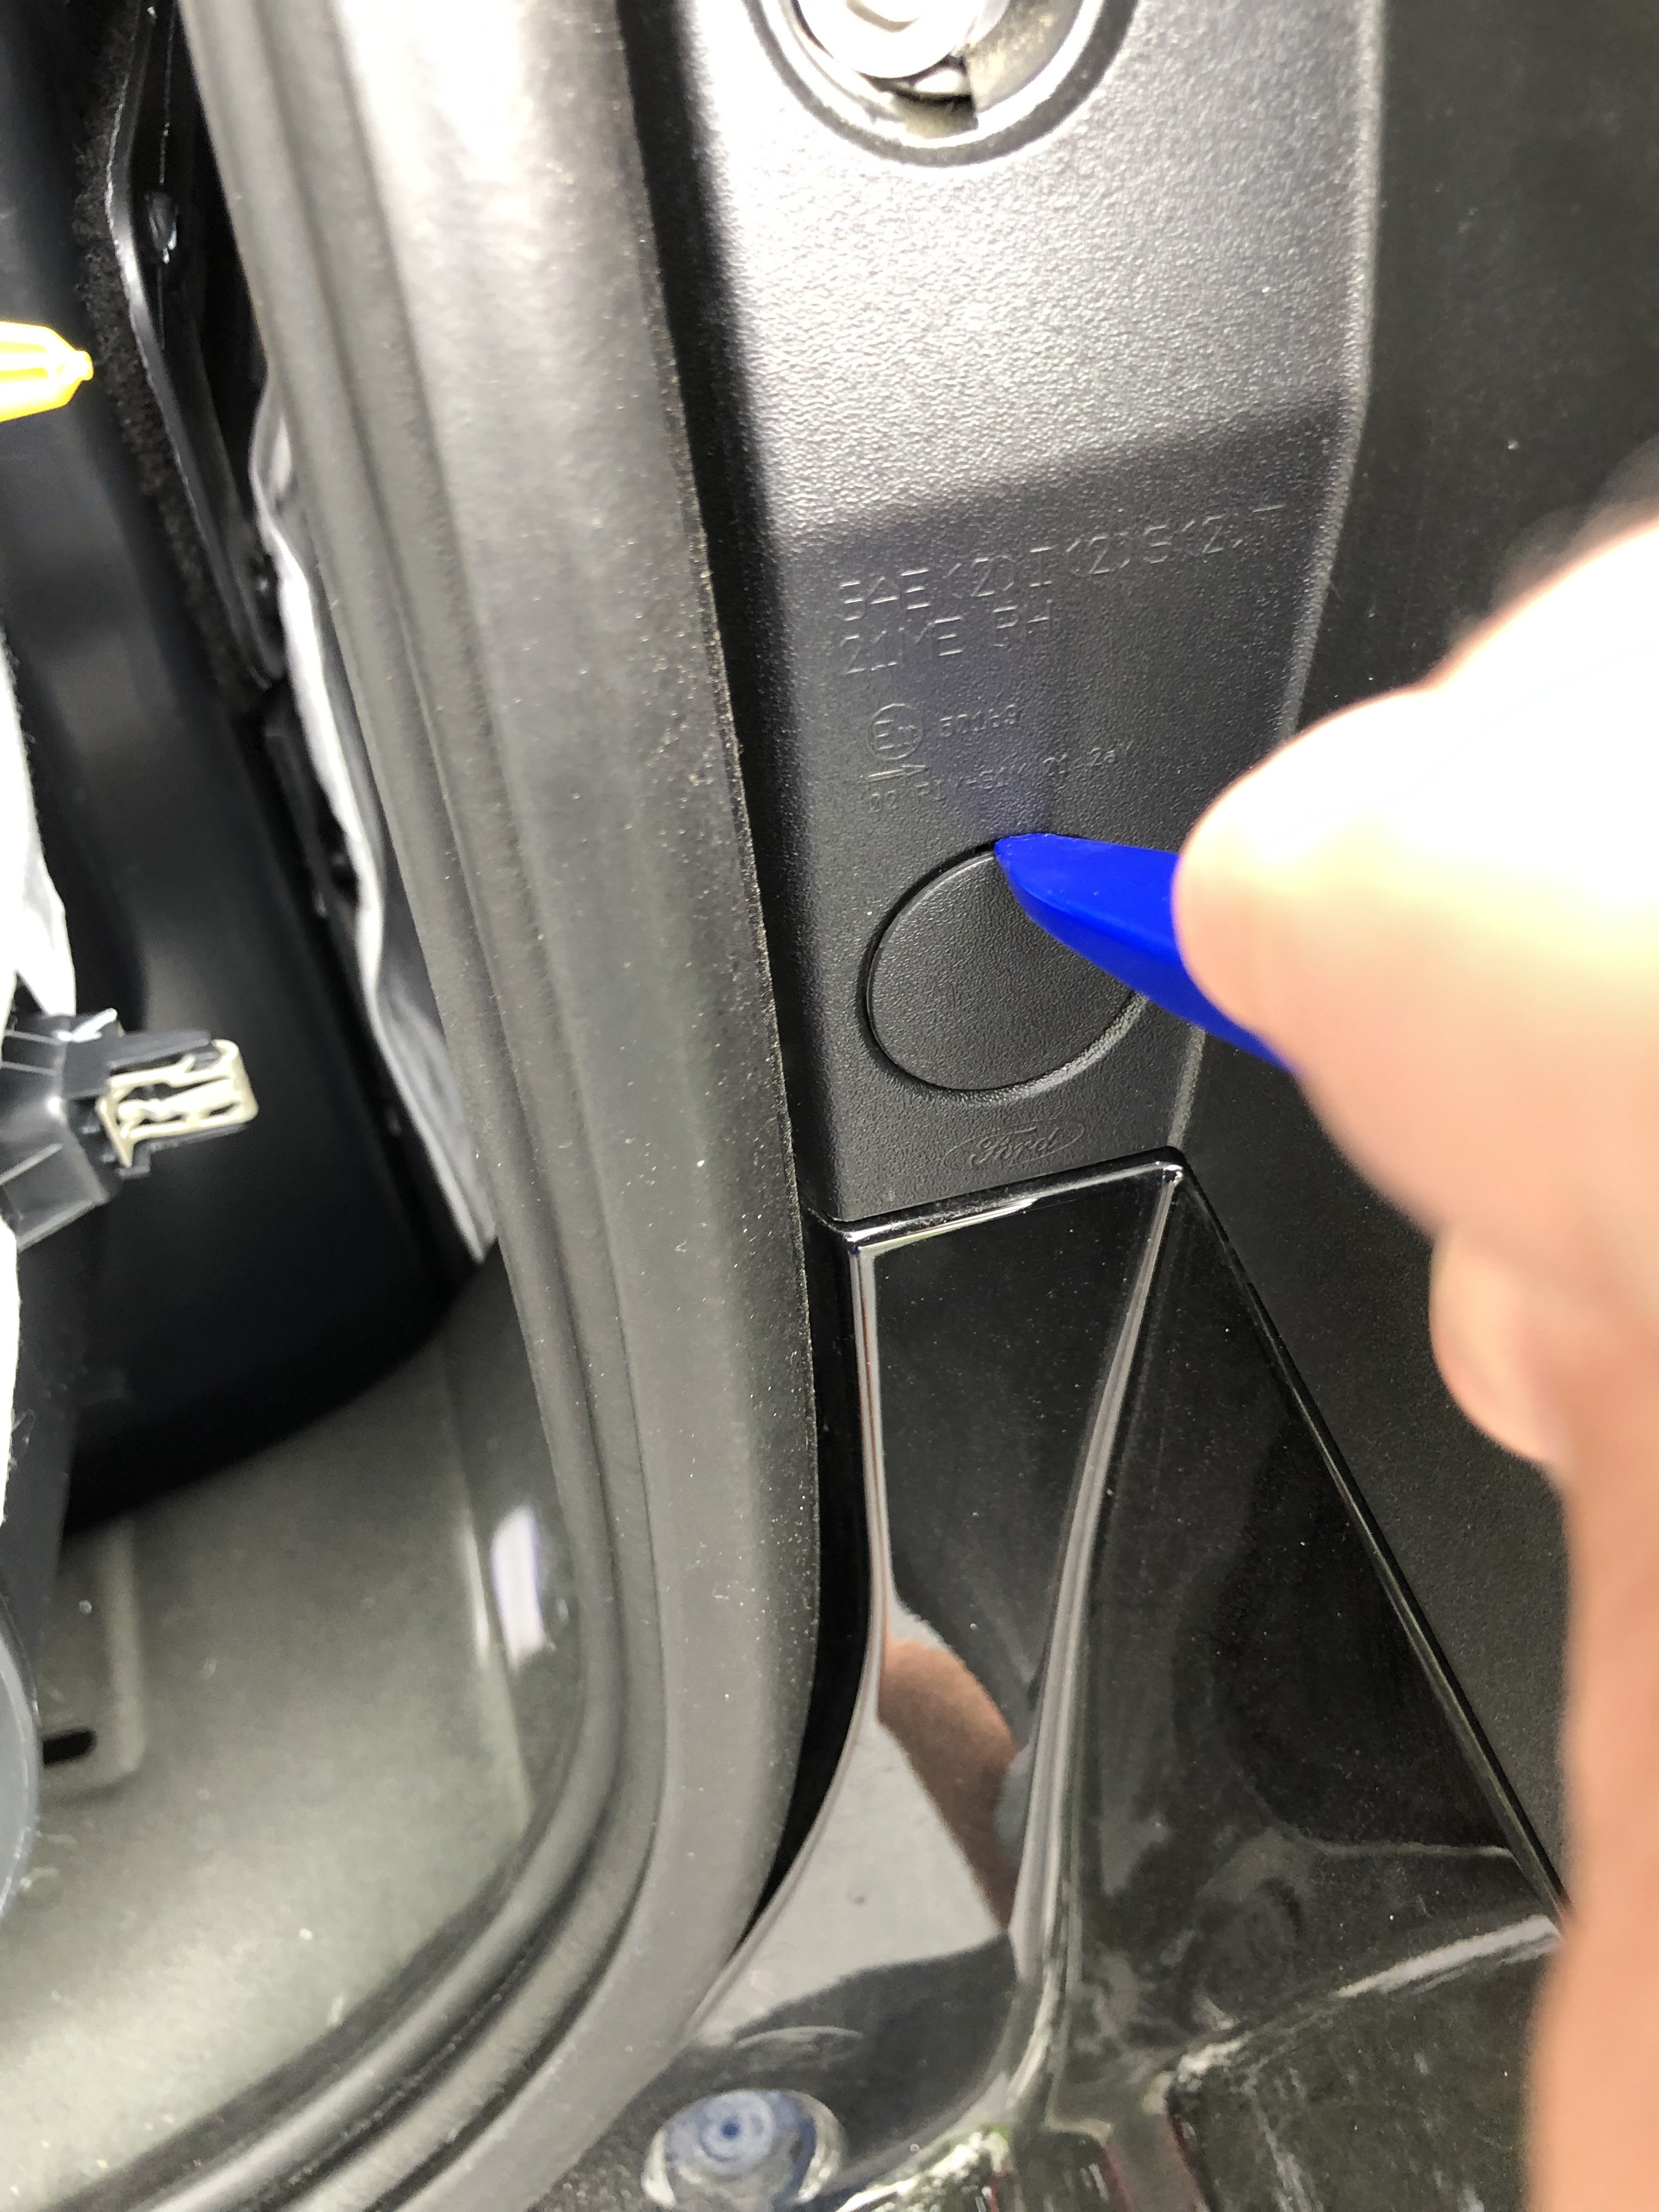
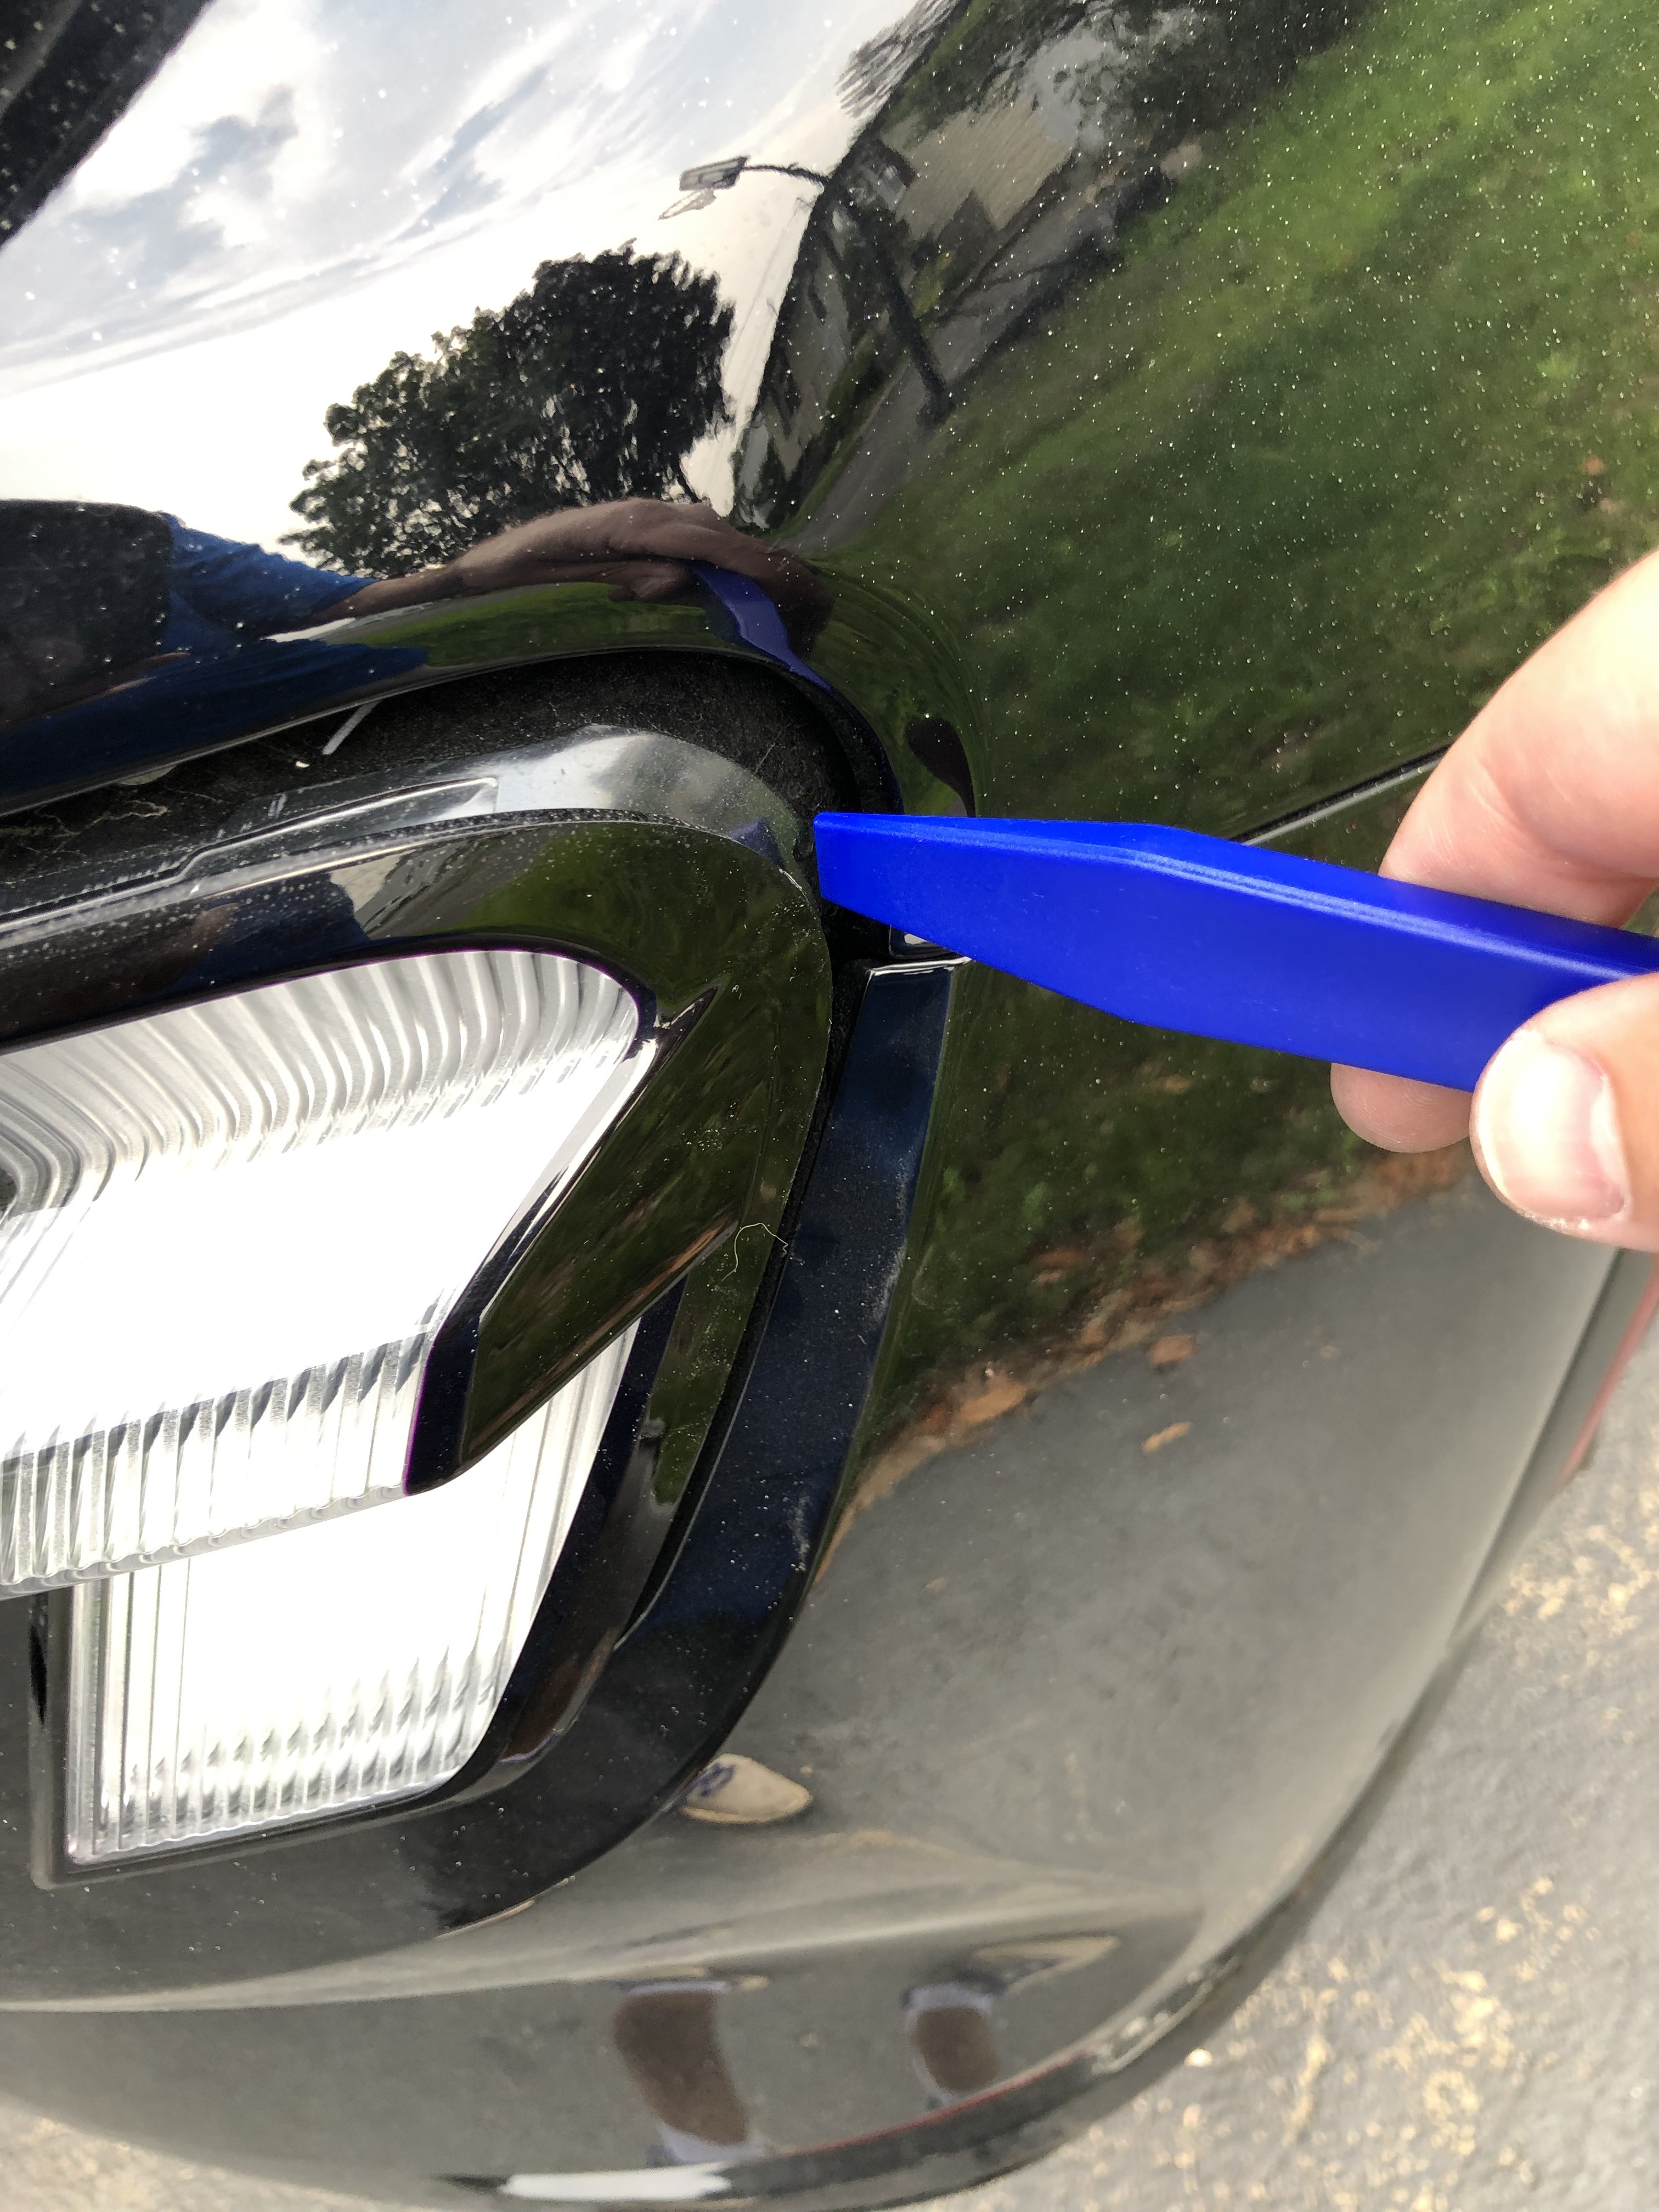
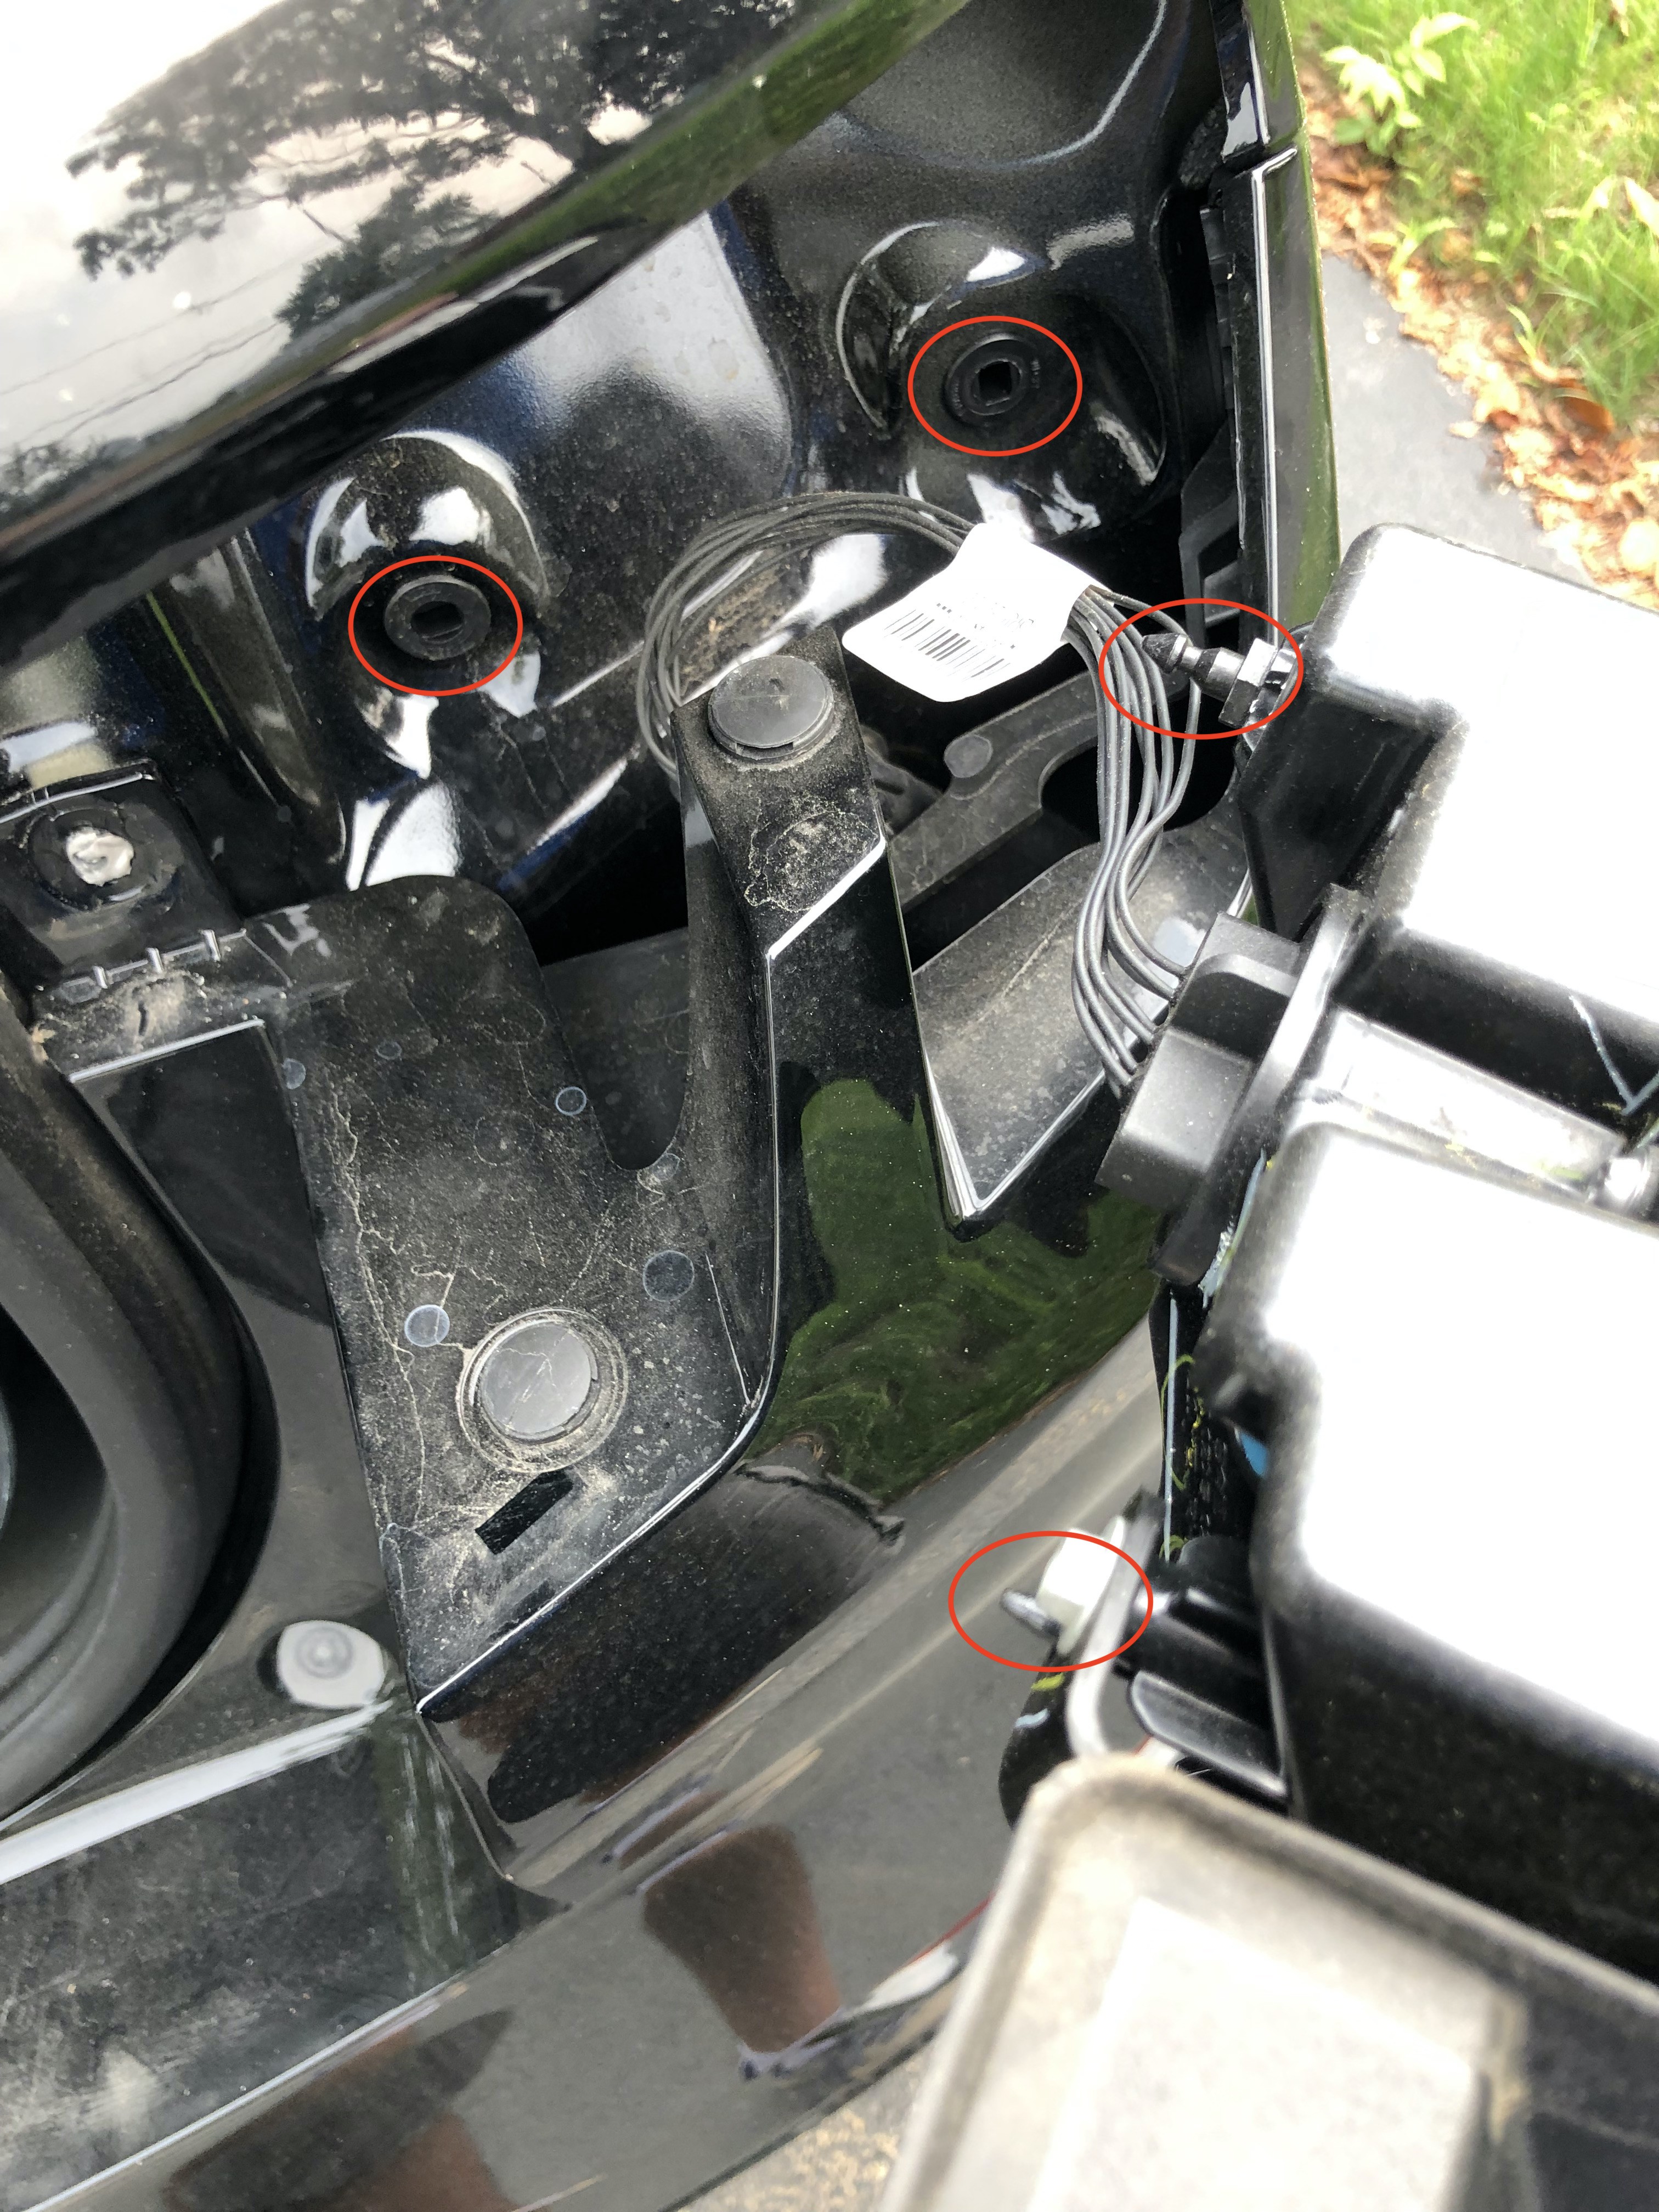
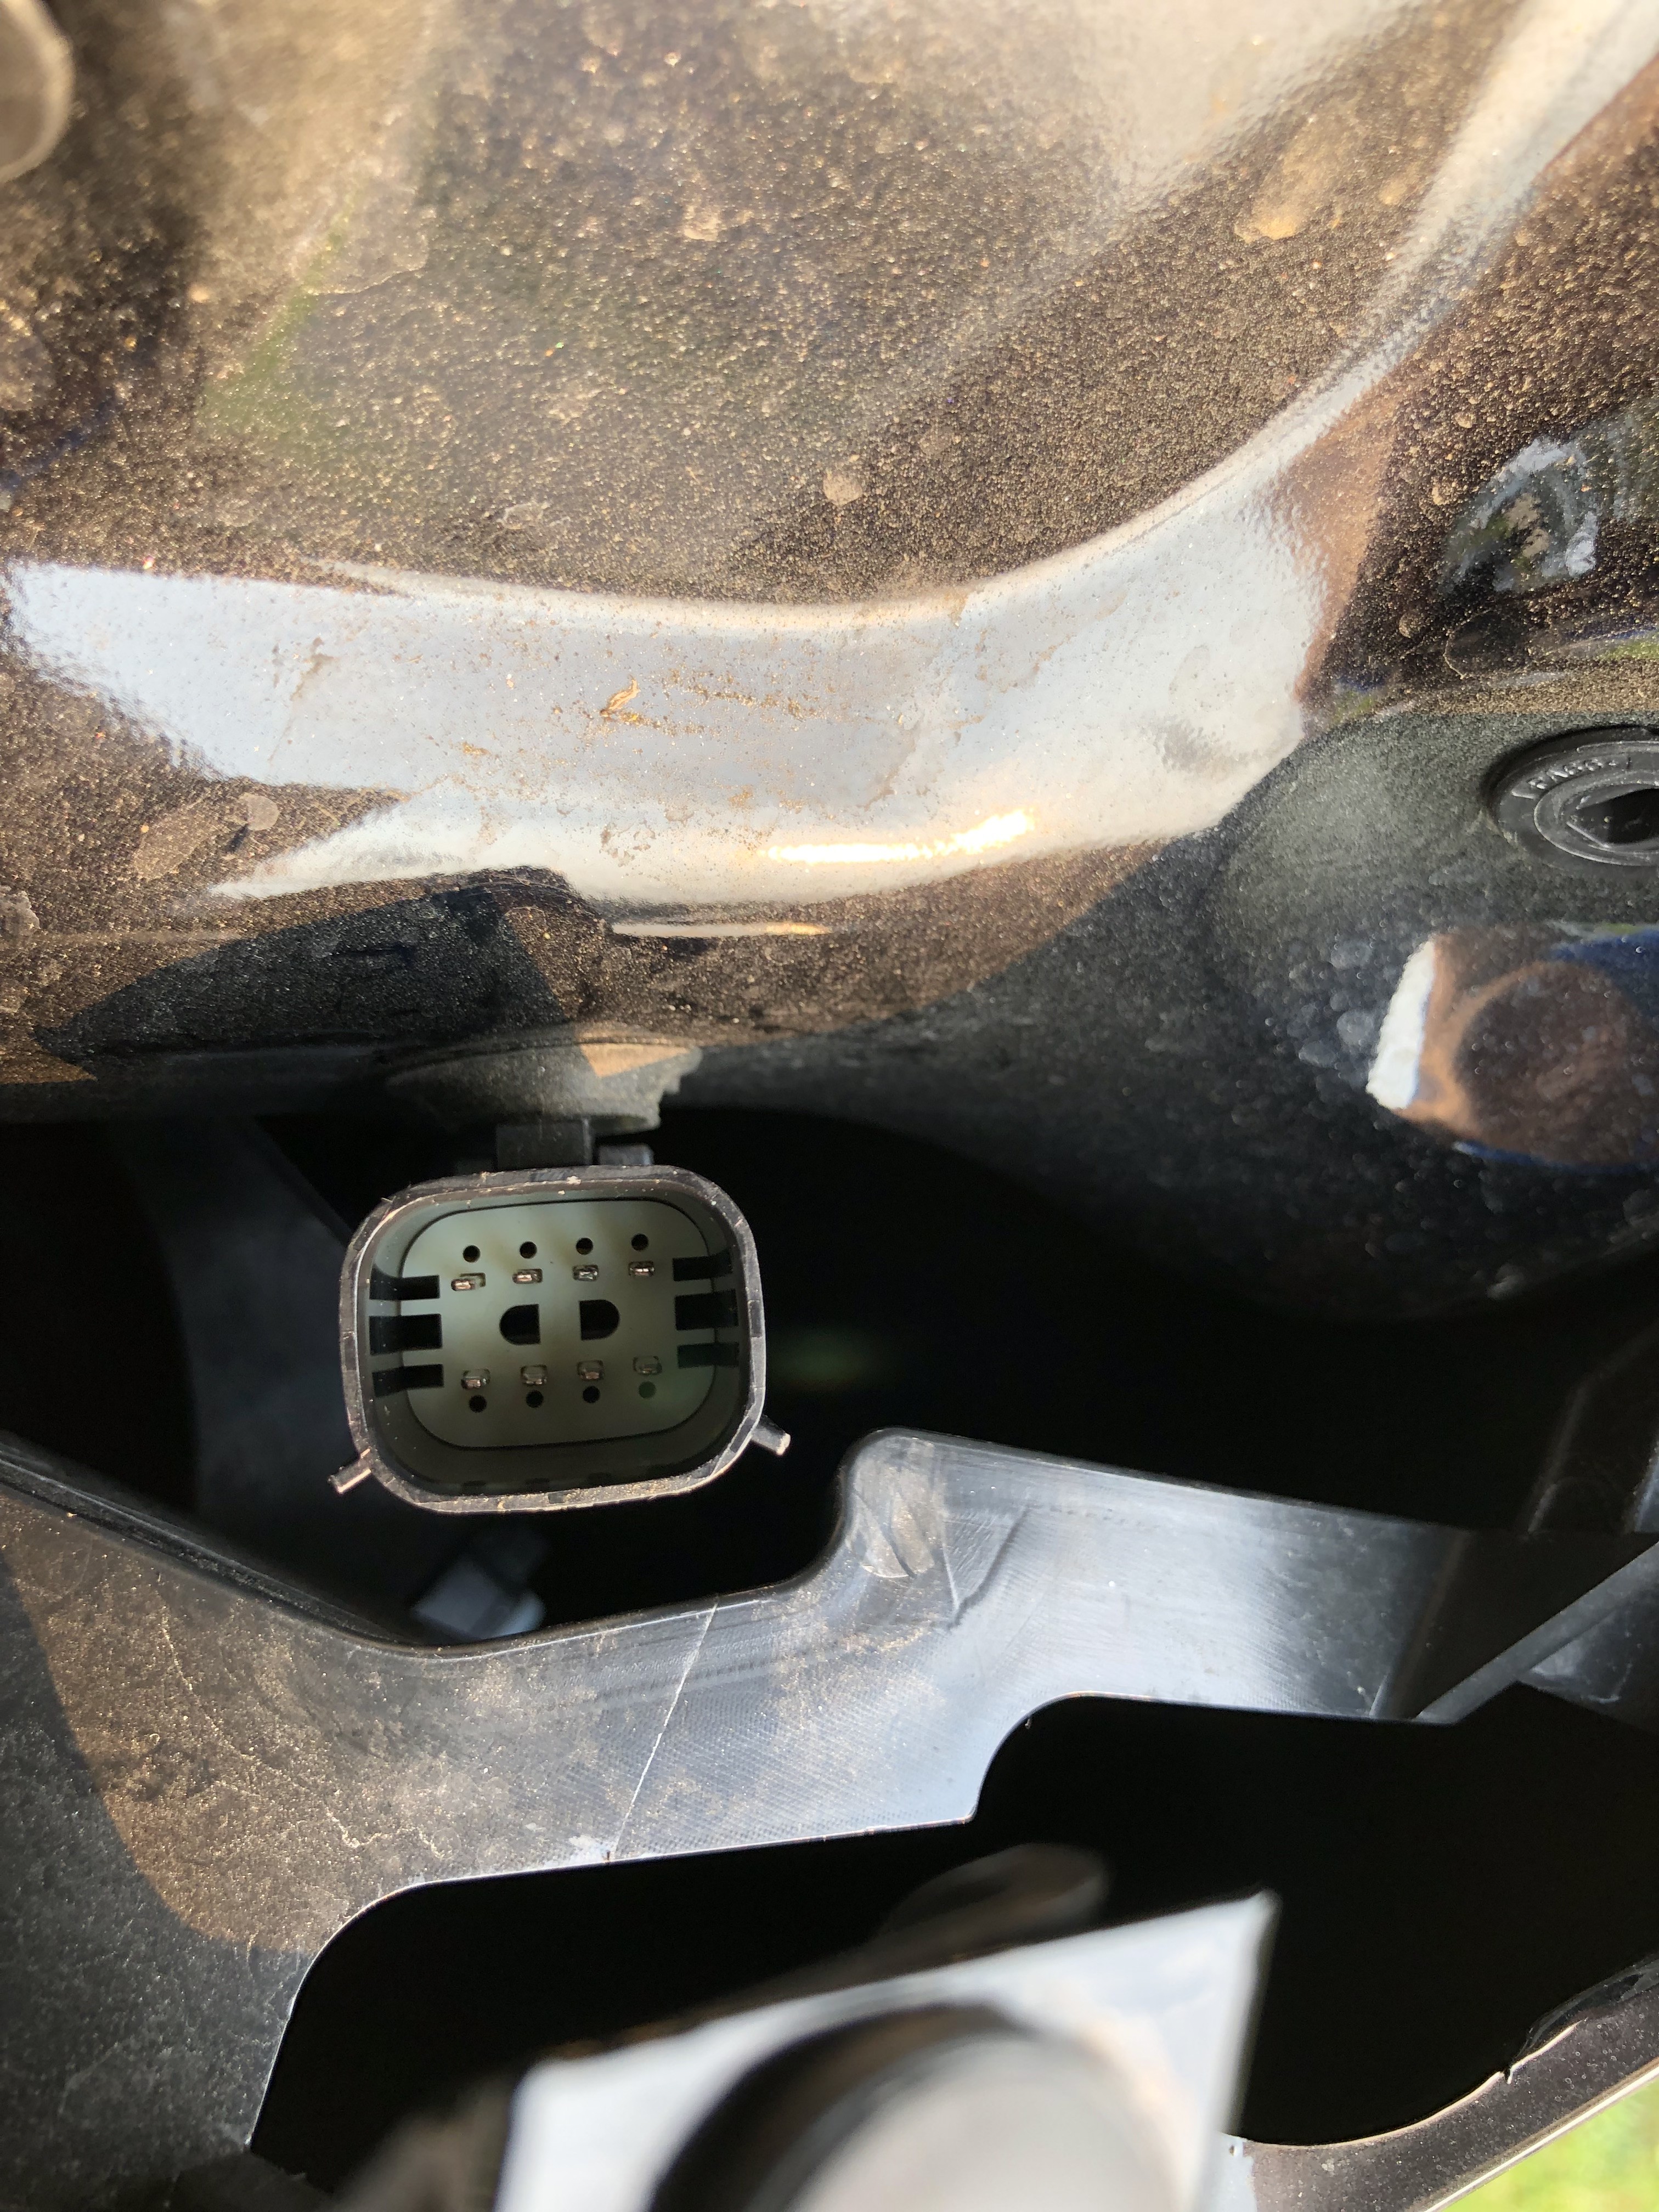
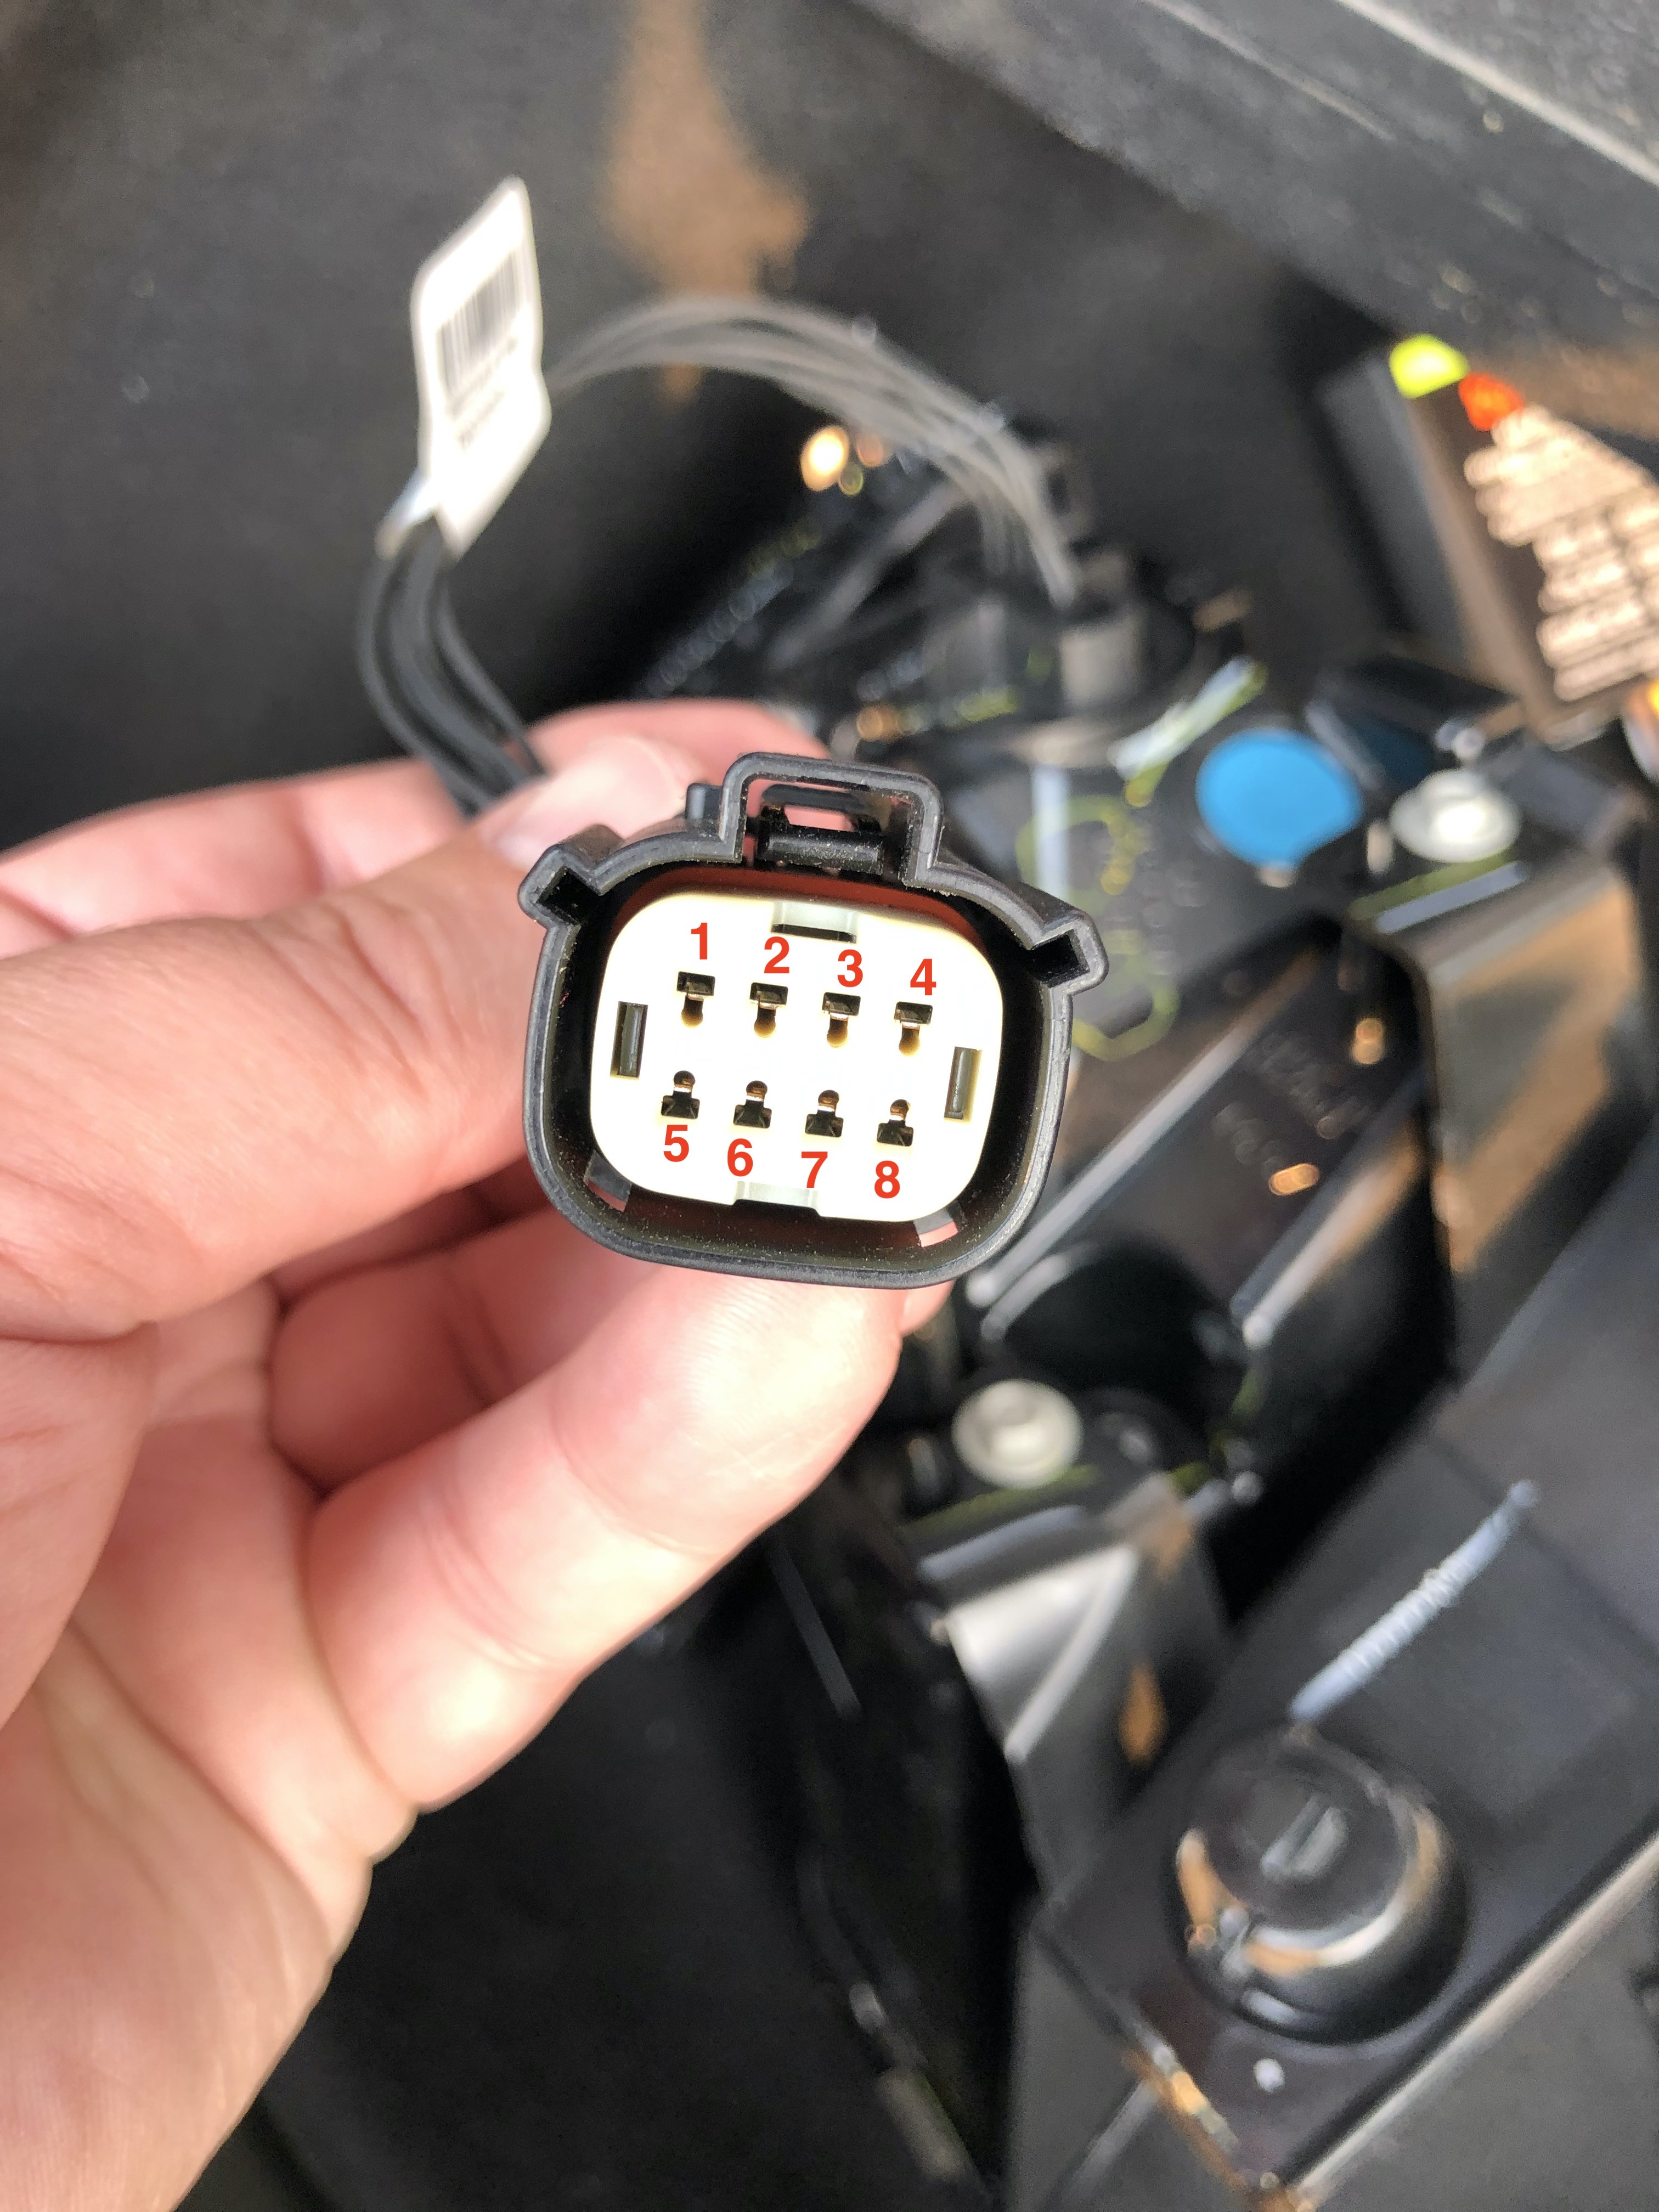
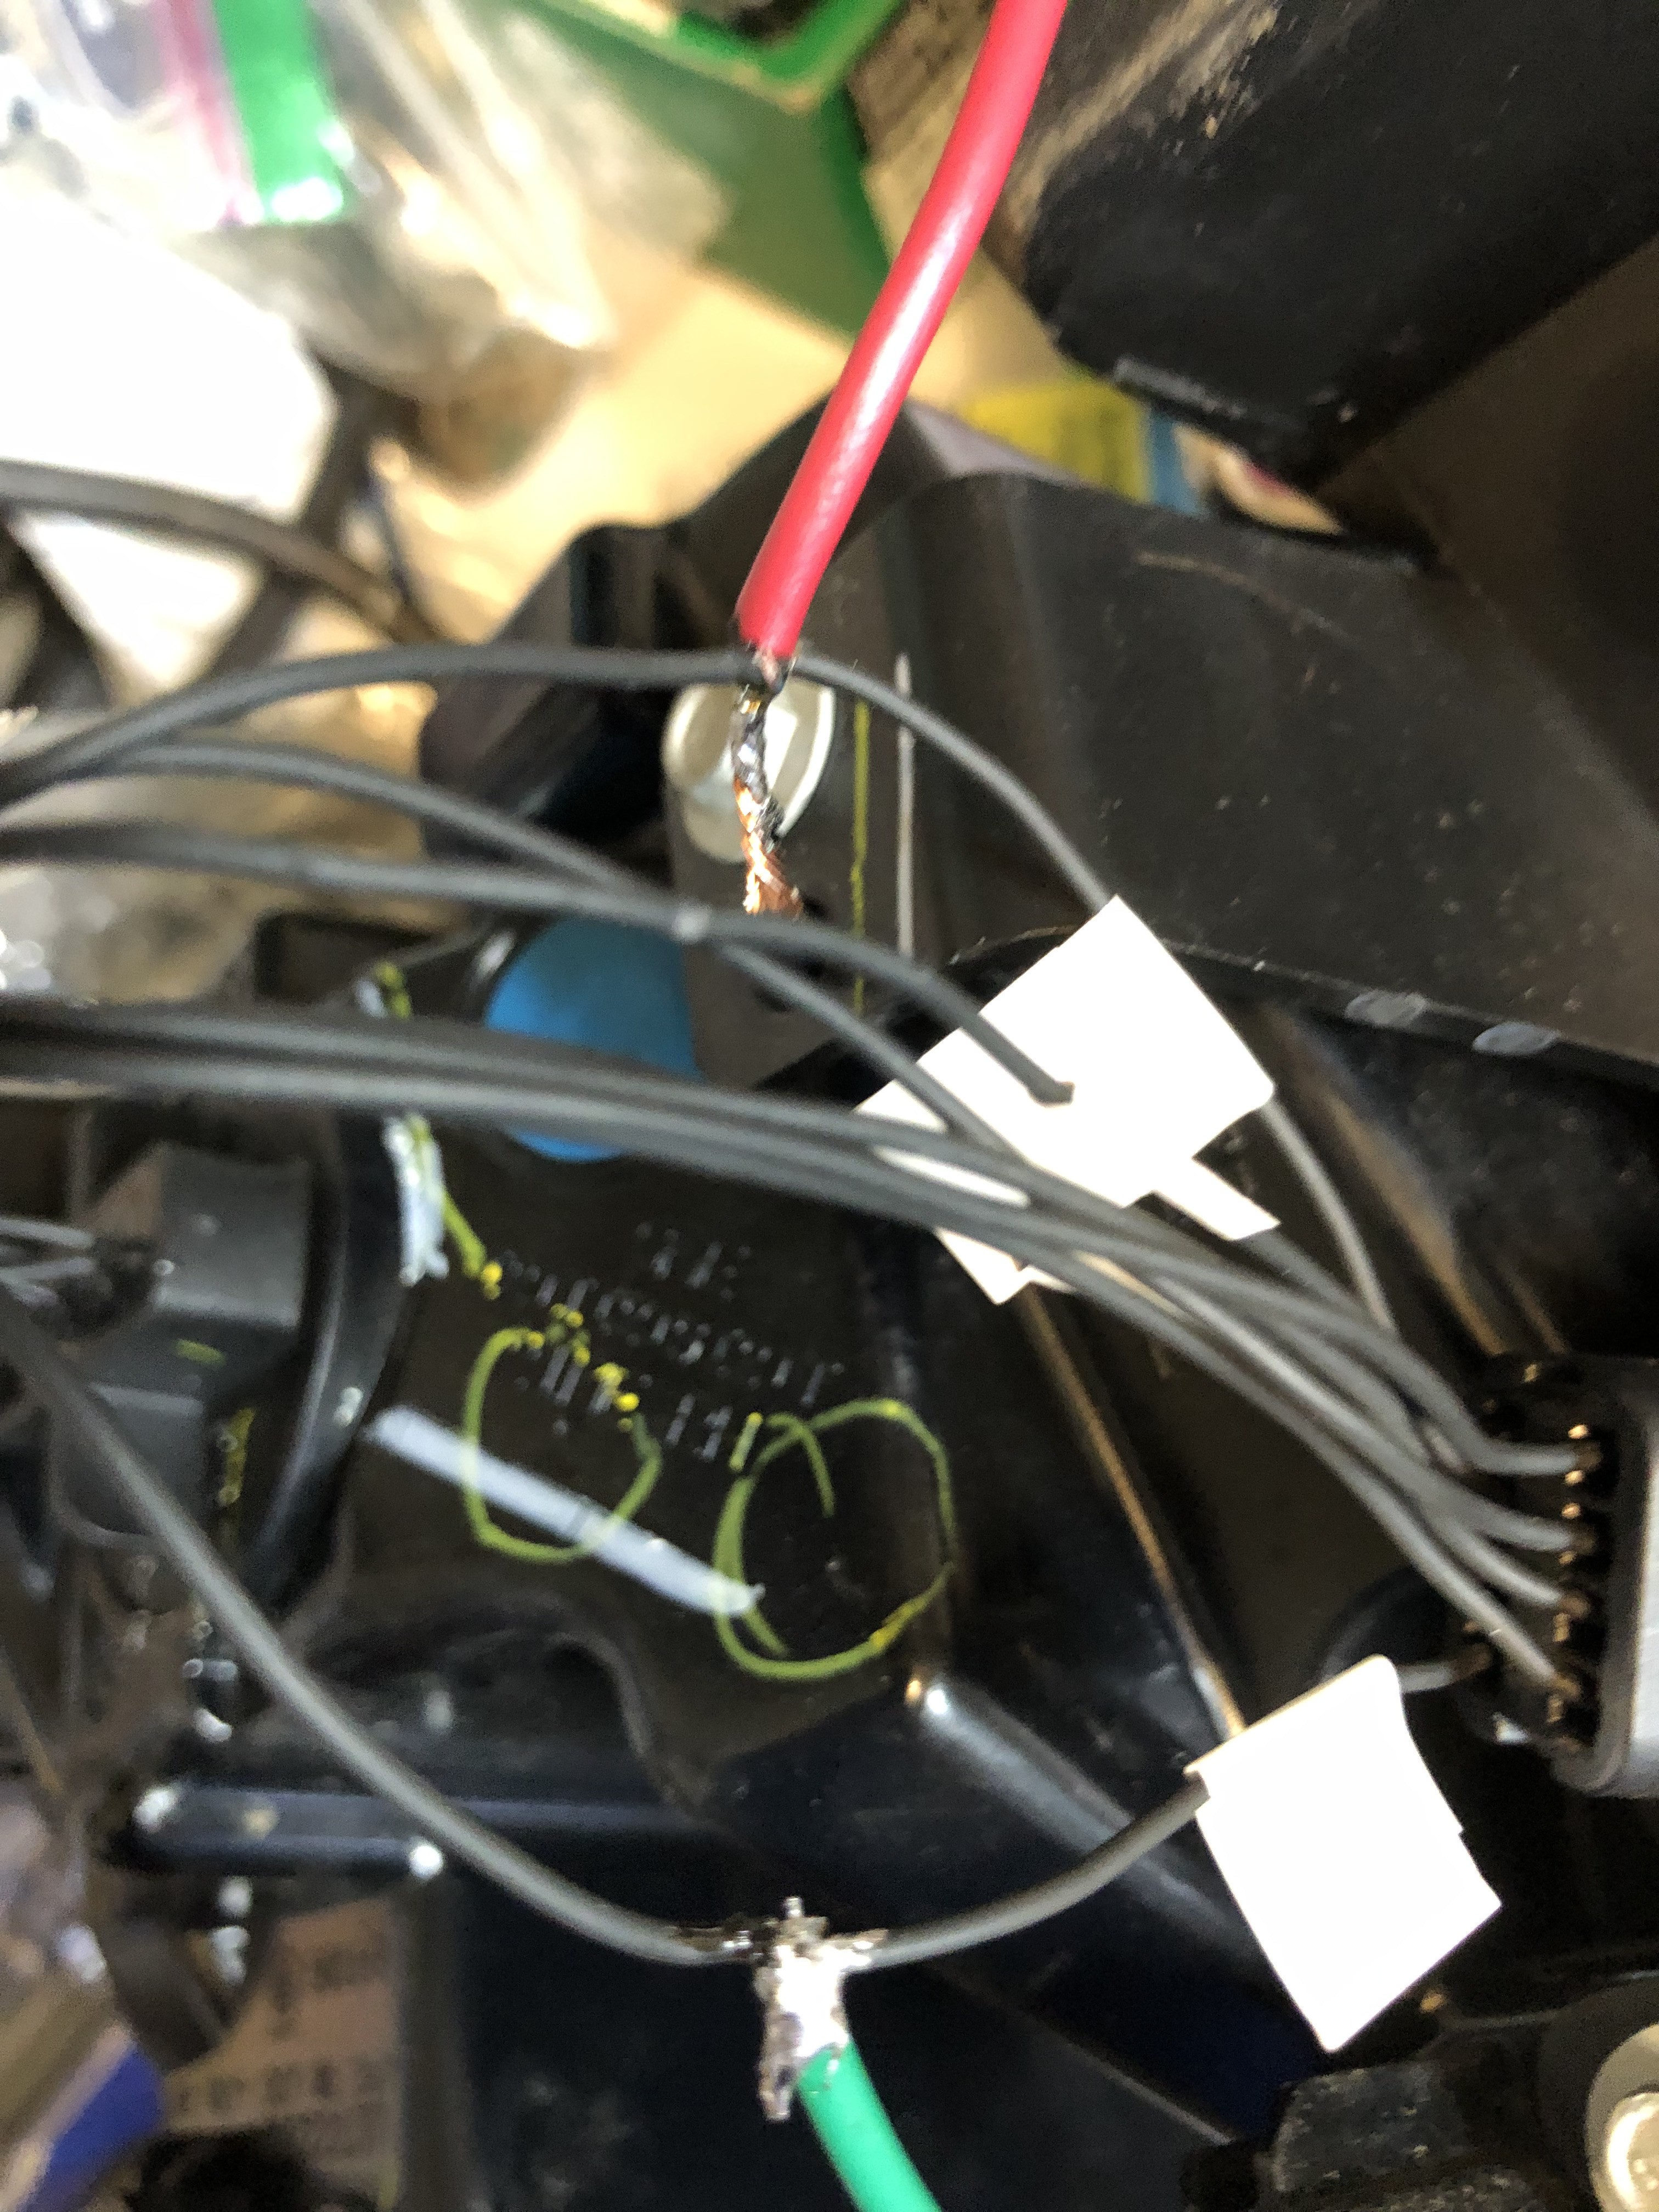
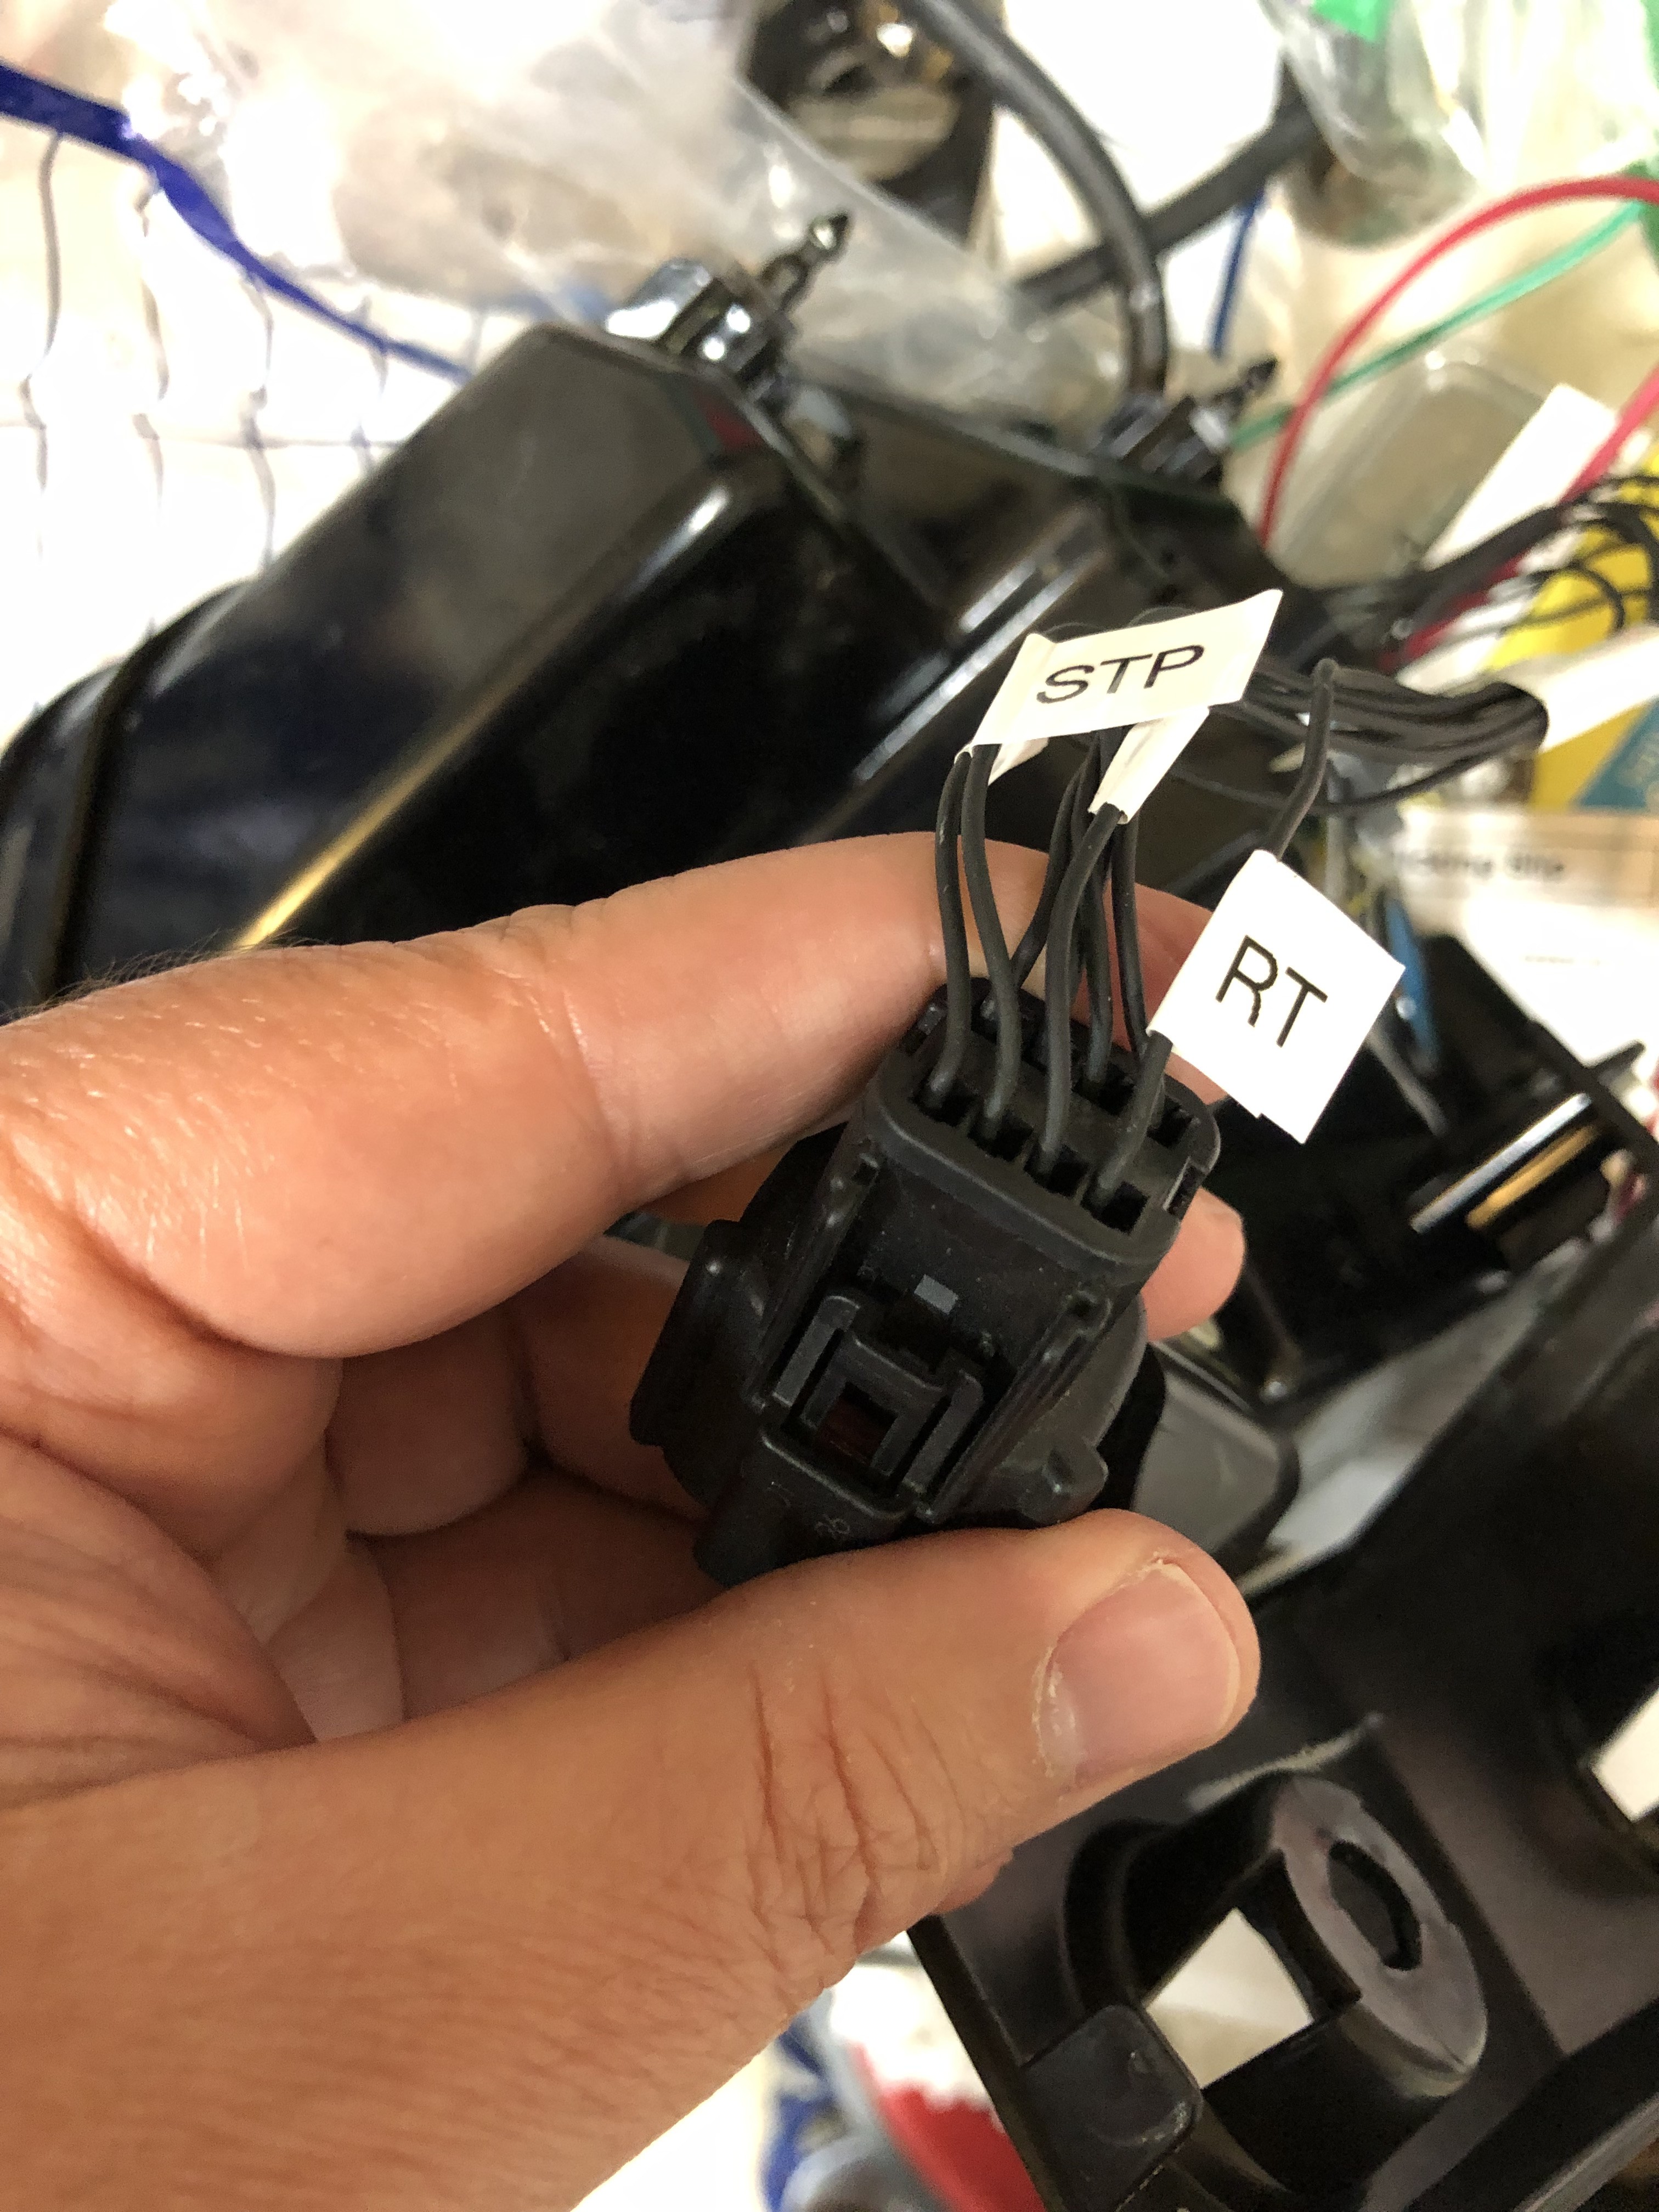
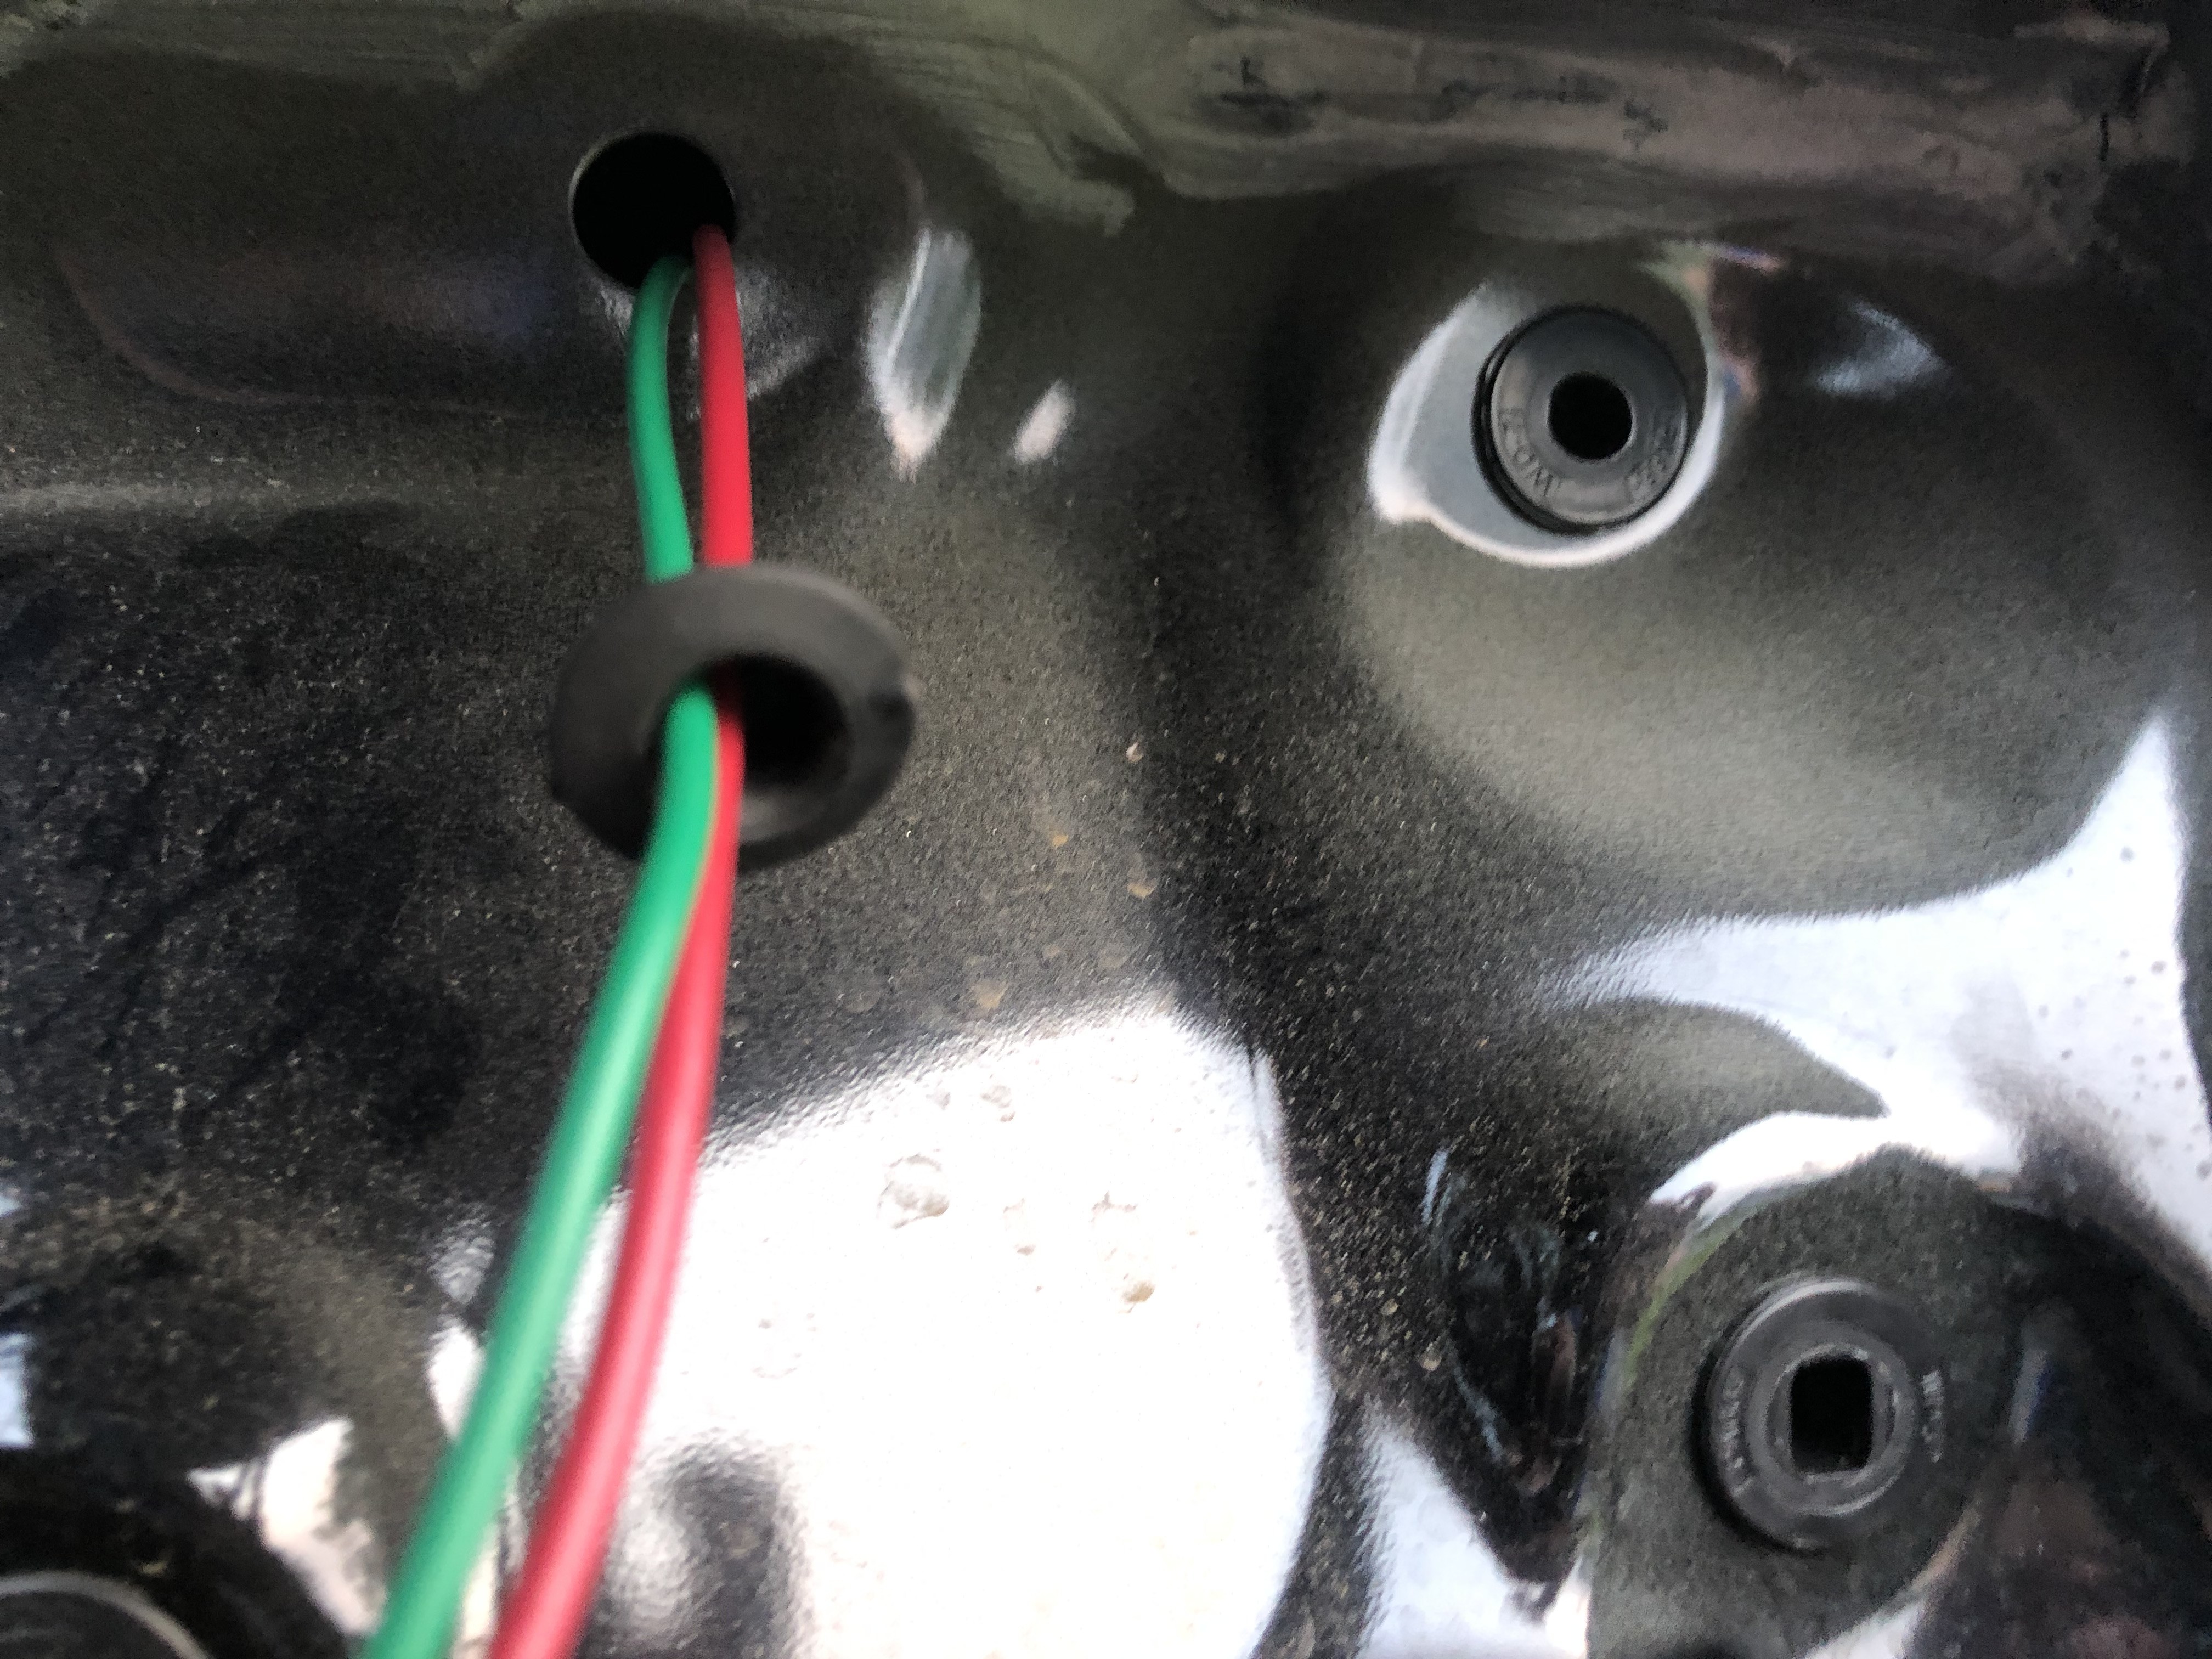
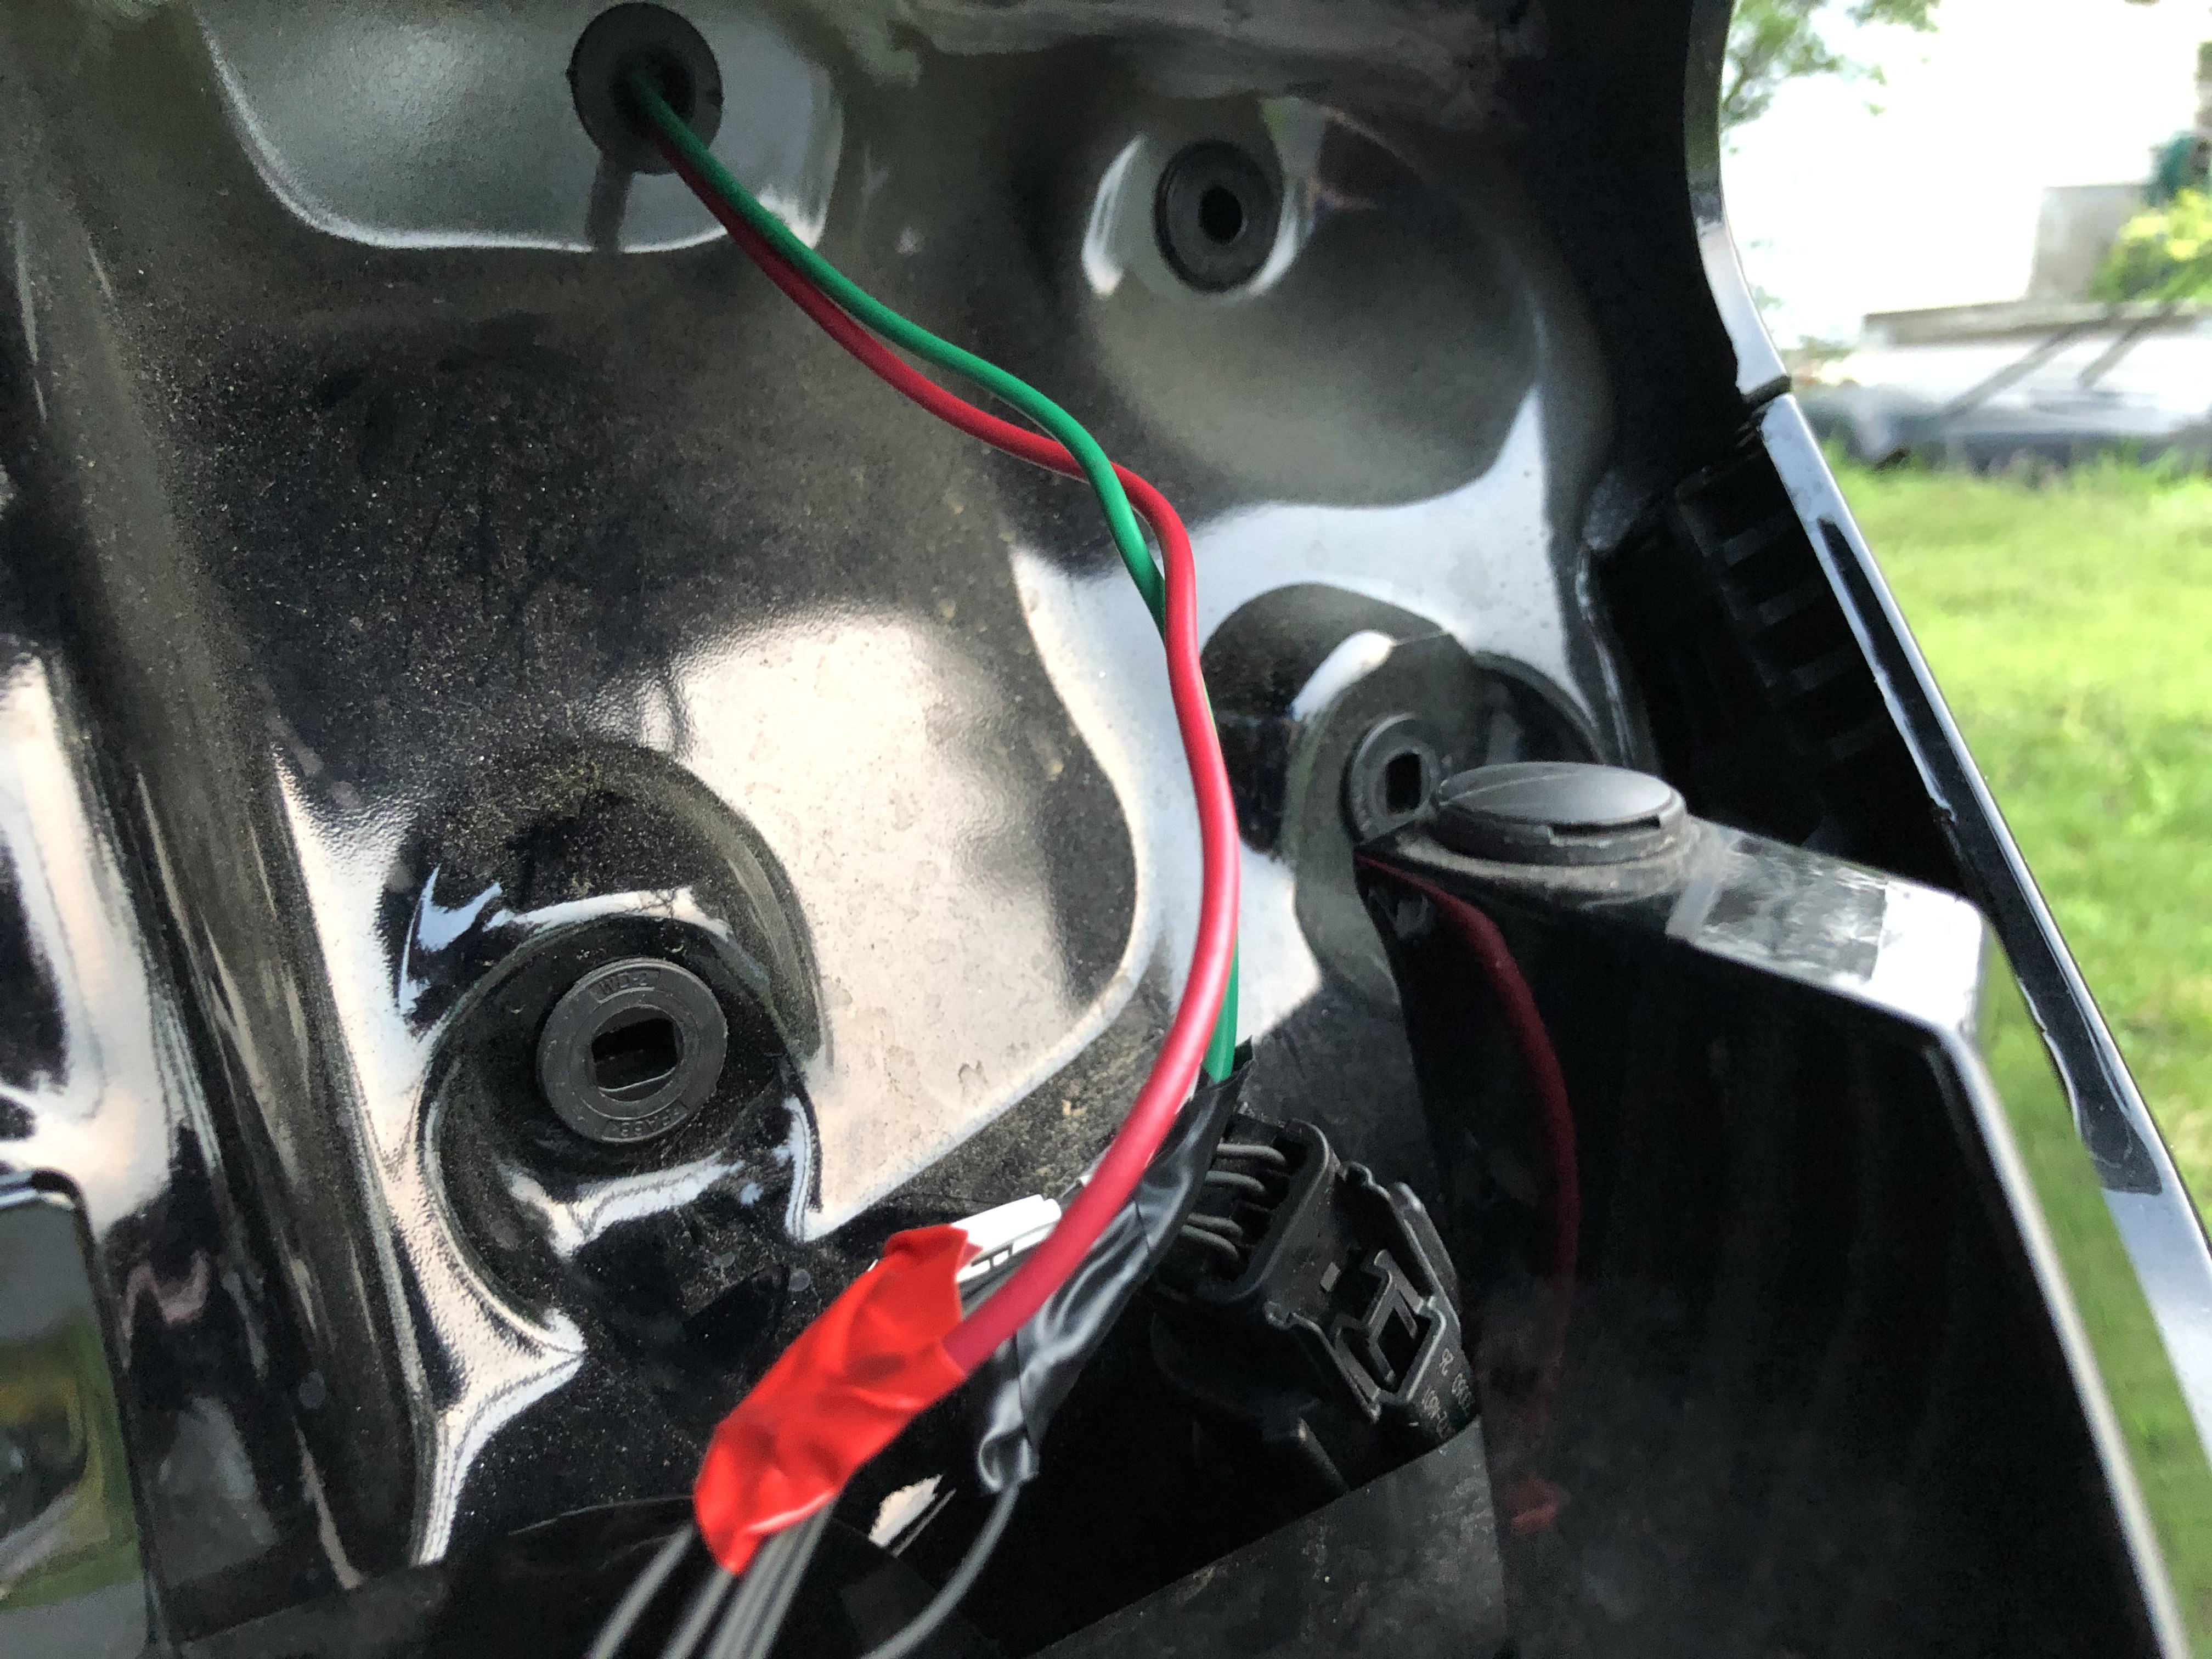
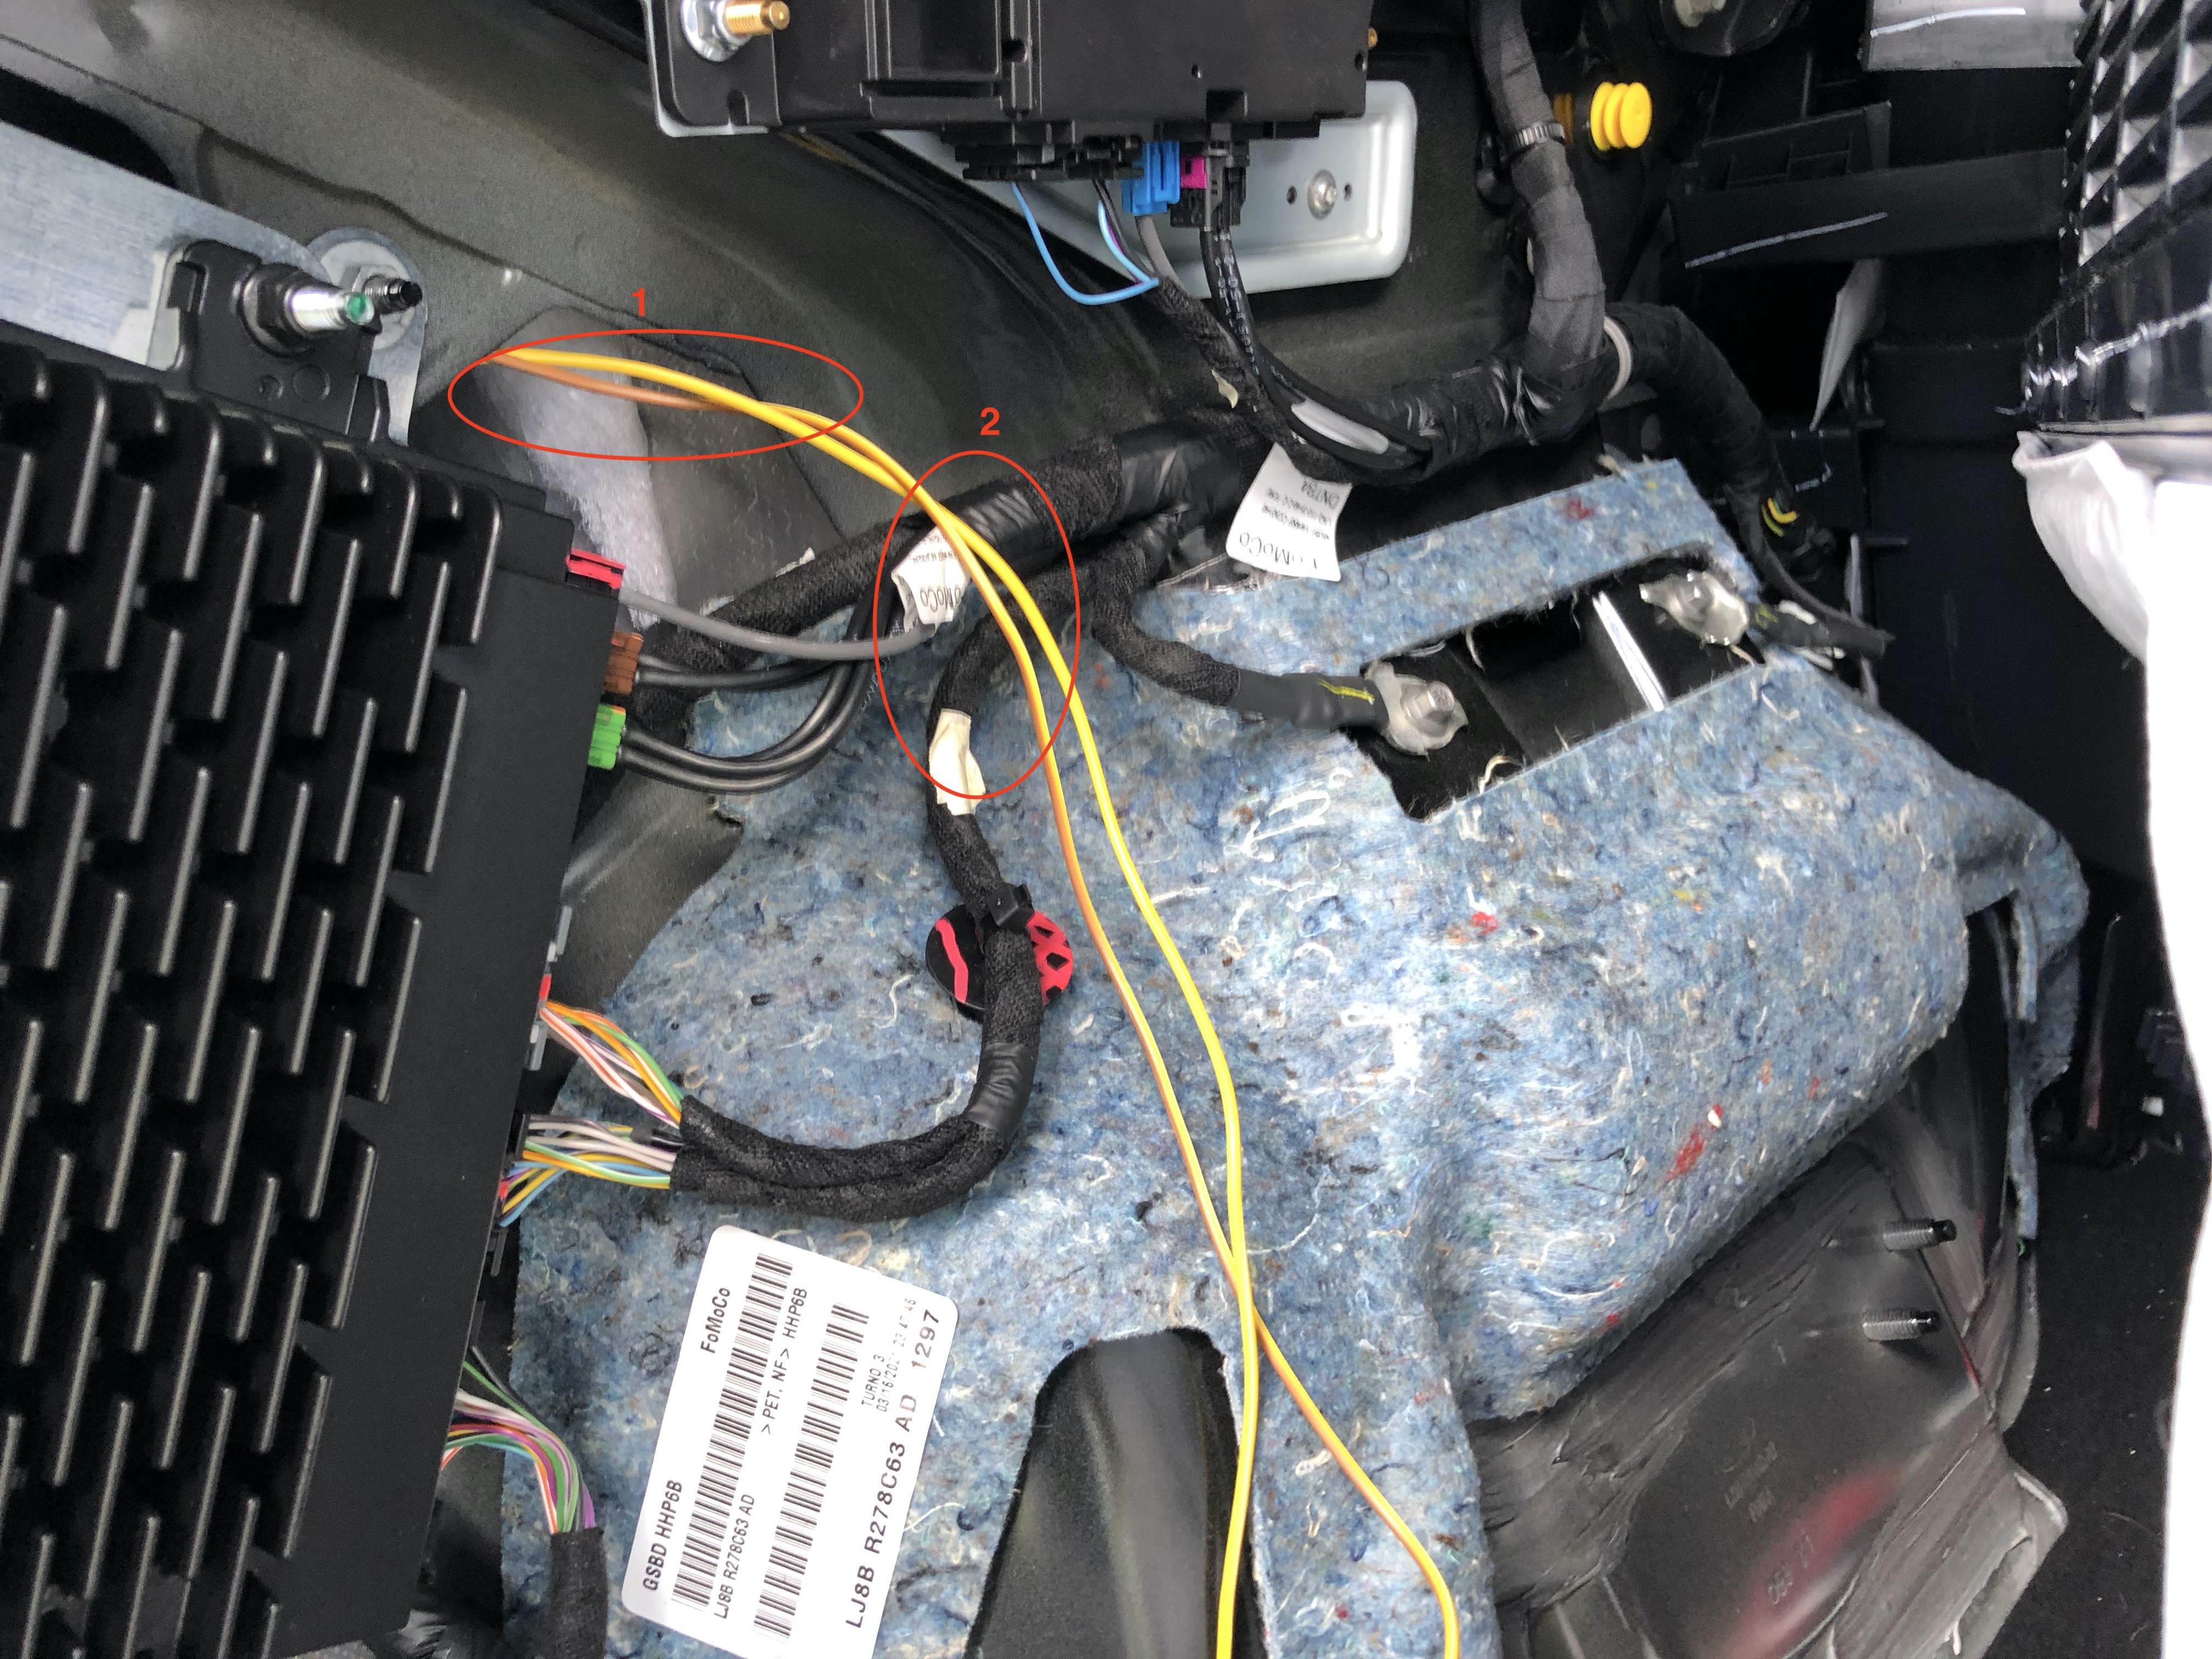
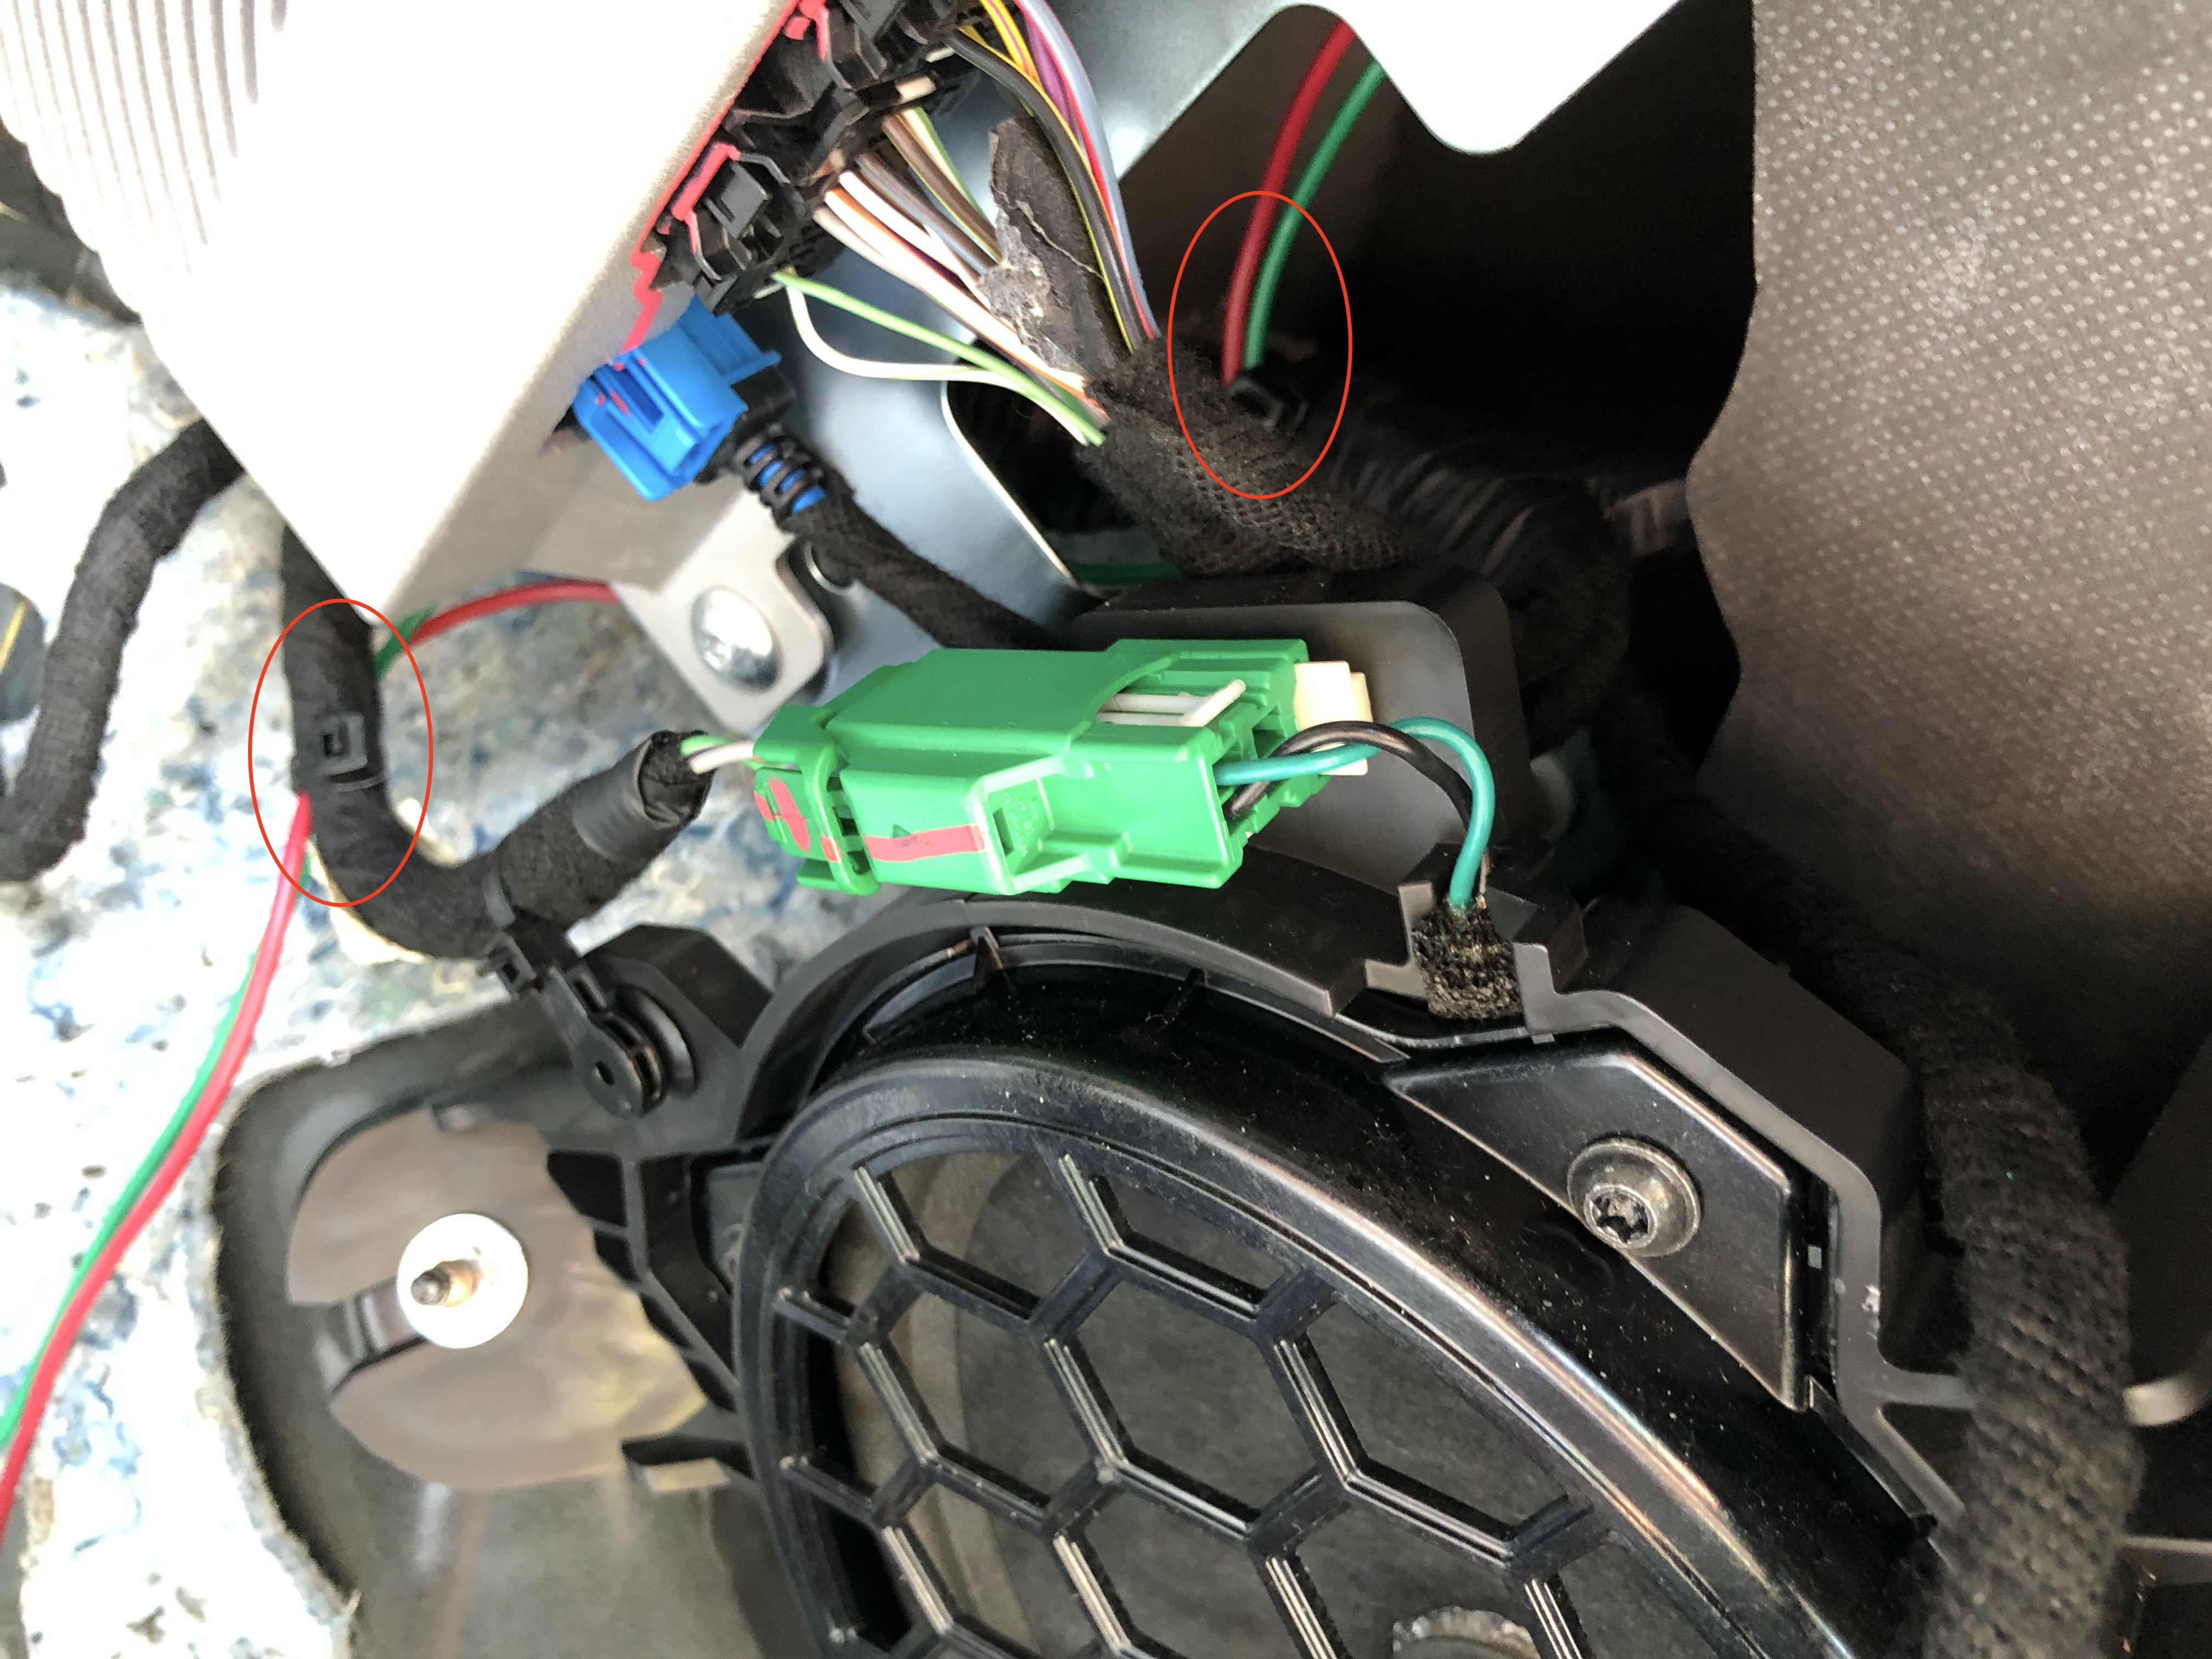
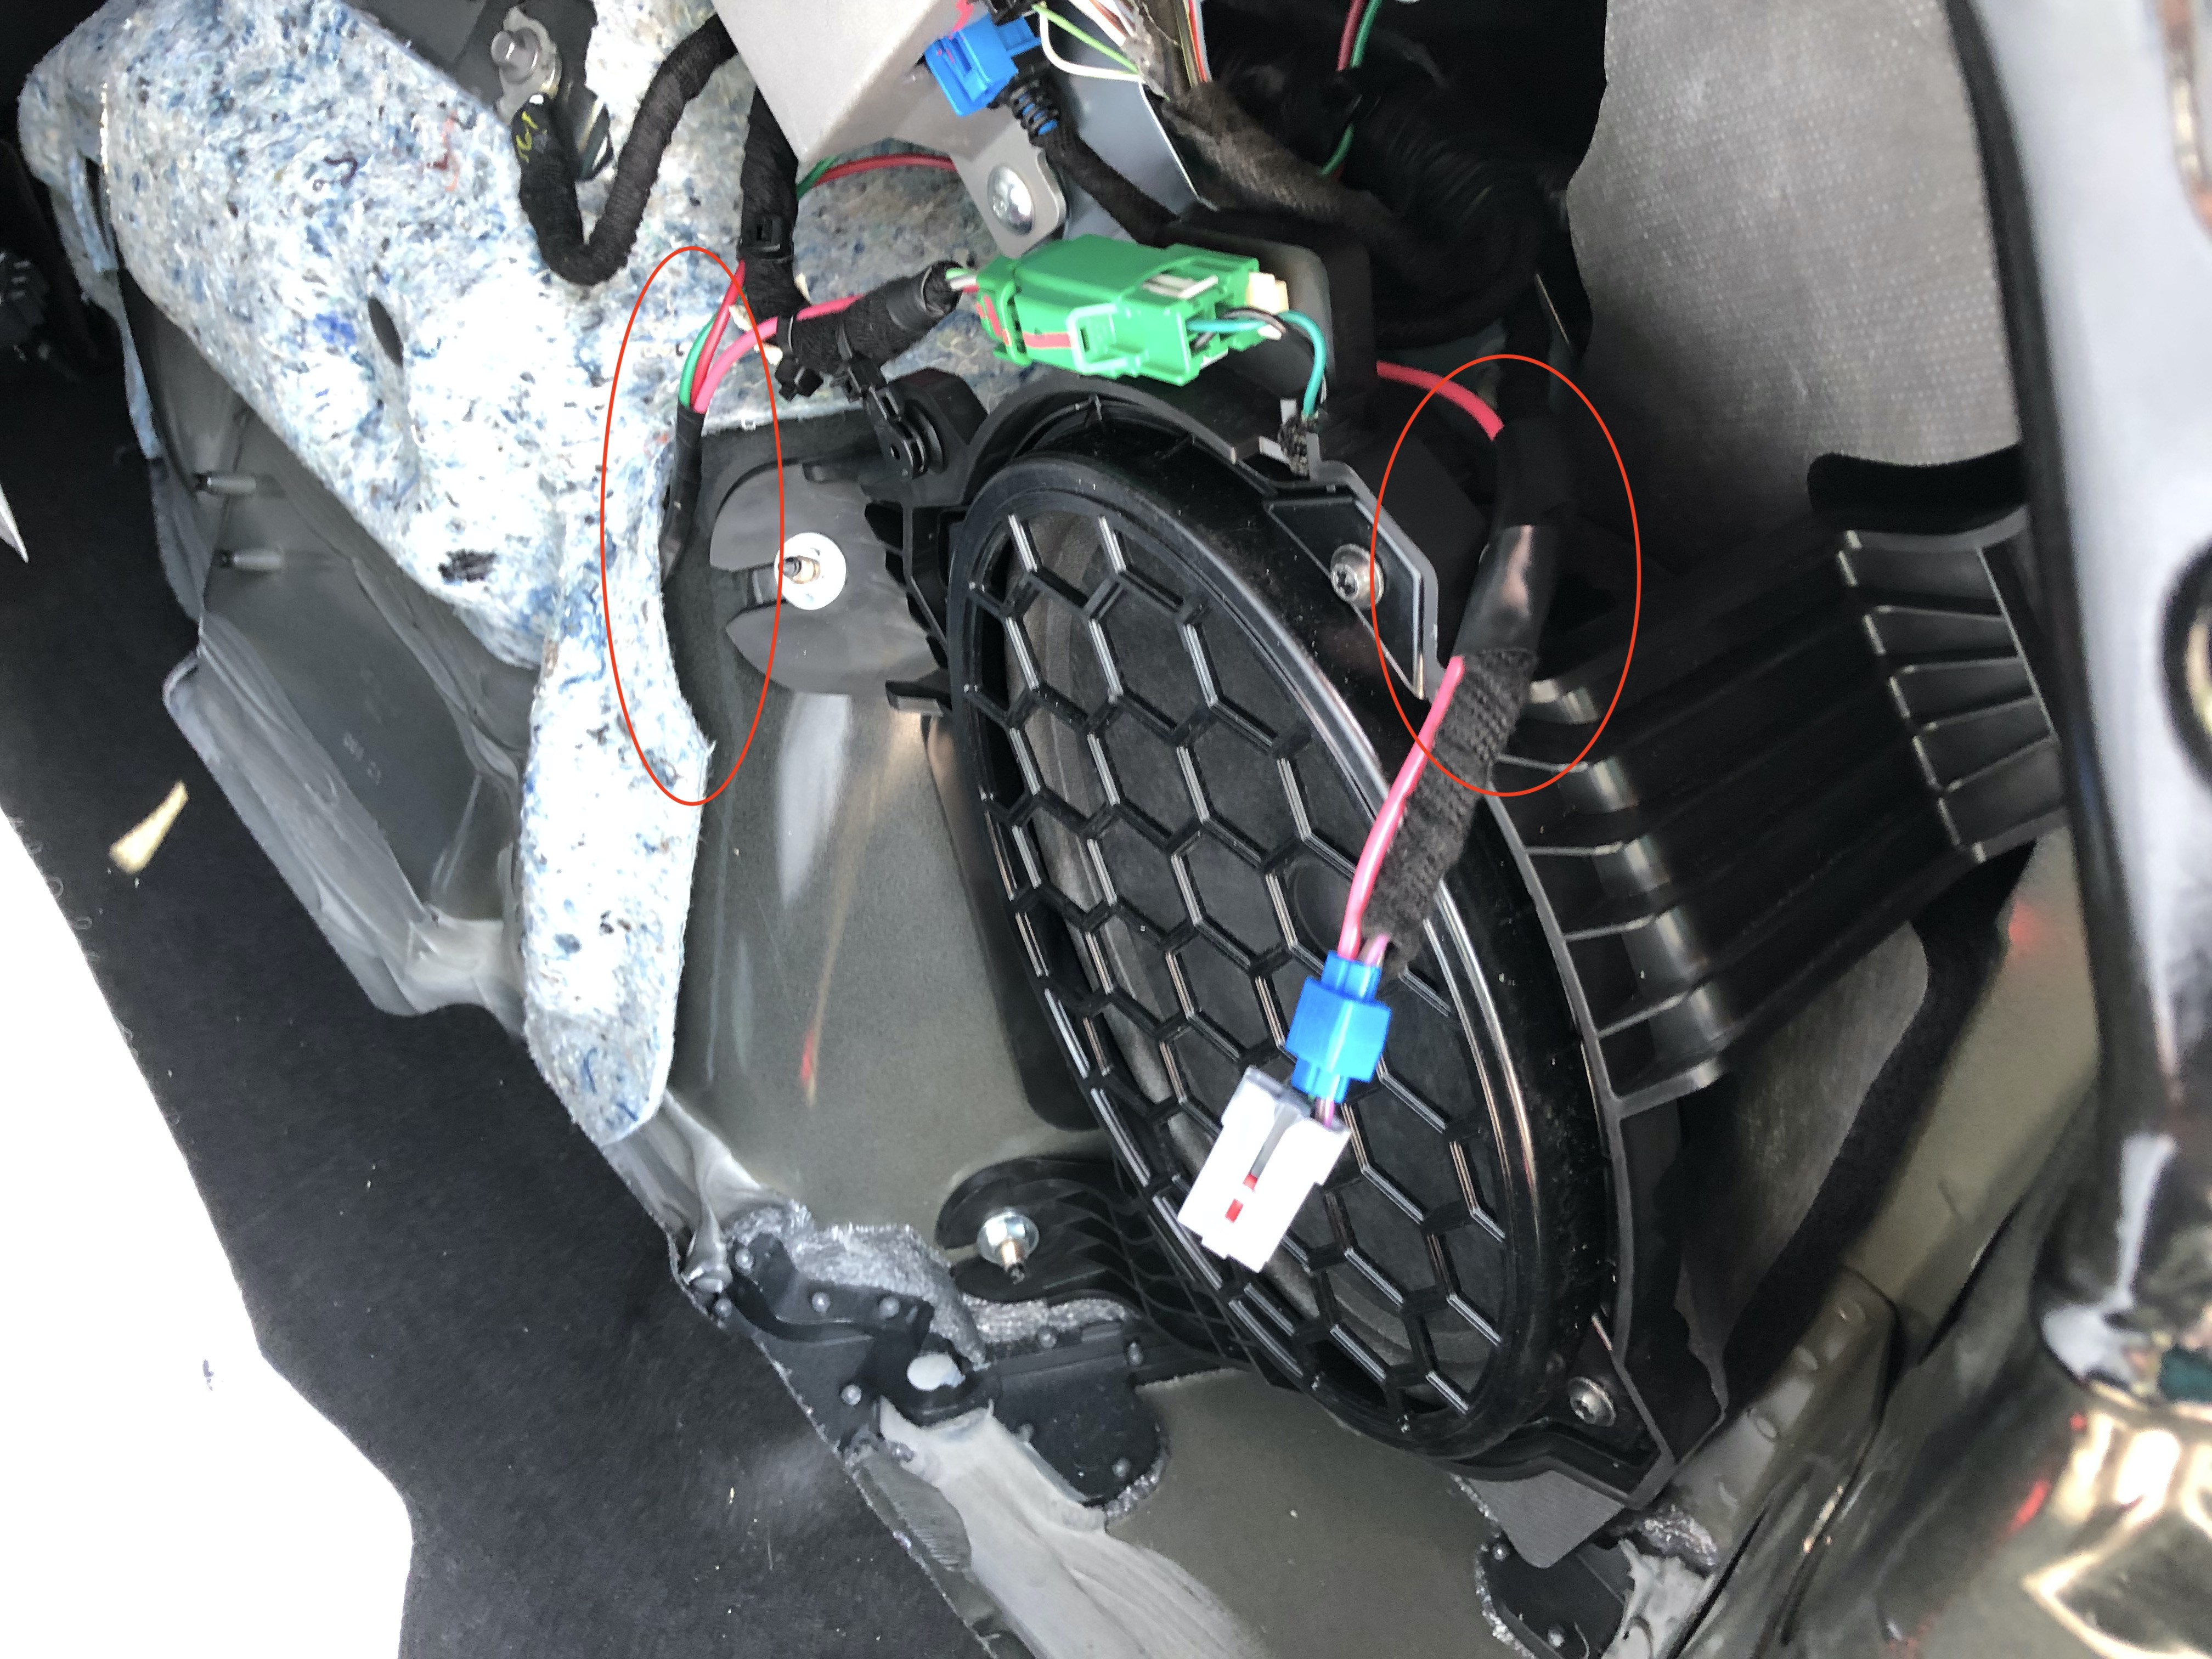
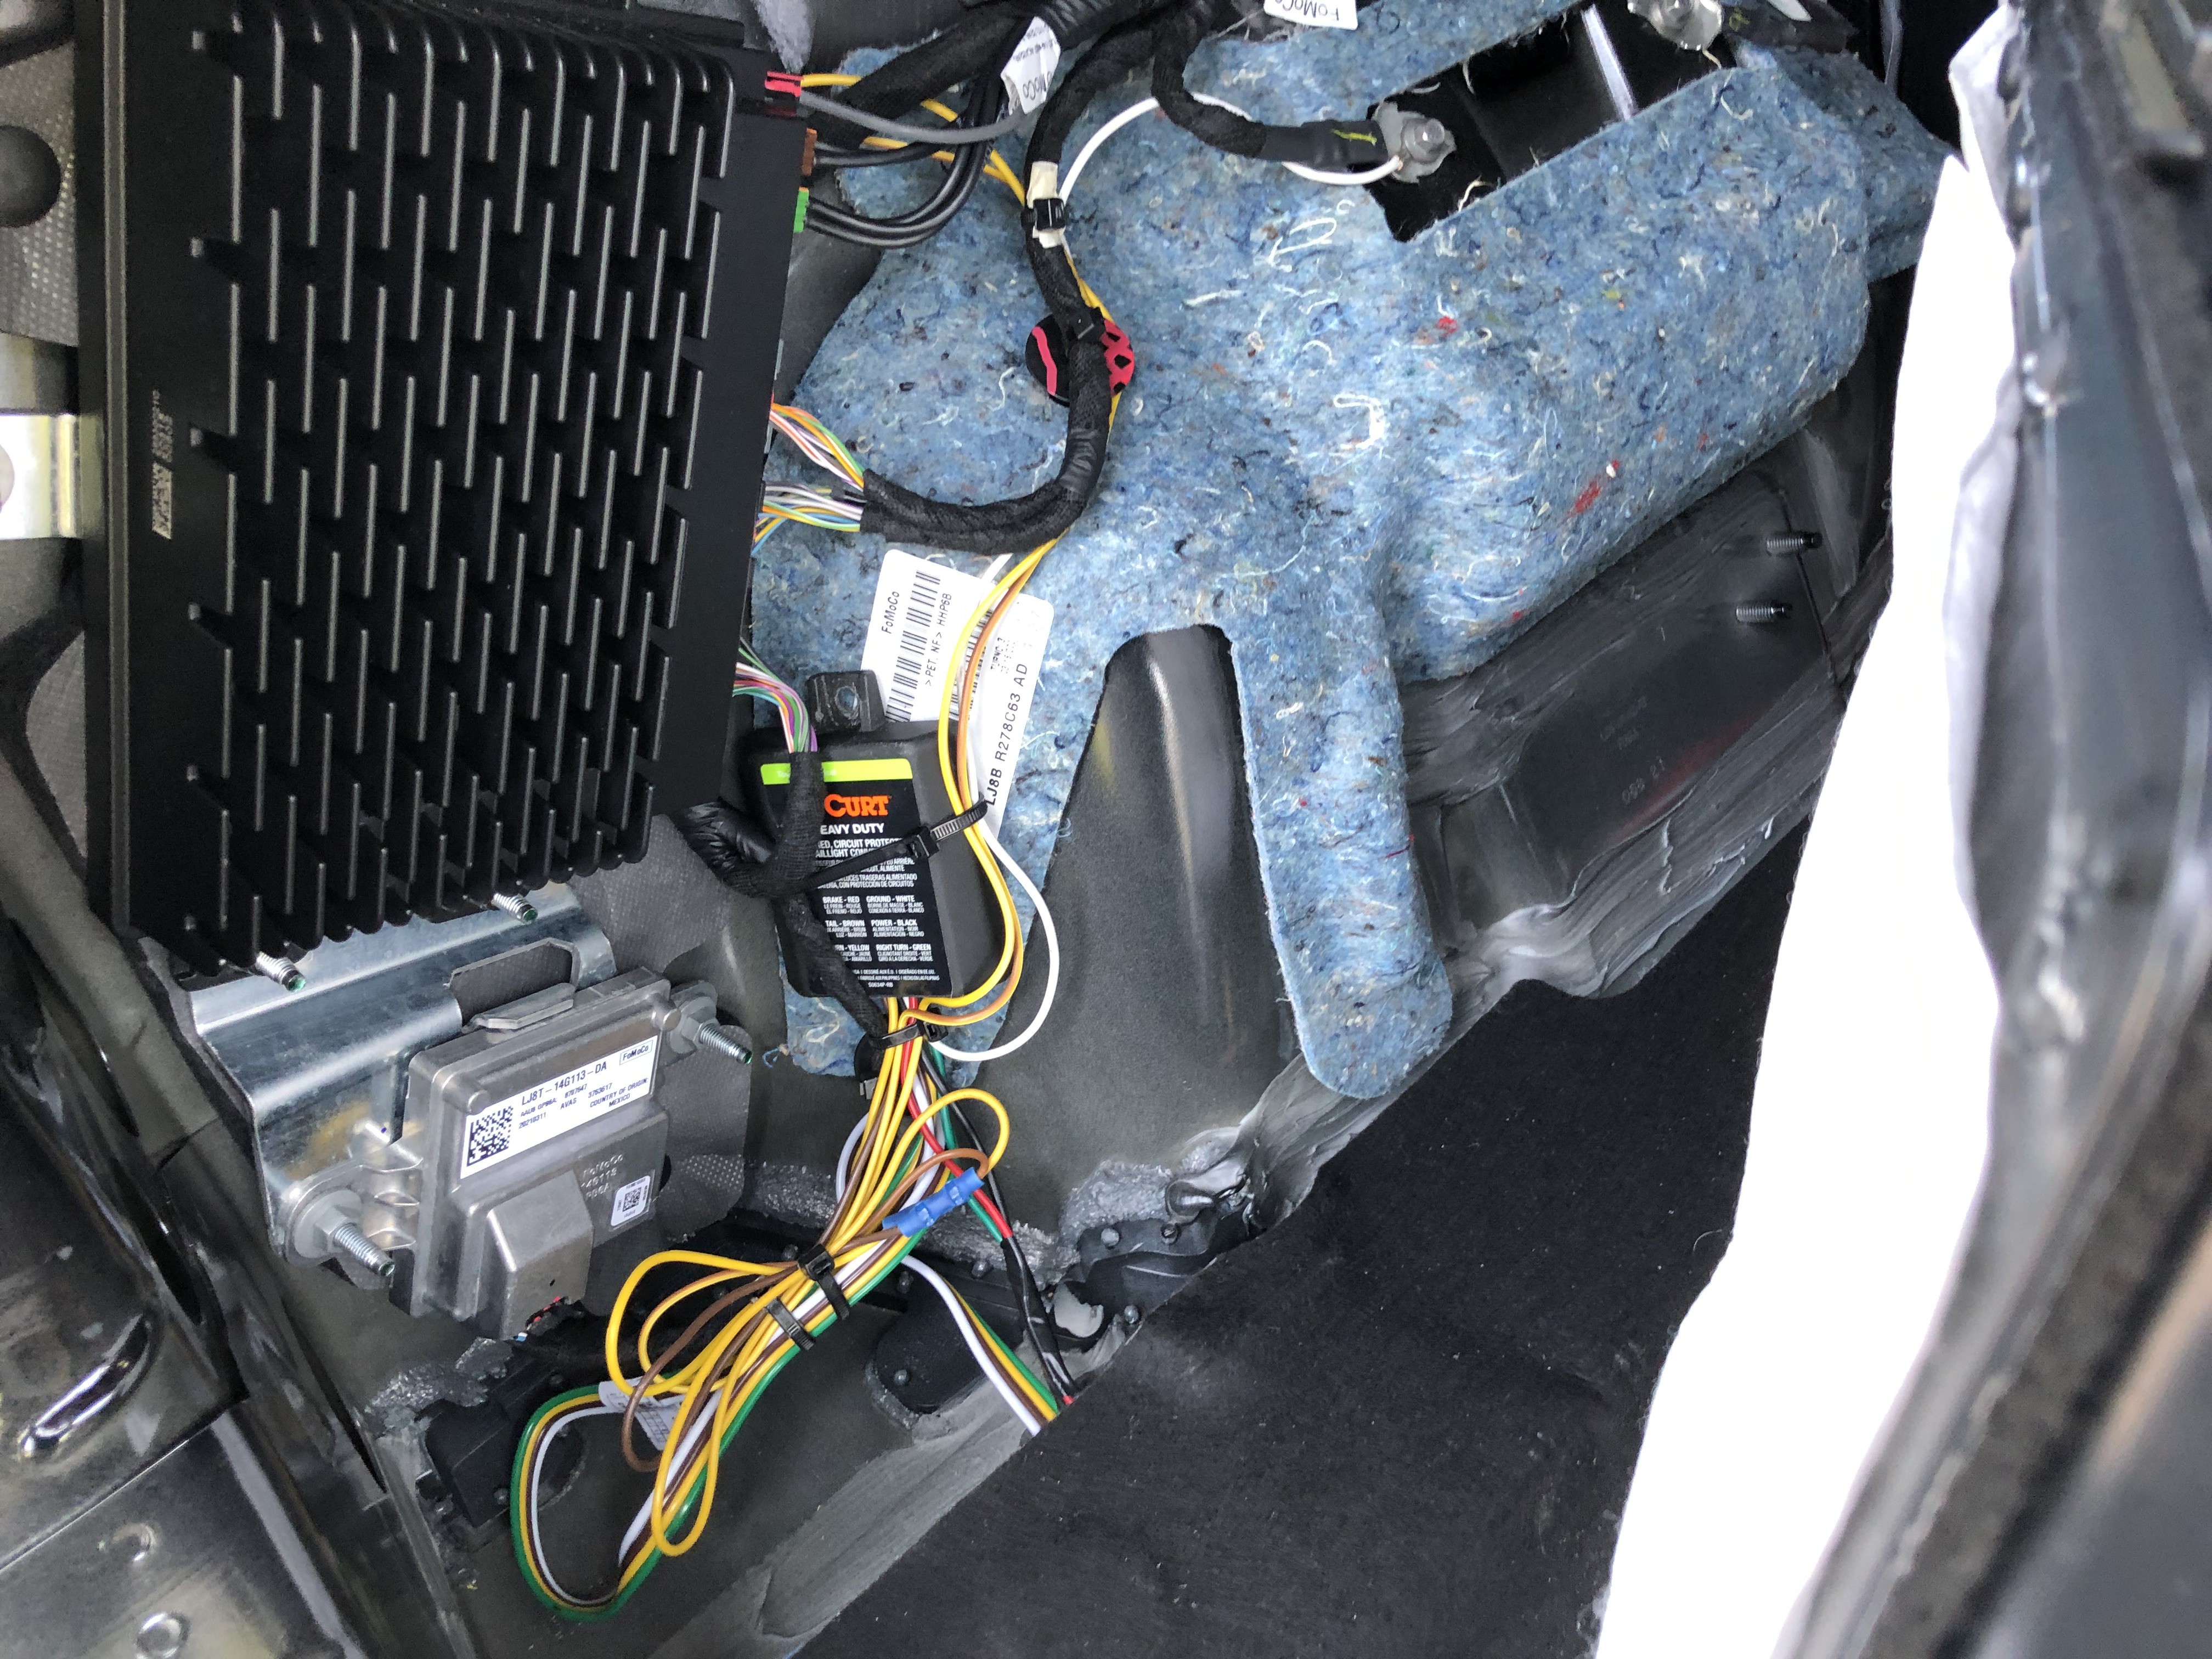
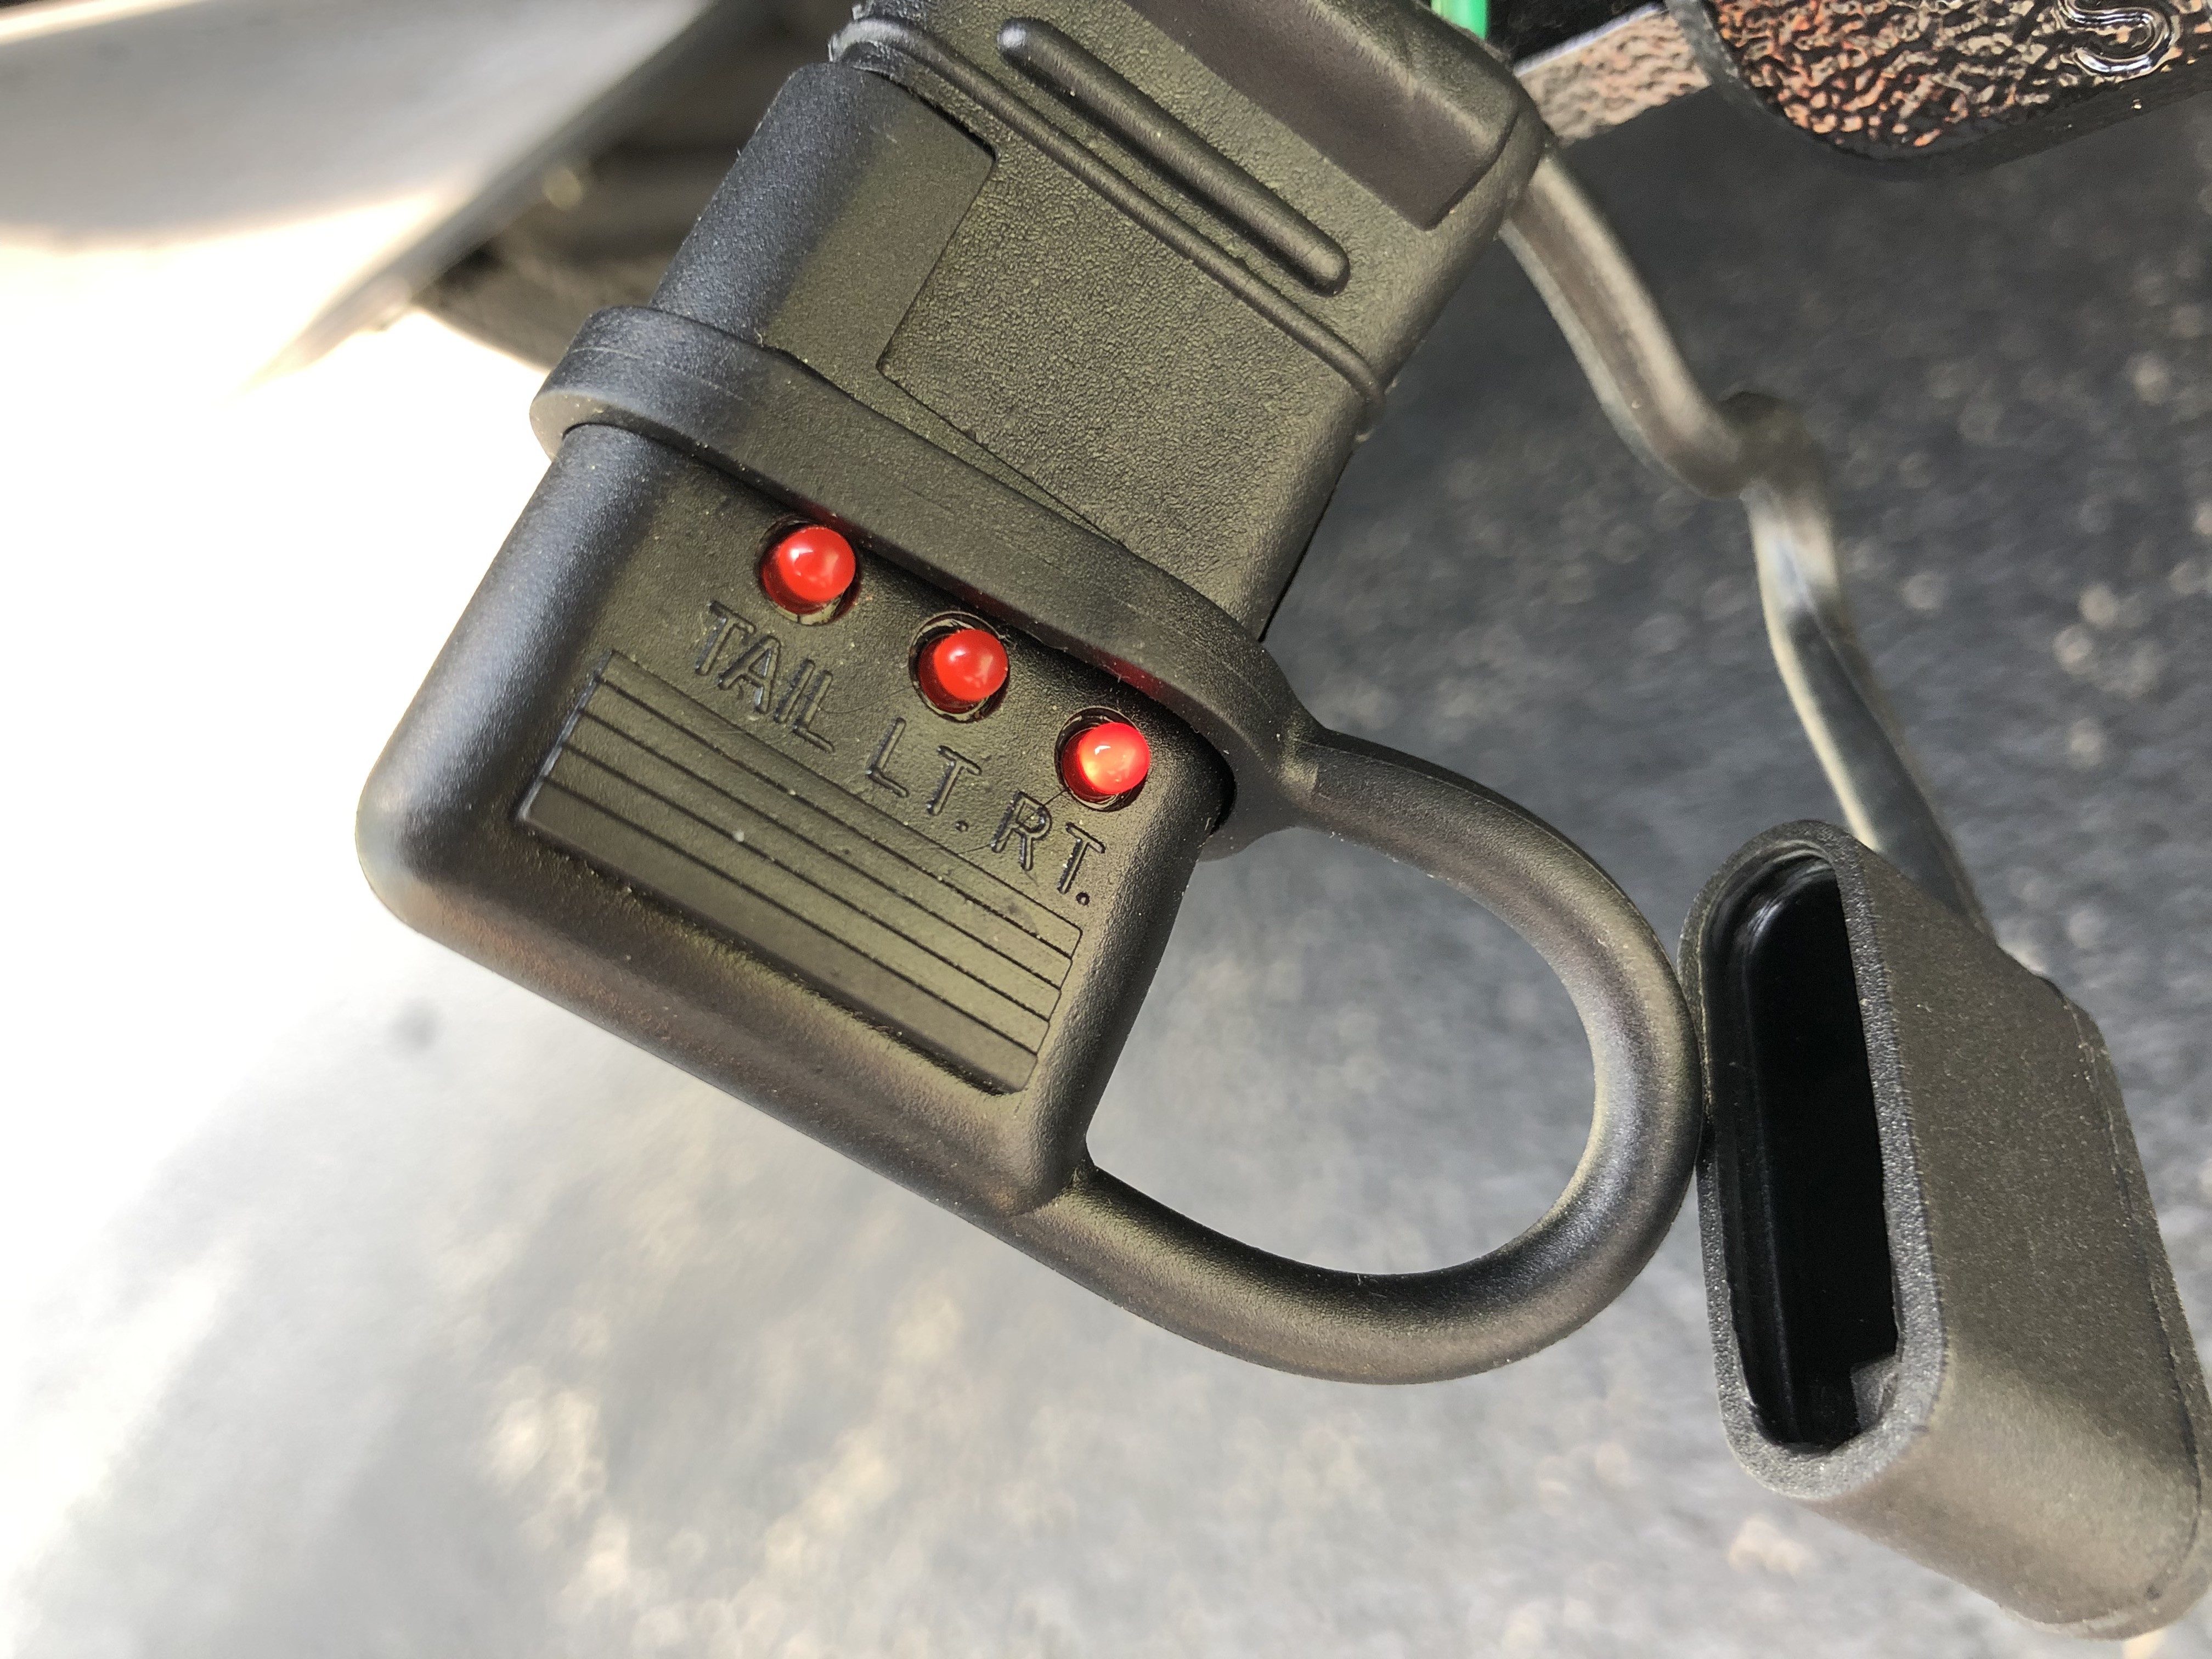
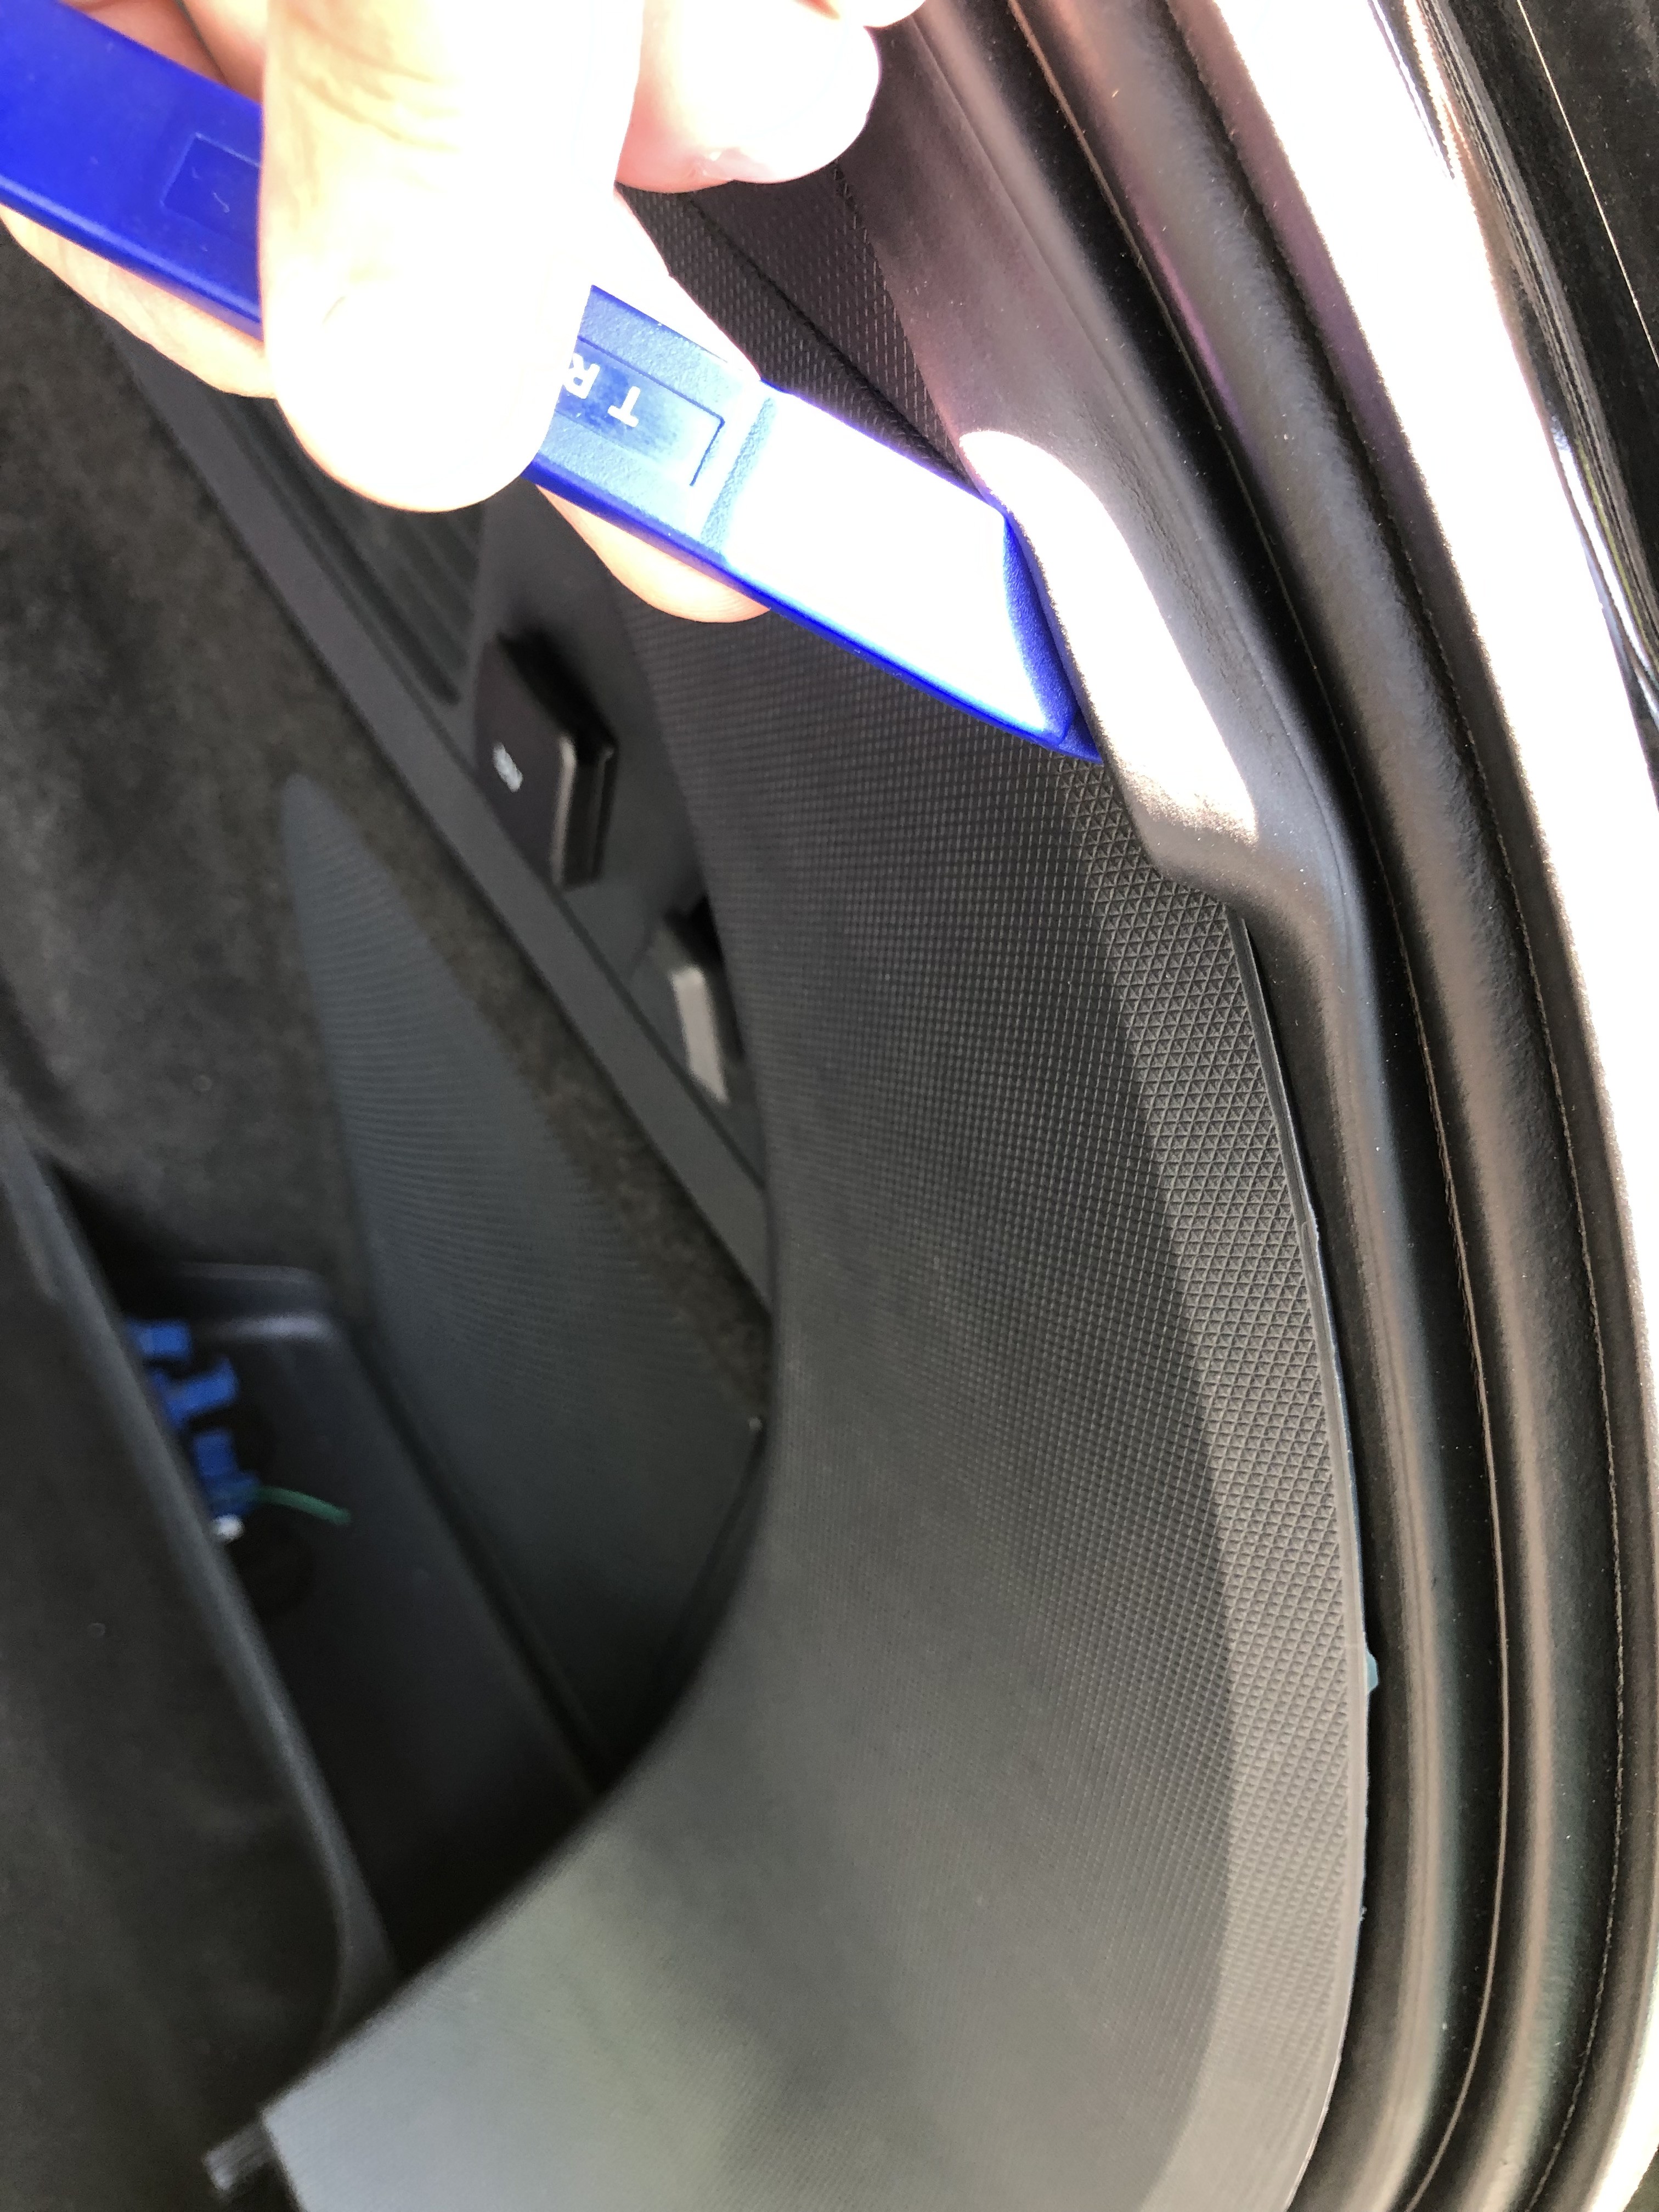
Table 3-3: Mapping of pinouts to function and wire color.
-
Connect Wires: Connect the wires from your trailer light converter to the corresponding wires in your vehicle’s taillight harness. You can use various methods for connecting wires:
-
Soldering and Heat Shrink: For the most reliable connection, solder the wires together and insulate with heat shrink tubing.
-
Butt Connectors: Crimp-on butt connectors provide a secure and relatively easy way to connect wires. Ensure you use quality connectors and crimp them properly.
-
Wire Taps (Less Recommended): While wire taps are convenient, they can sometimes be less reliable over time and may damage the factory wiring. If you use wire taps, choose high-quality ones and ensure they make a solid connection.
-
-
Route and Secure Wires: Route the wires neatly and securely along existing wiring harnesses or vehicle structures. Use zip ties to keep wires organized and prevent them from dangling or rubbing against sharp edges.
Part 5: Testing and Final Assembly
-
Reconnect Battery: Reconnect your vehicle’s battery.
-
Test Trailer Lights: Connect a trailer to your newly installed 4-pin connector or use a trailer light tester. Test all lighting functions: running lights, brake lights, left turn signal, and right turn signal. Ensure all lights are working correctly.
-
Reassemble Interior Panels: If the lights are functioning correctly, carefully reassemble the interior trim panels in reverse order of removal. Ensure all clips and screws are securely fastened.
Important Considerations and Disclaimer
- Vehicle-Specific Wiring: Always consult your vehicle’s wiring diagrams and repair manual for accurate wire identification and procedures specific to your make and model.
- Trailer Wiring Kit Instructions: Carefully follow the instructions provided with your chosen trailer wiring harness kit.
- Safety Precautions: Disconnect your vehicle’s battery before working on electrical systems. Work carefully and double-check all connections.
- Professional Installation: If you are not comfortable working with automotive electrical systems, consider having a professional mechanic or trailer shop perform the installation.
DISCLAIMER: This guide is for informational purposes only and should be used as a supplement to professional guidance and your vehicle’s specific documentation. Trailer light wiring involves working with automotive electrical systems, and improper installation can lead to vehicle damage, electrical malfunctions, or safety hazards. Follow this guide at your own risk. The author and website are not responsible for any damages or injuries resulting from the use or misuse of this information.
By following these steps and taking proper precautions, you can successfully install trailer light wiring on your vehicle and enjoy the added utility of towing and hauling. Remember to always test your trailer lights before each trip to ensure safe and legal towing.